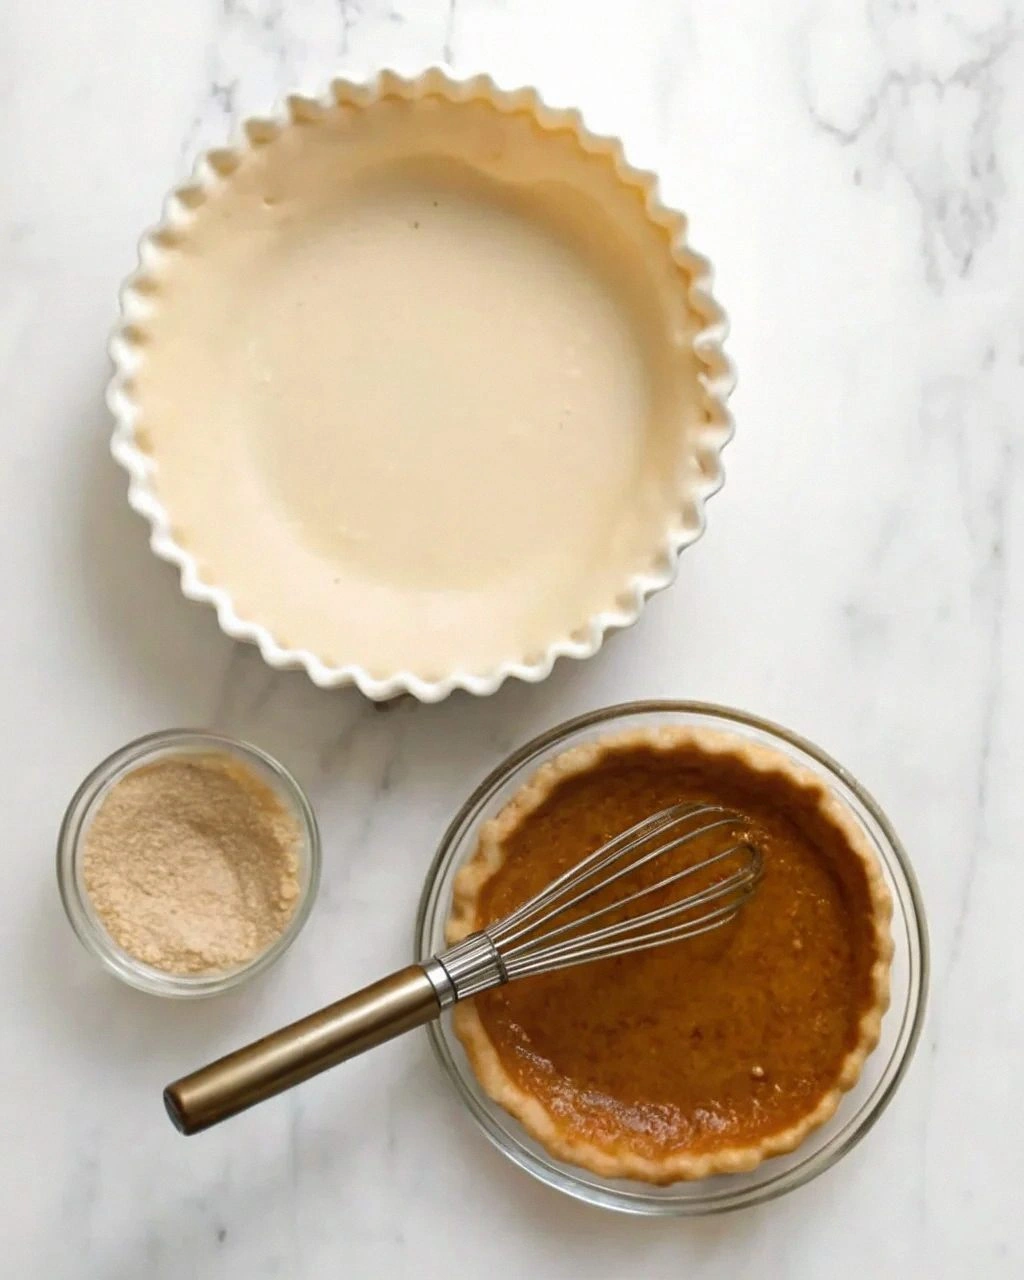
I burned the first batch. Not just a little charred around the edges — I’m talking full-on volcanic, smoke-alarm-screaming, open-all-the-windows catastrophe. My neighbor knocked to check if I was conducting a science experiment gone wrong, and I had to admit I was simply trying to make dessert. The pears had collapsed into mush, the berries had shriveled into tart little bullets, and the honey had turned into a bitter, blackened lacquer. I stood there in my polka-dot apron, holding a tray of what looked like charcoal briquettes, and I swore I would never bake fruit again.
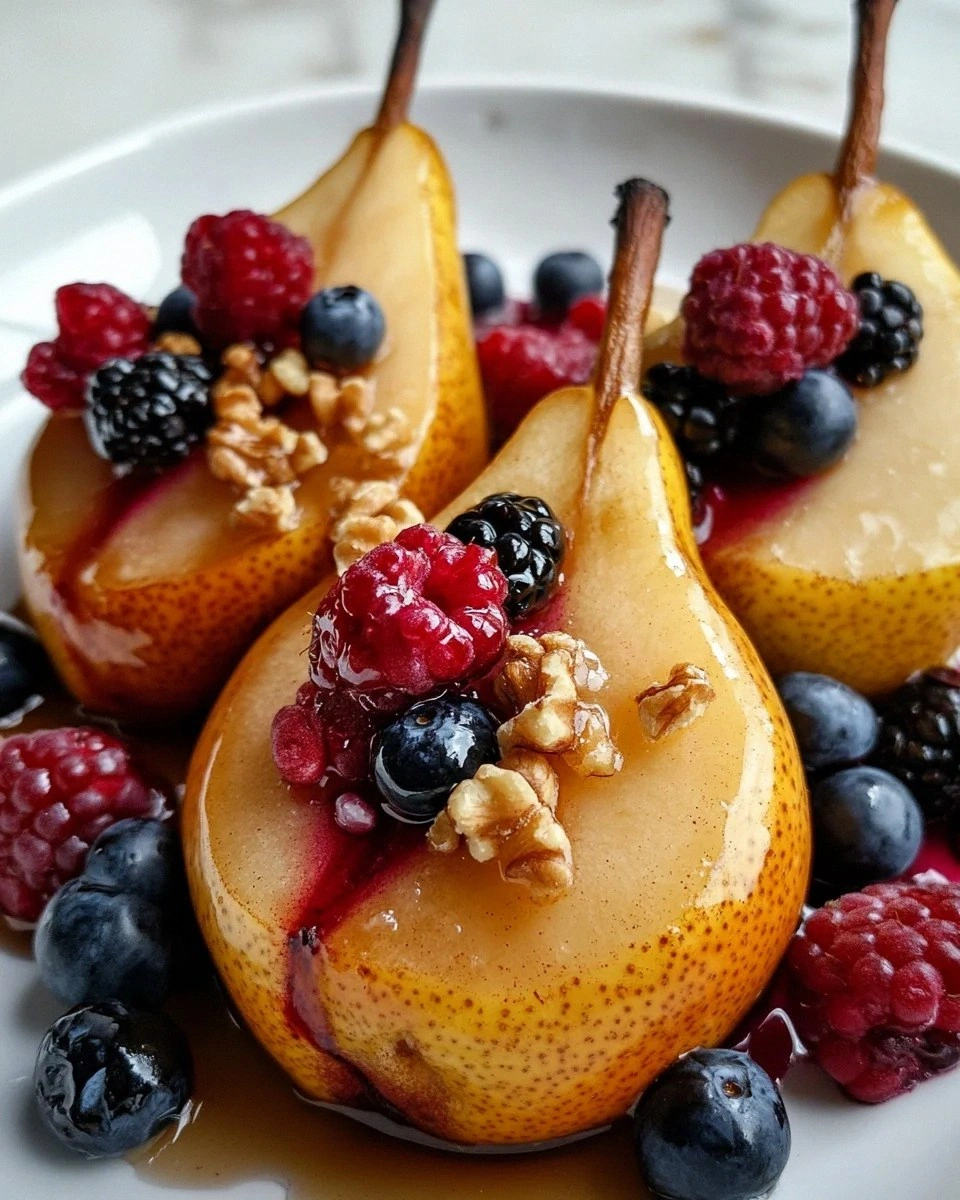
Fast-forward three days and I’m spooning silky, rose-scented syrup over pears so tender they practically sigh when you cut them. The berries have burst into jammy jewels, the honey has caramelized into a glossy cloak, and the whole kitchen smells like a late-summer farmers’ market wrapped in a warm blanket. Same oven, same ingredients, same easily distracted cook — but this time I cracked the code. The difference? I stopped following the vague, half-baked instructions floating around the internet and started treating the fruit like the delicate, living thing it is. I monitored temperature like a hawk, I shielded the berries with a foil tent, and I pulled the dish the instant the pears yielded to a gentle poke yet still held their shape.
Picture yourself pulling this out of the oven, the whole kitchen smelling incredible, steam curling up like you’ve summoned autumn itself. The pears slump just enough to look inviting, not deflated; the berries are plump and glistening; the honey has reduced into a thin, amber sheet that crackles softly as it cools. One bite and you get the floral sweetness of pear, the bright pop of berry, the warming hug of cinnamon, and that haunting vanilla back-note that makes people close their eyes and say, “Wait, what is that?” I dare you to taste this and not go back for seconds. I’ll be honest — I ate half the batch before anyone else got to try it, standing over the counter in my sock feet, using the same spoon again and again like a dessert outlaw.
Okay, ready for the game-changer? We’re going to poach the pears in their own steamy little sauna so they stay moist, then blast them with high heat for the final five minutes to get those honeyed edges to lace into caramel. Most recipes get this completely wrong: they roast everything at one temperature, which either turns the berries into leather or leaves the pears crunchy and sour. Stay with me here — this is worth it. By the end, you’ll wonder how you ever made it any other way.
What Makes This Version Stand Out
Silky Centers: We steam-then-roast so the pears turn into velvet pockets that hold the berry syrup like little edible bowls. Skip this and you risk biting into grainy fruit that tastes like a bland apple with identity issues.
Jammy Berries, Not Burnt Ones: A loose foil hat protects the berries during the first bake, then we uncover so they blister gently. Other recipes toss them in naked and wonder why they emerge as tart pellets you could break a tooth on.
Two-Stage Caramelization: Honey goes in at the midpoint so it has time to reduce without blackening. Pour it in too early and it scorches; too late and it stays raw and watery. Timing equals liquid gold.
Vanilla Hit You Can Taste: We add vanilla after the initial steam when the heat has mellowed, keeping its floral notes alive. Most bakers bake the extract into oblivion and wonder where the aroma went.
Weeknight Simple, Dinner Party Stunning: Fifteen minutes of actual work, one dish, and you have a dessert that looks like it emerged from a Paris bistro. People will assume you attended pastry school; you can let them.
Make-Ahead Magic: Bake, chill, and rewarm for thirty seconds in the microwave or five in a low oven. The flavor actually deepens overnight, making this the ultimate stress-free dinner party ace up your sleeve.
Alright, let's break down exactly what goes into this masterpiece...
Inside the Ingredient List
The Flavor Base
Ripe but firm pears are the star, and Bosc or Anjou are my ride-or-die choices because they hold their shape under heat while releasing a honeyed perfume that Bartletts can only dream of. Underripe fruit stays stubbornly crunchy; overripe fruit collapses into baby food, so aim for that sweet middle where the neck yields slightly to pressure but the body stays taut. Three pears feed four dessert portions generously, or two if you’re feeling indulgent and don’t want to share. If you can only find Bartletts, reduce the final roast by five minutes and start checking texture earlier.
Mixed berries bring the acid pop that keeps the dish from tipping into cloying territory. Fresh is fantastic, but frozen works as long as you don’t thaw first — toss them in rock solid so they bleed slowly, staining the honey into a ruby ribbon. I like a fifty-fifty split between blueberries (jammy) and raspberries (tangy), but blackberries add an almost wine-like depth when you want to feel fancy. Buy the berries on sale, freeze them yourself, and you’ll have dessert ammunition waiting whenever a craving ambushes you.
The Sweetness Squad
Two tablespoons of honey is my goldilocks amount: enough to lacquer the fruit, not so much that you feel like you’re eating a beeswax candle. Orange-blossom honey adds floral mystery, wildflower honey is more robust, and if you’re vegan, maple syrup slides in seamlessly with a darker, woodsy note. Whisk the honey with a splash of warm water or orange juice first so it loosens up and coats everything like liquid silk. Skip this and you’ll get sticky blobs that cling to one pear and leave the others naked and jealous.
Cinnamon is the cozy sweater of spices, but it can bully the more delicate flavors if you dump with abandon. One teaspoon, no more, toasted briefly in the butter until it smells like Saturday morning French toast, awakens the essential oils so the warmth threads through every bite. Use Ceylon if you’re a spice nerd; otherwise, the grocery-store cassia works just fine. Leave it out and people will still eat dessert, but they won’t close their eyes and sigh the way they do when that nostalgic cinnamon aroma hits.
The Aromatic Whisper
Vanilla extract arrives fashionably late because heat evaporates its top notes faster than you can say “expensive.” Stir it in after the steam phase when the temperature has dropped slightly, and you’ll preserve those buttery, almost floral back-flavors that make guests ask, “What is that extra something?” Fake extract is detectable from a mile away, so splurge on the real stuff or substitute half a scraped vanilla bean if you’re feeling particularly domestic goddess. In a pinch, a teaspoon of bourbon adds smoky vanilla vibes that turn this into a flirty, grown-up dessert.
Butter (or coconut oil for the dairy-free crowd) is the stealth carrier that helps honey and spices cling to the fruit like velvet. One tablespoon, melted until it foams and just starts to smell nutty, lays down a flavor base that watery syrups can’t match. Skip the fat and you’ll get a wan, watery pool at the bottom of the pan; add too much and it slicks into greasiness. Think of butter as the diplomatic escort that introduces flavors to each other and then politely steps into the background.
The Liquid Lifeline
A quarter cup of water or orange juice creates the steamy micro-spa that keeps the pears moist while they roast. Orange juice adds a gentle citrus perfume that brightens honey and balances cinnamon’s warmth; water is neutral if you want pure pear expression. Pour it around, not over, the fruit so you don’t wash off the buttered honey glaze you just painted on. Too much liquid and you’ll poach instead of roast; too little and the sugars scorch before the pears soften.
Everything's prepped? Good. Let's get into the real action...
The Method — Step by Step
- Heat your oven to 375°F (190°C) and park the rack in the lower-middle slot so the tops brown without scorching the delicate berries. While the oven wakes up, peel the pears halfway, leaving a strip of skin around the equator for rustic flair and to keep the halves from falling apart. Halve them lengthwise and core with a melon baller so the cavity is wide enough to cradle a small berry mountain. Rub the cut faces with a lemon wedge to stop the oxidation tantrum that turns them khaki while your back is turned.
- Swirl the butter in a skillet over medium heat until it foams, smells nutty, and the milk solids turn toasted brown like graham crackers. Off the heat, whisk in cinnamon for thirty seconds so the spice blooms in the hot fat and releases its essential oils. Stir in honey and orange juice until you have a loose, glossy syrup that coats the back of a spoon like thin caramel. This is the moment of truth: taste the glaze and adjust with more honey if your berries are especially tart or a squeeze of lemon if the mixture feels cloying.
- Arrange the pear halves cut-side up in a snug baking dish where they can prop each other up like cozy bookends. Brush the cavities generously with the buttered honey, then flip the pears over so the cut faces drink in the syrup while the rounded backs stay smooth and golden. Pour the remaining glaze around the fruit, not on top, so you don’t wash away the sticky layer you just painted. The liquid should come halfway up the pears’ sides; add an extra splash of water if your pan is wider than expected.
- Scatter the berries into the spaces between pears and tuck a few into the cavities so every bite includes both fruit layers. Tear a sheet of foil large enough to tent the dish without touching the fruit, crimp it tightly, and slide the dish into the oven for fifteen minutes of gentle steaming. During this phase, the pears relax, the berries swell, and the honey mingles with pear juice to create a ruby lake without evaporating into tar. Don’t walk away from the stove here; set a timer and peek once to be sure the foil isn’t sagging onto the fruit.
- After fifteen minutes, remove the foil, baste the pears with the now fragrant syrup pooling below, and sprinkle the vanilla extract over everything. Increase the temperature to 425°F (220°C) for the final push that lacquers the surfaces into sticky, bronzed perfection. Return the dish uncovered and roast another ten to twelve minutes, spooning the bubbling juices over the fruit twice during this sprint. The pears are ready when the edges caramelize to deep amber and a skewer slides through the thickest part with gentle resistance.
- Transfer the pears to a warm platter and pour the syrupy berries over the top so they tumble down like edible confetti. Let everything rest for five minutes; this brief pause allows the sugars to thicken just enough to cling like velvet rather than running off the plate. Serve as is for a virtuous weeknight treat, or gild the lily with a scoop of vanilla ice cream that melts into the sauce and creates an impromptu hot-cold sundae. Leftovers (if you have any) reheat beautifully for breakfast over yogurt with a shower of granola.
That's it — you did it. But hold on, I've got a few more tricks that'll take this to another level...
Insider Tricks for Flawless Results
The Temperature Rule Nobody Follows
Most home bakers set one temperature and hope for the best, but fruit needs a two-step sauna to reach its full potential. Low, moist heat relaxes cell walls without collapsing structure; high, dry heat caramelizes sugars into that crave-worthy lacquer. If you reverse the order, you’ll torch the outside while the inside stays wooden. Buy an oven thermometer — many ovens lie by 25°F, and in the dessert world, that’s the difference between silky and rubbery.
Why Your Nose Knows Best
Vanilla and cinnamon announce their readiness through aroma, not sight. When the kitchen suddenly smells like Saturday morning cinnamon rolls, the spices have fully bloomed and it’s time to add the berries. If you wait for visual cues, the volatile compounds have already jumped ship. Trust your sniffer; it’s the cheapest, most accurate kitchen tool you own.
The 5-Minute Rest That Changes Everything
Pull the dish when the pears still feel a touch firm; residual heat will finish the cooking while they rest. A friend tried skipping this step once and served crunchy pears swimming in syrup — let’s just say it didn’t end well for her dinner-party reputation. Cover loosely with foil so the steam softens the centers without turning the surface soggy. The syrup thickens just enough to coat a spoon like warm caramel, turning each bite into a glossy dream.
Pick the Right Dish or Regret It
Ceramic retains heat like a cozy sweater, so fruit continues cooking even out of the oven. Glass looks pretty but can scorch sugars, while metal cools fast and gives you more control. I bake in ceramic and transfer to a room-temperature platter the instant I pull it from the oven, stopping the cooking on a dime. If you only have glass, drop the final temperature by 25°F and check five minutes early.
Creative Twists and Variations
This recipe is a playground. Here are some of my favorite ways to switch things up:
Spiced Wine Version
Swap the water for a fruity red wine, add a star anise and two cardamom pods, and you’ve got a winter warmer worthy of a ski chalet. The wine reduces into a sultry syrup that stains the pears a dramatic ruby. Serve with mascarpone whipped with a kiss of sugar and watch grown adults lick their plates.
Tropical Sunset Pears
Sub in diced pineapple and mango for the berries, use coconut oil instead of butter, and swap honey for a spoon of brown sugar mixed with lime zest. The result tastes like Caribbean sunset in dessert form. Top with toasted coconut flakes for crunch and a tiny pinch of flaky salt to keep the sweetness in check.
Savory Cheese Course
Reduce the honey by half, add fresh thyme and black pepper, and serve the pears alongside a wedge of tangy blue. The sweet-salty-herbal trifecta turns this into an elegant cheese course that fools everyone into thinking you planned a three-course dinner. Add walnuts candied in a dry skillet for five minutes and you’ve got texture nirvana.
Breakfast Yogurt Parfait
Chop leftover pears and berries, layer with Greek yogurt and a drizzle of granola, and you’ve got a breakfast that feels like dessert but keeps your nutritionist happy. The syrup soaks into the yogurt and creates a fruit-on-the-bottom situation without the cloying store-bought sugar bomb. Make it in a mason jar Sunday night and grab it on your way out Monday morning.
Chocolate Seduction
Tuck a square of dark chocolate into each pear cavity during the last five minutes of roasting so it melts into a molten core. Serve with a tiny pour of espresso over vanilla ice cream for an affogato-style finish. If you’ve ever struggled with molten-chocolate cakes that collapse, this is your fool-proof shortcut to the same drama.
Storing and Bringing It Back to Life
Fridge Storage
Cool completely, transfer to an airtight container, and refrigerate for up to four days. The flavors meld and intensify, making day-two pears arguably better than fresh from the oven. Keep the syrup spooned over the fruit so it doesn’t dry out. If you have multiple layers, slip a sheet of parchment between to prevent sticking.
Freezer Friendly
Freeze portions in silicone muffin cups for easy single-serve desserts. Once solid, pop them out into a zip-top bag and store for up to two months. Thaw overnight in the fridge or rewarm from frozen in a 300°F oven for fifteen minutes. Texture softens slightly, but the taste remains a sunny reminder of warmer days.
Best Reheating Method
Add a tiny splash of water before reheating — it steams back to perfection without drying edges. Warm in a 325°F oven for ten minutes or microwave on 50% power in thirty-second bursts. Avoid high heat; it turns berries into BB pellets and honey into bitter tar. Serve with a fresh scoop of ice cream and no one will guess it’s yesterday’s news.