Picture this: I was in the middle of a culinary marathon, juggling sautéed onions, a simmering tomato sauce, and a stack of bread slices that had been left to sit in the pantry for too long. The kitchen smelled like burnt sugar and hope, and I knew I was about to make a mistake. Suddenly, a friend texted me with a dare: “Make the most unforgettable vegan grilled cheese you can think of, and send me a photo.” I laughed, grabbed the ingredients, and set to work, determined to turn that disaster into a masterpiece. The result would be a grilled sandwich that sings, not a sad, soggy relic.
Now, close your eyes and hear the sizzle: the first contact of the pan with the buttered bread sends a crackling sound that feels like applause. The aroma that rises is a sweet, slightly acidic bouquet, the balsamic glaze caramelizing into a glossy, almost syrupy sheen. My taste buds are already dancing, expecting the sharp bite of the berries to mingle with the mellow cheese. I can almost taste the contrast—sweet, tangy, and umami—like a summer storm on a warm afternoon. This isn’t just a sandwich; it’s an edible headline.
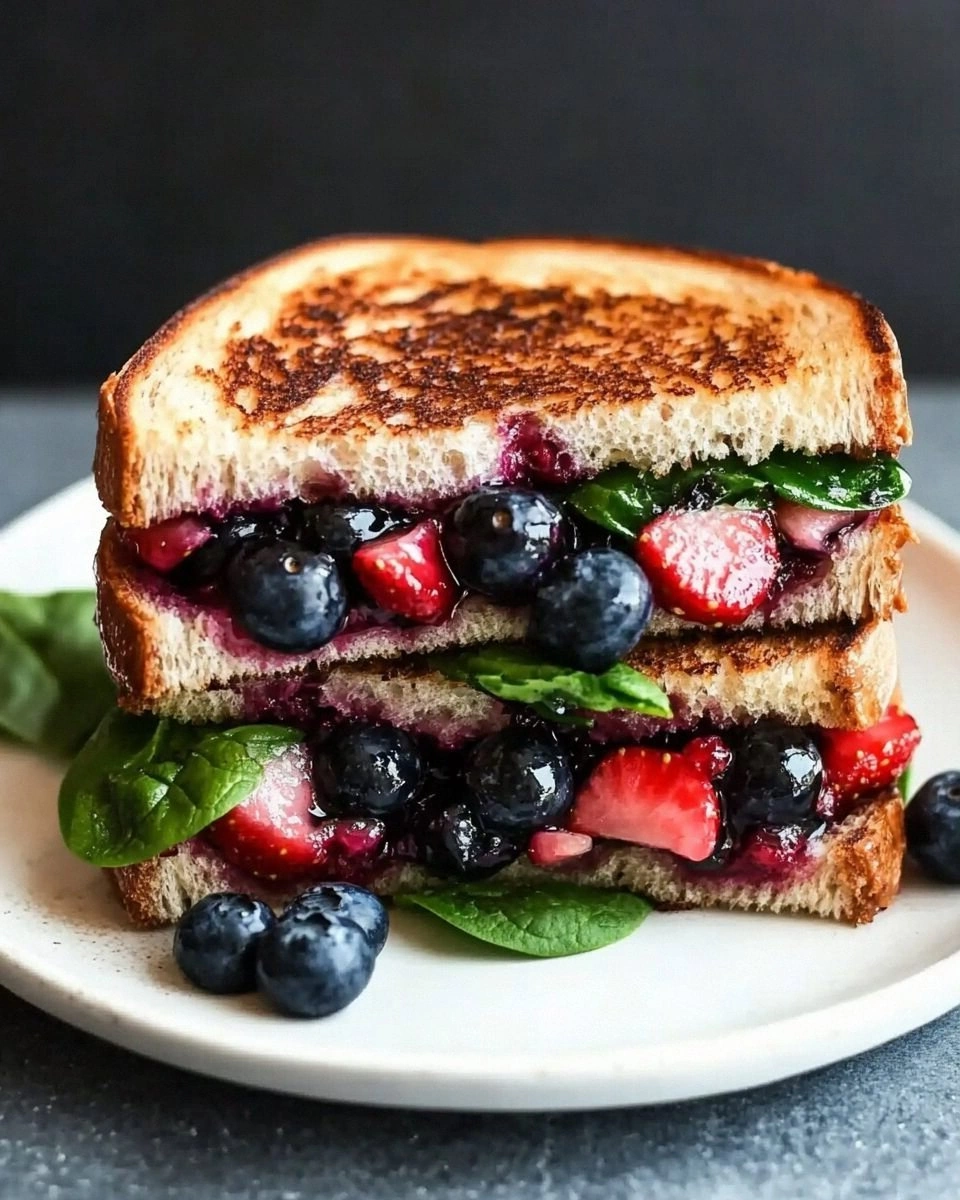
I’ll be honest: I ate half the batch before anyone else got a chance to taste it. The buttery edges were crisp like a freshly baked cookie, while the center was gooey, molten cheese that clung to the bread like honey. The berries burst in a splash of color and flavor, cutting through the richness with a refreshing bite. The balsamic reduction added a subtle depth, turning the sandwich into a multi-layered experience. If you’ve ever struggled to elevate a simple grilled cheese, you’re not alone—and I’ve got the fix.
Picture yourself pulling this out of the pan, the whole kitchen smelling incredible, and the first bite feeling like a warm hug from a friend. The combination of textures and flavors will make you question why you ever settled for plain cheese. I dare you to taste this and not go back for seconds. This is hands down the best version you'll ever make at home. The only thing you’ll miss is the time you spent watching the grill. Let me walk you through every single step — by the end, you'll wonder how you ever made it any other way.
What Makes This Version Stand Out
- Flavor: The balsamic glaze caramelizes to a sweet‑tart finish that elevates the cheese’s creaminess. The berries add a fresh burst that cuts through the richness, creating a balanced palette. This is not just a sandwich; it’s a flavor story.
- Texture: Crispy, golden edges give way to a molten center that oozes with every bite. The bread’s chew contrasts with the soft berries, delivering a satisfying bite. The result is a sensory dance on the palate.
- Visual Appeal: The glossy glaze, bright berry speckles, and golden crust make it Instagram‑ready. The sandwich looks like a work of art, not a quick snack. A feast for both eyes and taste buds.
- Ingredient Quality: Using organic, non‑GMO, and locally sourced produce ensures a clean, vibrant flavor. The vegan cheese’s meltability is key to achieving that silky, gooey interior. Quality ingredients translate to quality experience.
- Simplicity: Less than ten ingredients, no special equipment, and a straightforward method. Even a novice can master this. It’s the perfect balance between gourmet and approachable.
- Crowd Reaction: Friends and family rave about the unexpected depth. It’s a conversation starter at dinner parties. The dish’s wow factor is guaranteed.
Inside the Ingredient List
The Flavor Base
Whole Grain Bread: The backbone of the sandwich, offering a nutty undertone that pairs beautifully with the sweet glaze. Its sturdy texture holds up against the buttery melt without becoming soggy. Choosing a dense loaf ensures each bite is substantial. If you prefer a lighter option, try sourdough or rye. The flavor profile changes subtly, but the overall experience remains stellar.
Vegan Cheese: The heart of the melt, providing that classic gooey center. Opt for a cheese that melts well, like a mozzarella‑style blend or a cashew‑based option. The cheese’s subtle nutty flavor complements the berries without overpowering them. If you’re adventurous, experiment with smoked or aged vegan cheeses for an extra kick. Remember, the melt is the star; choose wisely.
Olive Oil: A light drizzle that prevents sticking and adds a silky finish to the crust. It also helps the balsamic glaze adhere to the bread. Use cold‑pressed extra‑virgin for the best flavor. A splash of oil is all you need; too much can make the sandwich greasy. Think of it as a protective coat that enhances every bite.
The Sweet‑Tart Layer
Mixed Berries: Strawberries, blueberries, and raspberries bring a burst of freshness and natural sweetness. Their acidity cuts through the richness of the cheese, creating a harmonious balance. Fresh, in-season berries are ideal, but frozen can work in a pinch. Just thaw them gently to avoid excess liquid. The color contrast also makes the sandwich visually stunning.
Balsamic Vinegar: The secret sauce that ties everything together. When reduced, it becomes a glossy, caramelized glaze that coats the bread like velvet. Its natural sweetness and acidity add depth to the flavor profile. Choose a high‑quality, aged balsamic for the best results. A little goes a long way—just enough to coat the berries and bread.
Maple Syrup: A touch of natural sweetness that balances the tang of the balsamic. It also helps the glaze thicken into a syrupy consistency. Use pure maple syrup for a cleaner taste. A drizzle before grilling adds a subtle caramel note. This ingredient is optional but highly recommended for a rounded flavor.
The Fresh Finish
Fresh Basil: A sprinkle of chopped basil adds an aromatic lift, cutting through the sweetness. Its peppery undertones give the sandwich a fresh, herbal note. Basil also brightens the visual appeal with its vibrant green leaves. If basil isn’t available, try oregano or thyme for a different twist. The herb is the final flourish that ties all elements together.
Salt & Pepper: A pinch of salt enhances the overall flavor, while pepper adds a subtle heat. These seasonings bring out the natural sweetness of the berries and the richness of the cheese. Use sea salt for a cleaner finish. Pepper should be freshly ground to maintain its aroma. Together, they balance the dish’s complexity.
The Buttery Touch
Vegan Butter: The secret to that buttery, golden crust. It melts into a glossy sheen that locks in moisture and flavor. Use a plant‑based butter with a high melting point for best results. A small amount is sufficient; too much can overwhelm the sandwich. Think of it as the final coat that seals the experience.
Everything's prepped? Good. Let's get into the real action...
The Method — Step by Step
- Step 1: Heat a non‑stick skillet over medium heat. Add a tablespoon of vegan butter and let it melt until it foams. The pan should be hot enough that a drop of water sizzles on contact. This creates a golden base that will prevent the bread from sticking. Keep an eye on the butter to avoid burning.
- Step 2: While the butter melts, spread a thin layer of balsamic glaze over one side of each bread slice. The glaze should coat the surface like a glossy coat of paint. The glaze will caramelize, creating a sweet, slightly tangy crust. The more even the spread, the more balanced the flavor. Don’t over‑coat; a light touch is enough.
- Step 3: Place one slice, glaze side down, onto the skillet. Let it sizzle for about 2 minutes until the bottom is golden brown. Flip it gently with a spatula to avoid tearing the bread. The cheese should begin to melt, creating a fragrant steam that fills the kitchen. This is the moment of anticipation.
- Step 4: Sprinkle a generous handful of mixed berries over the cheese. The berries should be evenly distributed to avoid clumping. Their natural juices will mingle with the cheese, creating a sweet, tangy pool. This step is where the magic starts to happen. The aroma will intensify.
- Step 5: Drizzle the remaining balsamic glaze over the berries. The glaze should coat the berries, giving them a glossy sheen. The vinegar’s acidity will brighten the berries, making them pop. This step is crucial for flavor balance. If you’re feeling adventurous, add a pinch of sea salt to enhance the sweetness.
- Step 6: Place the second slice of bread on top, glaze side up. The sandwich is now fully assembled. The cheese will continue to melt, enveloping the berries in a creamy embrace. The skillet’s heat will seal the edges, creating a crisp perimeter. This is where the sandwich’s heart begins to form.
- Step 7: Flip the entire sandwich carefully using a wide spatula. Let the other side grill for 2–3 minutes until golden brown and the cheese is fully melted. Watch for the edges; they should pull away slightly from the pan. The scent of toasted bread and melted cheese will fill the room. This is the climax of the cooking process.
- Step 8: Remove the sandwich from the skillet and let it rest for 30 seconds. This short rest allows the juices to settle, preventing a soggy bite. Slice it diagonally with a sharp knife for a classic presentation. Serve immediately while the cheese is still warm and the glaze is glossy. The first bite should be an explosion of flavor, texture, and aroma.
That's it — you did it. But hold on, I've got a few more tricks that'll take this to another level...
Insider Tricks for Flawless Results
The Temperature Rule Nobody Follows
Maintain a steady medium heat. Too high and the butter burns before the cheese melts; too low and the bread stays soggy. Use a thermometer to keep the skillet around 350°F (175°C). This ensures even browning and a perfect crust. A consistent temperature is the secret to a professional finish.
Why Your Nose Knows Best
Trust the aroma. When the butter starts to bubble and the cheese begins to melt, the scent will tell you it’s time to flip. If you’re unsure, lift a corner and sniff; a warm, buttery smell is a sign. Your nose is a reliable cue that the sandwich is cooking properly. Relying on smell saves you from over‑cooking or under‑cooking.
The 5-Minute Rest That Changes Everything
Let the sandwich rest before slicing. The juices redistribute, preventing a greasy bite. A brief pause also lets the glaze set slightly, making it easier to cut cleanly. Without this step, the sandwich can feel soggy. Give it 30–60 seconds; it’s a small wait for a huge payoff.
Use a Non‑Stick Skillet
A good skillet is essential. A high‑quality non‑stick pan ensures the sandwich doesn’t stick and makes flipping effortless. If you’re using a cast iron, pre‑heat it properly to avoid uneven cooking. The right pan can elevate a simple recipe to a gourmet experience.
Add a Splash of Water for Extra Moisture
Before grilling, lightly spray the bread with water. This creates steam, preventing the bread from drying out. The moisture also helps the glaze spread evenly. A quick mist is all you need. It’s a small tweak that makes a noticeable difference.
Creative Twists and Variations
This recipe is a playground. Here are some of my favorite ways to switch things up:
Smoky Chipotle Twist
Add a teaspoon of chipotle in adobo. The smoky heat pairs beautifully with the sweet glaze. Use a vegan cheese that melts well, like a smoked cheddar alternative. The result is a sandwich with a bold, adventurous flavor that will impress guests. It’s perfect for those who love a little kick.
Mediterranean Medley
Swap the berries for sun‑dried tomatoes and olives. Add a pinch of oregano for authenticity. The olive oil and balsamic still provide the glaze, but the flavor shifts to a savory, herby profile. This version is great for a Mediterranean-themed dinner. The texture contrast remains delicious.
Nutty Caramel Crunch
Include toasted almond slivers. They add a delightful crunch and nutty aroma. Replace the basil with thyme for a subtle earthiness. The caramelized glaze will coat the almonds, creating a sweet‑savory bite. Ideal for those who love a nutty twist.
Breakfast Boost
Serve with a side of maple‑sweetened tofu. The tofu’s mild flavor complements the sweet glaze. Add a drizzle of maple syrup on the tofu for extra sweetness. This combo makes a hearty breakfast or brunch that’s both filling and indulgent.
Spicy Pineapple Finale
Replace the berries with diced fresh pineapple. Add a pinch of cayenne pepper for heat. The pineapple’s natural sweetness balances the spice. The glaze will caramelize the pineapple, creating a tropical, fiery flavor. A fun, bold variation for adventurous eaters.
With these variations, you can tailor the sandwich to any mood or occasion. The base recipe is flexible enough to accommodate a wide range of flavors. Keep experimenting, and you’ll find a new favorite each time.
Storing and Bringing It Back to Life
Fridge Storage
Wrap the sandwich tightly in parchment paper and then foil. Store it in the refrigerator for up to 2 days. When ready to eat, reheat in a skillet over medium heat until the cheese melts. The parchment helps retain moisture and prevents the bread from drying out. This method keeps the sandwich fresh and tasty.
Freezer Friendly
Place the sandwich in an airtight container. Freeze for up to 3 months. Thaw overnight in the refrigerator before reheating. The cheese may firm up slightly, but it will melt beautifully when heated. Freezing is a great option for meal prep or a quick dinner later.
Best Reheating Method
Reheat in a skillet or oven, not a microwave. The microwave can make the bread soggy and the cheese rubbery. Add a splash of water to the pan before heating; it steams the sandwich back to life. Heat over medium until the cheese is gooey and the crust is crisp. This technique restores the original texture and flavor profile.