I'll never forget the first time I attempted a classic French mousse. It was a disaster of epic proportions — a grainy, separated mess that looked more like chocolate-flavored scrambled eggs than the silky, cloud-like dessert I'd fallen in love with at a tiny Parisian café. My dinner guests politely picked at their glasses, making small talk while I silently plotted my revenge on every French pastry chef who made this look so effortless. Fast forward through three failed attempts, countless YouTube videos, and one particularly memorable tantrum involving a whisk and some very expensive chocolate, and I've finally cracked the code. This isn't just another mousse recipe — this is the one that'll make you feel like you've got a Michelin star hidden somewhere in your kitchen drawer.
Picture this: You're standing at your kitchen counter, the afternoon light filtering through the window as you crack open a bar of premium dark chocolate. The rich aroma immediately fills the space, mingling with the subtle scent of vanilla from the beans steeping in cream. Your fingers are already anticipating that first spoonful — cold, impossibly light, melting on your tongue like a whisper of chocolate clouds. The sound of your whisk against the metal bowl creates a steady rhythm, almost hypnotic, as you transform simple ingredients into something that feels like magic. That first taste? It's like discovering chocolate for the very first time, but better.
What makes this version different from every other mousse recipe cluttering the internet? I've eliminated all the guesswork and replaced it with foolproof techniques that restaurants don't want you to know. No more wondering if your egg whites are at the right peak, no more anxiety about folding techniques that seem to require a culinary degree. This recipe holds your hand through every single step, explaining exactly what to look for, smell for, and taste for. Plus, I've discovered a game-changing method for achieving that legendary airy texture without any of the usual heart-stopping moments when everything threatens to collapse.
Here's the thing about classic French mousse — it should feel like eating chocolate air, but taste like the most intense chocolate experience of your life. Every spoonful should make you close your eyes involuntarily, the way you do when something is so good it bypasses all your usual food-critic brain circuits and goes straight to your soul. If you've ever struggled with mousse that separates, tastes eggy, or has the texture of chocolate-flavored Styrofoam, you're not alone — and I've got the fix. Stay with me here — this is worth it.
What Makes This Version Stand Out
Silky Smooth: This mousse achieves that legendary texture through a temperature-controlled method that prevents any graininess. We're talking spoon-coating, melt-in-your-mouth velvet that makes store-bought versions taste like chocolate pudding in comparison. The secret lies in how we handle the chocolate's crystallization, ensuring every bite is impossibly smooth.
Intense Chocolate Flavor: Most recipes dilute the chocolate with too much cream or sugar, but this version lets the chocolate sing. We're using a higher ratio of premium chocolate to cream, balanced with just enough sugar to enhance rather than mask the complex flavors. The result? A chocolate experience so pure, you'll swear you can taste the terroir where the cacao beans grew.
Foolproof Technique: Gone are the days of wondering if your egg whites are over-whipped or your chocolate seized up from being too hot. This method uses a thermometer-guided approach that takes all the mystery out of the process. You'll know exactly when each component is ready, eliminating the usual mousse-making anxiety.
Make-Ahead Magic: Unlike fussy desserts that need last-minute assembly, this mousse actually improves after an overnight rest. The flavors meld and deepen, creating something even more spectacular than when freshly made. You can prepare it up to three days ahead, making it perfect for dinner parties when you want to impress without the stress.
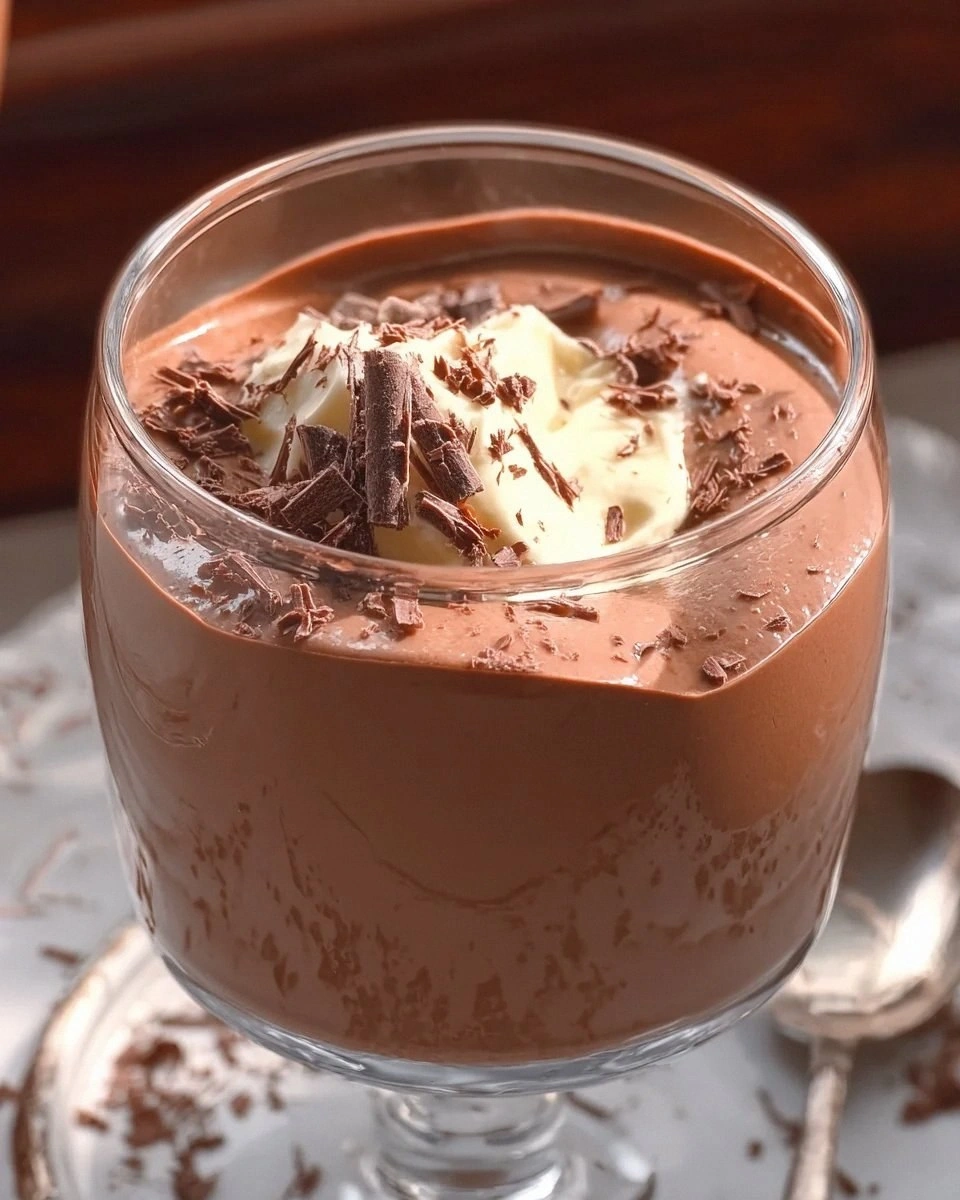
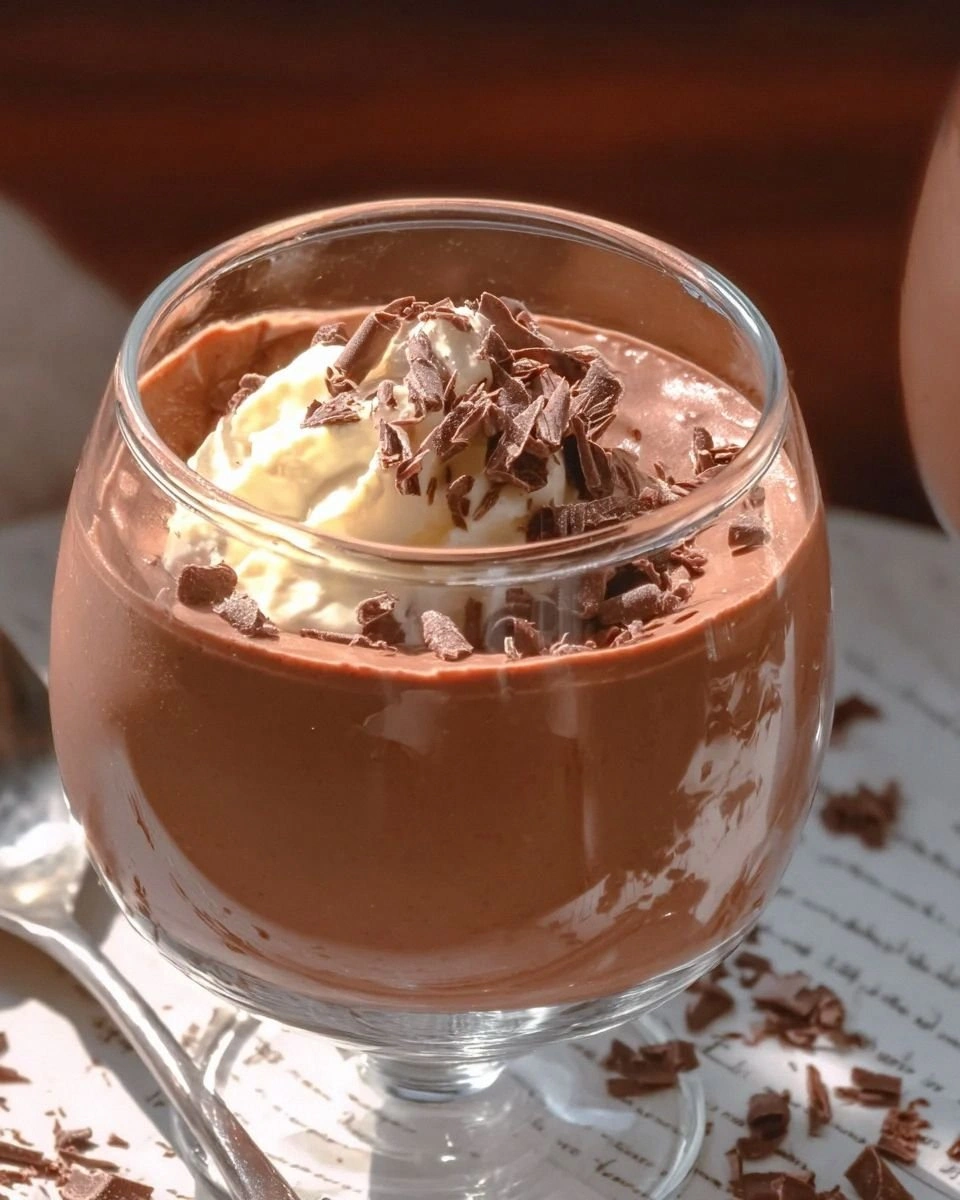
Crowd-Pleasing Presentation: We're not just dumping mousse in a bowl here. This recipe includes techniques for creating those gorgeous layered parfaits you see in French patisseries, complete with chocolate shavings and a texture contrast that'll have everyone reaching for their phones before their spoons.
Ingredient Flexibility: While I give you my favorite chocolate blend, this recipe works beautifully with everything from milk chocolate to ultra-dark 85%. You can also adapt it for different dietary needs without sacrificing that essential mousse texture that makes this dessert so beloved.
Restaurant-Quality Results: The techniques here are straight from professional kitchens, but simplified for home cooks. You'll learn the same methods pastry chefs use, but with equipment you already own and steps that won't require a culinary degree to execute successfully.
Alright, let's break down exactly what goes into this masterpiece...
Inside the Ingredient List
The Chocolate Foundation
The chocolate you choose will make or break this mousse, and I'm not being dramatic here. Skip those baking chips or supermarket chocolate bars — we're looking for the good stuff, preferably with a cacao content between 60-70% for that perfect balance of intensity and sweetness. Valrhona, Callebaut, or even high-quality grocery store brands like Ghirardelli will work wonders. The chocolate needs to have a good percentage of cocoa butter, which is what creates that smooth, melt-in-your-mouth sensation we're after. Cheap chocolate often replaces cocoa butter with vegetable oils, resulting in a waxy, disappointing texture that no amount of culinary skill can fix.
Here's where it gets interesting — I actually use a blend of chocolates for maximum complexity. Two-thirds dark chocolate provides the backbone of flavor, while one-third milk chocolate adds subtle caramel notes and rounds out any bitterness. This combination creates a more sophisticated flavor profile than using just one type of chocolate. The dark chocolate should have tasting notes you enjoy on its own — maybe something fruity like cherry or berry, or earthy like tobacco and leather. These nuances will shine through in the final mousse, elevating it from simple chocolate dessert to an experience worth savoring.
The Texture Enhancers
Eggs are the unsung heroes of perfect mousse texture, and we're using both yolks and whites in different ways for maximum impact. The yolks create a rich custard base that gives the mousse body and a luxurious mouthfeel, while properly whipped whites add that signature lightness. But here's the key — we're not just dumping everything together. The yolks get transformed into a light sabayon with sugar and a touch of liquid, creating a foamy base that supports the chocolate without making it dense. This technique, borrowed from professional kitchens, ensures your mousse stays airy rather than brick-like.
Heavy cream plays a dual role in this recipe, and understanding how to handle it makes all the difference. First, we'll whip some to soft peaks for folding into the chocolate base, creating those characteristic air pockets that define mousse texture. The remaining cream gets whipped to firmer peaks for the final fold, ensuring the mousse sets properly while maintaining its ethereal quality. The fat content matters here — look for cream with at least 36% butterfat. Anything less won't whip properly or hold its structure, leaving you with a sad, deflated dessert that no one wants to eat.
The Flavor Amplifiers
Vanilla might seem like an afterthought, but it plays a crucial supporting role in highlighting chocolate's complexity. Use real vanilla beans if you can — scrape those tiny black seeds into your cream before whipping, and you'll be rewarded with little explosions of flavor in every bite. The vanilla doesn't taste like vanilla per se; instead, it enhances the chocolate's natural flavors, making them taste more chocolatey. If you're using extract, go for the good stuff — artificial vanilla will give your mousse a chemical undertone that ruins all your hard work.
A touch of espresso powder is my secret weapon for taking chocolate flavor from good to unforgettable. Just a quarter teaspoon dissolved in a tablespoon of hot water intensifies the chocolate without making the mousse taste like coffee. It's like turning up the volume on your favorite song — everything becomes more vibrant and present. If you're serving this to kids or caffeine-sensitive guests, you can skip it, but I promise the small amount won't keep anyone awake. The chocolate remains the star; the espresso just helps it shine brighter.
The Unexpected Elements
Here's where I lose some people, but trust me on this — a tiny pinch of flaky sea salt makes all the difference. Not table salt, not kosher salt, but those delicate crystals of Maldon or fleur de sel that dissolve on your tongue. The salt doesn't make the mousse salty; instead, it heightens all the other flavors and adds a sophisticated edge that makes people wonder what your secret ingredient is. Add it to the chocolate while it's melting, stirring until you can't feel the crystals anymore. The result is a mousse with layers of flavor that unfold gradually, keeping your taste buds engaged long after you've finished eating.
A splash of good quality liqueur can transform your mousse into something truly special, but restraint is key. Grand Marnier adds a subtle orange note that pairs beautifully with dark chocolate, while Frangelico brings hazelnut warmth without overwhelming the chocolate. Start with just a teaspoon — you can always add more, but you can't take it out once it's in. The alcohol also helps prevent the mousse from freezing too solid if you want to serve it semi-frozen, creating a texture somewhere between mousse and ice cream that's absolutely divine on hot summer days.
Everything's prepped? Good. Let's get into the real action...
The Method — Step by Step
- Start by setting up your mise en place — everything in its place. Chop your chocolate into small, even pieces and place them in a heatproof bowl. Separate your eggs carefully, ensuring no yolk contaminates the whites, or they won't whip properly. Measure out your cream and place it in the refrigerator along with your mixing bowl and whisk — cold equipment whips cream faster and more efficiently. Take a moment to read through the entire recipe once more; understanding the flow will help you move smoothly from step to step without any panic moments.
- Create a double boiler by placing your chocolate bowl over a pan of barely simmering water. Make sure the bowl doesn't touch the water, or you'll scorch your chocolate. Stir occasionally with a rubber spatula as it melts — this is where patience pays off. The chocolate should melt slowly and evenly, becoming glossy and smooth without any lumps. While it's melting, dissolve your espresso powder in a tablespoon of hot water and prepare to add it along with a pinch of salt once the chocolate is nearly melted.
- While the chocolate melts, start your sabayon base. In a metal bowl, whisk together the egg yolks and sugar until the mixture becomes pale and thick — this should take about 2-3 minutes of vigorous whisking. You're looking for what's called the "ribbon stage," where the mixture falls from the whisk in thick ribbons that briefly hold their shape on the surface. Place this bowl over the same simmering water (wipe out the pan first) and continue whisking constantly. This is the moment of truth — don't walk away, or you'll end up with sweet scrambled eggs.
- The sabayon is ready when it's thick enough to coat the back of a spoon and hold a line when you run your finger through it. This usually takes 4-5 minutes of constant whisking over gentle heat. Remove it from the heat immediately and continue whisking for another minute to prevent carryover cooking. Now comes the fun part — slowly pour your melted chocolate into the sabayon while whisking constantly. The mixture will darken and become glossy, taking on the appearance of liquid velvet. This chocolate base needs to cool to room temperature before we fold in the whipped cream, so set it aside while we tackle the next component.
- Now for the egg whites — and this is where most recipes get it wrong. Start with impeccably clean beaters and bowl, as any trace of fat will prevent the whites from whipping properly. Begin beating at medium speed until the whites become foamy, then increase to high speed. When they start to hold soft peaks, gradually sprinkle in the remaining sugar while continuing to beat. You're aiming for stiff peaks that hold their shape but aren't dry or grainy. The whites should look glossy and smooth, like thick shaving cream. Over-beaten whites will be difficult to fold and can make your mousse grainy.
- Remove your cream from the refrigerator and pour it into your chilled bowl. Add the vanilla seeds or extract along with a tablespoon of powdered sugar, which helps stabilize the cream. Start whipping at medium speed — you want to control this process rather than racing to the finish line. Watch closely as the cream transforms from liquid to soft waves, then to gentle peaks that curl over when you lift the whisk. Stop when you reach soft peaks — the cream should hold its shape but still be smooth and billowy. Over-whipped cream will be difficult to fold and can make your mousse heavy rather than airy.
- This next part? Pure magic. We're going to fold everything together using a technique that preserves all that precious air we've worked so hard to create. Start by stirring about one-third of the whipped cream into your chocolate base — this lightens the mixture and makes it easier to fold in the remaining components. Use a large rubber spatula and fold in a figure-eight motion, turning the bowl as you go. Now add half the egg whites and fold gently until just combined, then repeat with the remaining whites. Finally, fold in the remaining whipped cream just until no streaks remain. The mixture should look like chocolate clouds — light, airy, and irresistible.
- Work quickly but gently to divide the mousse among your serving glasses or ramekins. I like to use a piping bag for neat, professional-looking portions, but a large spoon works fine if you don't mind a more rustic appearance. Fill each glass about three-quarters full, then give them a gentle tap on the counter to release any large air bubbles. Cover with plastic wrap and refrigerate for at least 4 hours, or preferably overnight. This setting time allows the flavors to meld and the texture to firm up to that perfect spoonable consistency that defines great mousse.
- Before serving, let the mousse sit at room temperature for about 10 minutes — this takes the chill off and allows the flavors to bloom. Garnish with chocolate shavings, a dollop of whipped cream, or perhaps some fresh berries if you're feeling fancy. But honestly? This mousse is so good it needs no adornment. Grab your spoon, take that first bite, and prepare for chocolate nirvana. The texture should be ethereally light yet intensely flavored, dissolving on your tongue while leaving behind a lingering chocolate memory that'll have you reaching for spoonful number two before you've even finished the first.
That's it — you did it. But hold on, I've got a few more tricks that'll take this to another level...
Insider Tricks for Flawless Results
The Temperature Rule Nobody Follows
Here's the thing that separates amateur mousse from professional-grade results: temperature control at every single step. Your chocolate should be melted but not hot — around 110°F is perfect. Your sabayon should be warm when you add the chocolate, but not steaming. And here's the crucial part most recipes skip — your chocolate base must be at room temperature (around 72°F) before you fold in the cream. Too warm, and the cream melts, deflating your mousse into a sad, dense puddle. Too cool, and the chocolate starts to set, creating little flecks throughout your mousse. A friend tried skipping this step once — let's just say it didn't end well, and she ended up serving what she now calls "chocolate gravel" to her dinner guests.
Why Your Nose Knows Best
Your senses are your best tools for knowing when each component is ready. When melting chocolate, you should smell deep, rich cocoa notes — if it smells sharp or bitter, it's getting too hot and might seize. Your sabayon is ready when it smells like sweet custard rather than raw eggs. When whipping cream, listen for the sound change as it thickens — it goes from sloshy to quieter, more muffled beats. And when folding everything together, watch for the moment when the mixture goes from streaky to uniformly colored while still maintaining its airy, cloud-like appearance. These sensory cues are more reliable than timers, which can't account for different altitudes, humidity levels, or the exact temperature of your ingredients.
The 5-Minute Rest That Changes Everything
After you've folded everything together, resist the urge to immediately portion it into glasses. Let the mousse rest for exactly 5 minutes — set a timer, because this is crucial. During this rest, the air bubbles redistribute evenly throughout the mixture, creating a more uniform texture. Any small lumps of chocolate have a chance to melt from the residual heat, ensuring your final product is perfectly smooth. This brief pause also allows the mixture to thicken slightly, making it easier to portion neatly. I discovered this trick by accident when I got distracted by a phone call, only to return and find my mousse had transformed from good to absolutely ethereal. Now it's a non-negotiable step in my kitchen.
The Folding Technique That Prevents Deflation
The secret to maintaining that airy texture lies in how you fold, not just what you fold. Start by placing your spatula at the edge of the bowl, cut down through the center, and lift up the chocolate mixture from the bottom, folding it over the cream. Rotate the bowl a quarter turn and repeat. This motion incorporates without deflating. Never stir in circles — that's how you lose all your precious air. And here's the key: stop folding while you still see a few streaks. Over-mixing is the enemy of airy mousse. Those final streaks will disappear as you portion the mousse, and you'll have preserved every bit of lightness you worked so hard to create.
Creative Twists and Variations
This recipe is a playground. Here are some of my favorite ways to switch things up:
The Orange Zest Dream
Transform your mousse into a chocolate orange sensation by adding the zest of one large orange to the cream before whipping. The oils in the zest infuse the cream with bright citrus notes that dance beautifully with the dark chocolate. For extra orange intensity, replace the vanilla with orange extract and add a tablespoon of orange liqueur like Cointreau to the chocolate base. This version tastes like those fancy chocolate orange candies, but infinitely more sophisticated and complex.
The Salted Caramel Swirl
Create a salted caramel version by making a quick caramel sauce (sugar, water, cream, butter, and salt) and swirling it through your finished mousse just before chilling. Use a skewer to create beautiful marbled patterns, and sprinkle a few flakes of sea salt on top for that addictive sweet-salty balance. The caramel adds a buttery richness that complements the chocolate without overwhelming it. Kids and adults alike go crazy for this variation, especially when served with extra caramel sauce on the side for the true caramel addicts.
The Espresso Explosion
For coffee lovers, increase the espresso powder to a full tablespoon and add a shot of espresso to the chocolate base. The coffee intensifies the chocolate while adding its own bitter complexity. Top with chocolate-covered espresso beans for garnish, and serve alongside a small glass of dessert wine. This version is sophisticated enough for the most discerning dinner party, yet comforting enough for a cozy night in. Just don't serve it too late unless you want your guests buzzing well past bedtime.
The White Chocolate Wonder
Swap the dark chocolate for good quality white chocolate and add a vanilla bean for visual appeal. The technique remains the same, but the result is a delicate, creamy dessert that feels like eating vanilla clouds. White chocolate can be tricky — it burns easily, so melt it very gently and let it cool slightly before adding to your sabayon. This version pairs beautifully with fresh berries or a raspberry coulis that adds a tart counterpoint to the sweet, creamy mousse.
The Spiced Mexican Hot Chocolate
Add a teaspoon of ground cinnamon, a pinch of cayenne pepper, and a quarter teaspoon of chili powder to your chocolate base. The spices create a subtle warmth that builds slowly, making each spoonful more intriguing than the last. Serve with cinnamon-sugar tortilla chips for scooping, turning your elegant dessert into a playful, interactive experience. This version is perfect for adventurous eaters who appreciate complex flavor profiles and a little heat with their sweet.
The Nutella Knockout
Replace half the chocolate with Nutella for a hazelnut-chocolate mousse that tastes like the inside of your favorite chocolate-hazelnut spread, but infinitely more refined. The Nutella adds natural sweetness and that distinctive hazelnut flavor that makes this version irresistible to kids and adults alike. Top with chopped toasted hazelnuts for crunch and a dollop of whipped cream to balance the richness. This is my go-to when I need a crowd-pleaser that feels familiar yet elevated.
Storing and Bringing It Back to Life
Fridge Storage
Your mousse will keep beautifully in the refrigerator for up to 4 days, though it's at its absolute peak within the first 48 hours. Store it in the coldest part of your fridge, covered tightly with plastic wrap pressed directly onto the surface to prevent it from absorbing any refrigerator odors. If you've portioned it into individual servings, place them on a tray and cover the entire tray with plastic wrap. The texture actually improves slightly after the first day as the flavors meld and deepen. Just give it a gentle stir before serving if it's been more than 24 hours — this redistributes any slight separation that might have occurred.
Freezer Friendly
Here's where this recipe really shines — it freezes beautifully for up to 2 months. Portion your mousse into freezer-safe containers, leaving a little room at the top for expansion. Thaw overnight in the refrigerator, then let it sit at room temperature for 15 minutes before serving. The texture will be slightly denser than fresh mousse, more like a frozen mousse or semifreddo, which is actually quite delightful. You can also serve it partially frozen for a hot weather treat that feels like chocolate ice cream but with the sophistication of mousse. Just don't refreeze once thawed, or the texture becomes grainy and unpleasant.
Best Reheating Method
The beauty of mousse is that it doesn't need reheating — in fact, reheating would destroy its delicate texture. However, if you've stored it and it's become too firm, let it sit at room temperature for 10-15 minutes before serving. For mousse that's been in the freezer, the overnight refrigerator thaw followed by the room temperature rest is all you need. If you've made too much and want to repurpose it, consider using slightly softened mousse as a cake filling, or stirring a spoonful into hot milk for the most decadent hot chocolate of your life. Just never microwave mousse — you'll end up with chocolate soup and a very sad dessert experience.