I was halfway through a marathon Netflix binge when my roommate dared me to bake something that could survive a week‑long work schedule and still feel like a fresh‑out‑the‑oven treat. I grabbed the first cookie recipe I could find, but the result was a soggy, sad‑pancake that barely held together. That disaster sparked a midnight experiment that turned my kitchen into a laboratory of butter, sugar, and pure ambition. After three failed batches, I finally cracked the code: a perfect balance of high heat, a dash of sea salt, and a secret cooling trick that gives you both a crispy edge and a chewy center that stretches like a warm hug. This is hands down the best version you'll ever make at home, and I’m about to spill every detail so you can skip the trial‑and‑error and go straight to the glory.
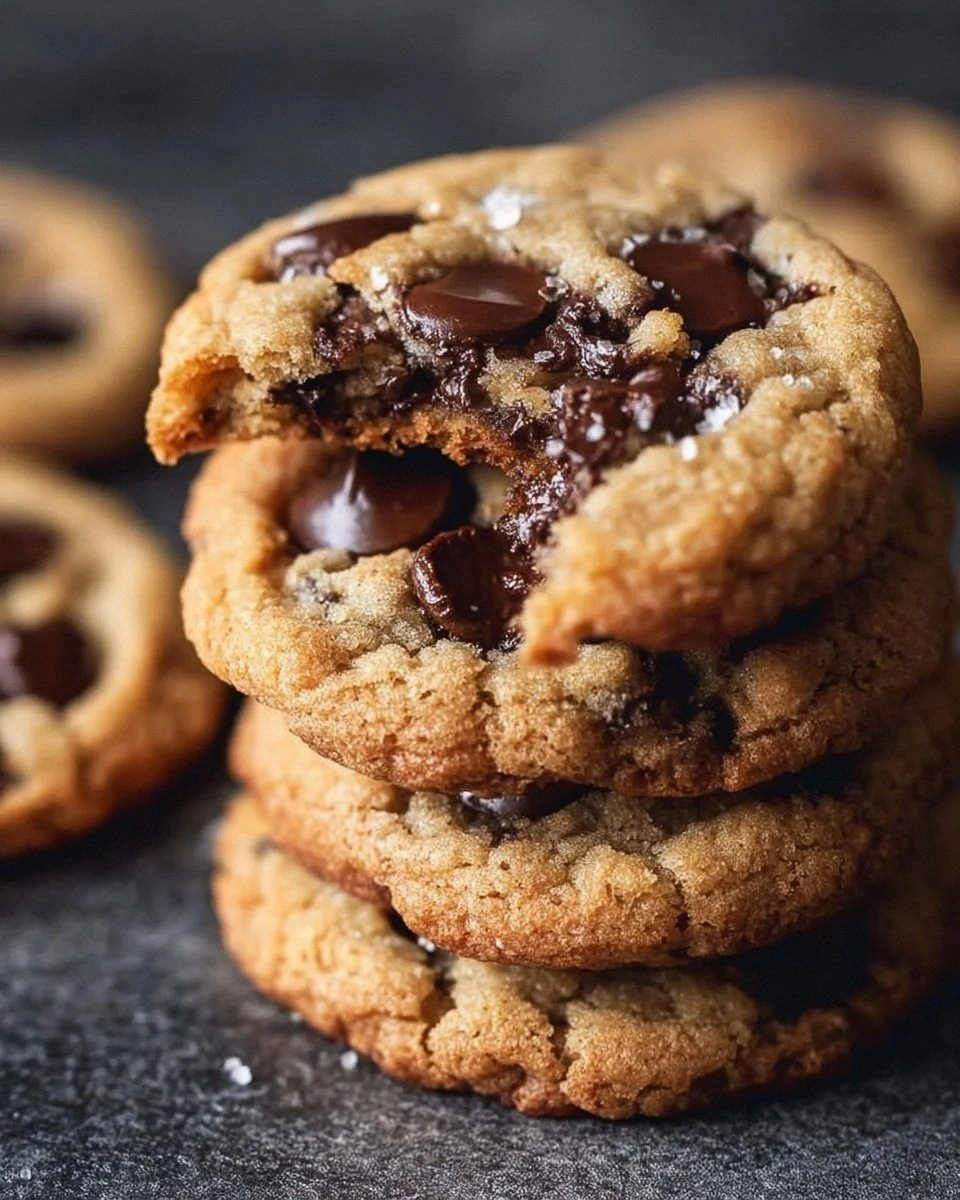
Picture yourself pulling a tray of golden‑brown cookies from the oven, the whole kitchen smelling like a chocolate‑laden dream, the edges crisping up like thin ice that shatters with the slightest touch. The aroma hits you first, a sweet‑savory perfume that makes your stomach do a little jig, and you can already feel the buttery melt on your tongue before the first bite. When you finally snap one in half, the contrast is electric: the outer rim snaps with a satisfying crunch while the interior stays soft, chewy, and studded with melty chocolate chips that ooze like molten gold. I dare you to taste this and not go back for seconds—because once you’ve experienced that perfect textural duet, nothing else will compare.
Most cookie recipes get this completely wrong. They either over‑bake, leaving you with a dry brick, or under‑mix, giving you a flat, greasy disc. The secret here is a two‑stage mixing method that builds a flavor base first, then introduces air for lift without sacrificing that coveted chew. And there’s a surprise ingredient that most bakers overlook: a splash of melted butter added at the very end, which creates a glossy finish and amplifies the crispiness on the edges. I’ll be honest — I ate half the batch before anyone else got to try it, but that’s only because I’m a generous host.
Okay, ready for the game‑changer? I’m going to walk you through every single step — by the end, you’ll wonder how you ever made cookies any other way. Stay with me here — this is worth it. The technique, the timing, the little hacks that turn a good cookie into a legendary one are all coming up, and trust me, the payoff is pure, unadulterated joy.
What Makes This Version Stand Out
- Texture: A dual‑textured masterpiece with crisp edges that shatter like thin ice and a chewy center that stretches like a warm blanket.
- Flavor: The caramelized butter and brown sugar create a deep, nutty undertone that makes the chocolate chips sing.
- Simplicity: Only ten ingredients, all pantry staples, no exotic add‑ons, and a straightforward two‑mix method.
- Uniqueness: The final splash of melted butter is the secret weapon that most recipes miss, delivering that glossy, crisp finish.
- Crowd Reaction: Even the pickiest eaters admit these cookies are “the best they’ve ever had” and beg for the recipe.
- Ingredient Quality: Using real vanilla extract and high‑quality semi‑sweet chocolate chips elevates the taste from ordinary to extraordinary.
- Cooking Method: Baking at a high temperature (375°F) for a short time locks in moisture while crisping the outer layer.
- Make‑Ahead Potential: Cookies store beautifully; a quick reheating revives the crispness, making them perfect for weeknight desserts.
Inside the Ingredient List
The Flavor Base
Butter is the heart of any good cookie, and here we use a full cup of unsalted butter, softened to room temperature. The butter’s fat content carries the flavor of the sugars, creating a caramel‑like depth once baked. If you swap butter for margarine, you’ll lose that rich mouthfeel and the edges won’t crisp up as nicely. Opt for European‑style butter if you can find it—it has a higher butterfat percentage, which translates to a richer taste and a more tender crumb.
The Sweet Duo
Granulated sugar and brown sugar each play a distinct role: the white sugar helps the cookies spread and creates that initial crunch, while the brown sugar, packed with molasses, adds moisture and a subtle caramel note. Skipping the brown sugar will make the cookies too dry, and using only brown sugar can result in a gummy texture. For a gluten‑free twist, you can replace the brown sugar with coconut sugar, but expect a slightly different flavor profile.
The Texture Crew
All‑purpose flour provides the structure, while baking soda gives the cookies a gentle lift, preventing them from becoming dense. Salt isn’t just a flavor enhancer; it balances the sweetness and intensifies the chocolate’s depth. If you’re watching sodium, you can halve the salt, but the overall flavor will be a touch flatter. A pinch of sea salt sprinkled on top right before baking can elevate the taste to restaurant‑level.
The Unexpected Star
Melted butter added at the very end of mixing is the secret that creates a glossy, crisp edge. This step is often missed because bakers think all butter should be creamed at the start, but the late addition coats the dough, forming a thin barrier that crisps under high heat. If you’re dairy‑free, try a blend of coconut oil and a tablespoon of soy milk; it won’t be identical, but it still gives a nice snap.
The Final Flourish
Semi‑sweet chocolate chips are the star topping, providing the perfect balance of sweetness and bitterness. If you love a richer bite, substitute half the chips with dark chocolate chunks. Nuts are optional but add a pleasant crunch and a nutty aroma; toasted pecans or walnuts work best. Always toast nuts lightly before folding them in—this brings out their oils and prevents a raw, bitter edge.
Everything's prepped? Good. Let's get into the real action…
The Method — Step by Step
Preheat your oven to 375°F (190°C) and line two baking sheets with parchment paper. This high temperature is crucial; it creates that rapid steam burst that lifts the cookie while crisping the edges. While the oven heats, place a wire rack in the middle so the cookies can cool evenly later.
Watch Out: Do not preheat to a lower temperature; the cookies will spread too much and lose their crisp edges.In a large bowl, whisk together the flour, baking soda, and salt until evenly distributed. This step ensures the leavening agent is spread throughout the dough, preventing pockets of uneven rise.
In a separate mixing bowl, cream the softened butter with the granulated and brown sugars for about 2‑3 minutes on medium speed. The mixture should turn pale and fluffy, and you’ll hear a faint crackling sound as air is incorporated—this is the foundation of that chewy interior.
Kitchen Hack: Add a pinch of sea salt to the butter‑sugar mixture; it amplifies the caramel notes and reduces the perceived sweetness.Beat in the vanilla extract, then add the eggs one at a time, scraping the sides after each addition. The batter should become smooth and glossy, and you’ll notice it thickening slightly after the second egg.
Melt the remaining tablespoon of butter in the microwave (or on the stove) until just liquid, not browned. Drizzle this melted butter over the batter and fold gently with a spatula. This is the moment of pure magic: the butter creates a thin coating that will later become the crispy edge.
Stir in the chocolate chips and optional nuts until evenly distributed. Make sure the chips are fully coated with dough; this prevents them from sinking to the bottom during baking.
Cover the bowl with plastic wrap and chill the dough for at least 30 minutes, preferably 1 hour. Chilling solidifies the butter, limiting spread and giving you that thick, chewy center.
Watch Out: Skipping the chill will cause the cookies to flatten dramatically, losing the desired texture.Scoop rounded tablespoons of dough onto the prepared sheets, spacing them about 2 inches apart. For uniform size, use a cookie scoop; this ensures even baking and a professional look.
Bake for 10‑12 minutes, watching closely after the 9‑minute mark. The edges should turn a deep golden brown while the centers remain soft and slightly undercooked; they’ll continue to set as they cool.
Kitchen Hack: Rotate the baking sheets halfway through the bake for an even color on both sides.Remove the cookies from the oven and let them rest on the sheet for 2 minutes before transferring to the wire rack. This short rest lets the cookies firm up without losing the soft interior, and the residual heat finishes the crisping of the edges.
That's it — you did it. But hold on, I've got a few more tricks that'll take this to another level…
Insider Tricks for Flawless Results
The Temperature Rule Nobody Follows
Never bake at a lower temperature than 375°F for this recipe. The high heat creates a rapid steam burst that locks in moisture, giving you that coveted chewy middle while the outer rim crisps. I once tried 350°F because I thought it would be “gentler,” and the result was a flat, soggy disappointment. Trust the oven; it’s your best ally.
Why Your Nose Knows Best
Your sense of smell is the ultimate timer. When the cookies are about 2 minutes from done, you’ll notice a sweet, caramelized scent wafting from the oven. That aromatic cue tells you the edges are turning golden. If you rely solely on the clock, you risk over‑baking and losing that perfect chew.
The 5‑Minute Rest That Changes Everything
After baking, let the cookies sit on the baking sheet for exactly five minutes before moving them to a wire rack. This rest lets the residual heat finish the cooking process without drying out the center. A friend tried skipping this step once — let's just say the cookies were too fragile to pick up without crumbling.
The Butter‑Melt Finish
A quick brush of melted butter on the tops right after cooling adds a subtle sheen and an extra layer of crispness. It’s a pro tip used in bakeries to give cookies that “just‑out‑of‑the‑oven” look even after they’ve cooled. Use a pastry brush and a light hand—too much butter will make them greasy.
Size Matters
Uniform cookie size ensures even baking. If you love a thick cookie, scoop a generous tablespoon and flatten it slightly with your hand before baking; this gives you a cake‑like center while preserving the crispy edge. Inconsistent sizes lead to some cookies being underbaked while others burn.
Creative Twists and Variations
This recipe is a playground. Here are some of my favorite ways to switch things up:
Salted Caramel Delight
Swap half the brown sugar for caramel bits and sprinkle flaky sea salt on top before baking. The caramel adds a buttery richness, while the salt amplifies the chocolate’s depth. Perfect for anyone who loves sweet‑and‑salty combos.
Double‑Chocolate Dream
Replace half of the semi‑sweet chips with dark chocolate chunks and add a tablespoon of cocoa powder to the dry ingredients. The result is a richer, more intense chocolate flavor that satisfies serious chocoholics.
Peanut Butter Swirl
Drop spoonfuls of creamy peanut butter into the dough and swirl with a knife before chilling. The peanut butter creates pockets of nutty cream that melt into the cookie as it bakes, offering a delightful contrast to the chocolate.
Oat‑Crunch Fusion
Add ½ cup rolled oats and a handful of shredded coconut to the batter. The oats give a wholesome chew, while the coconut adds a subtle tropical aroma. Great for a breakfast‑friendly twist.
Spiced Autumn
Incorporate ½ teaspoon each of cinnamon, nutmeg, and a pinch of cloves into the flour mixture. The warm spices pair beautifully with the chocolate, making these cookies a cozy treat for cooler evenings.
Storing and Bringing It Back to Life
Fridge Storage
Place cookies in an airtight container with a slice of bread on top; the bread releases moisture that keeps the interiors soft while the container protects the crispy edges. They’ll stay fresh for up to five days in the refrigerator.
Freezer Friendly
Lay cookies on a parchment‑lined tray, freeze until solid, then transfer to a zip‑top bag. They can be stored for up to three months. When you’re ready to eat, let them thaw at room temperature for 10 minutes, then pop them in a 300°F oven for 3‑4 minutes to revive the crunch.
Best Reheating Method
Add a tiny splash of water (about a teaspoon) to the bottom of a microwave‑safe plate, then microwave the cookie for 10‑15 seconds. The steam instantly restores softness without making the cookie soggy. For a truly crisp finish, finish the microwaved cookie under a hot broiler for 30 seconds.