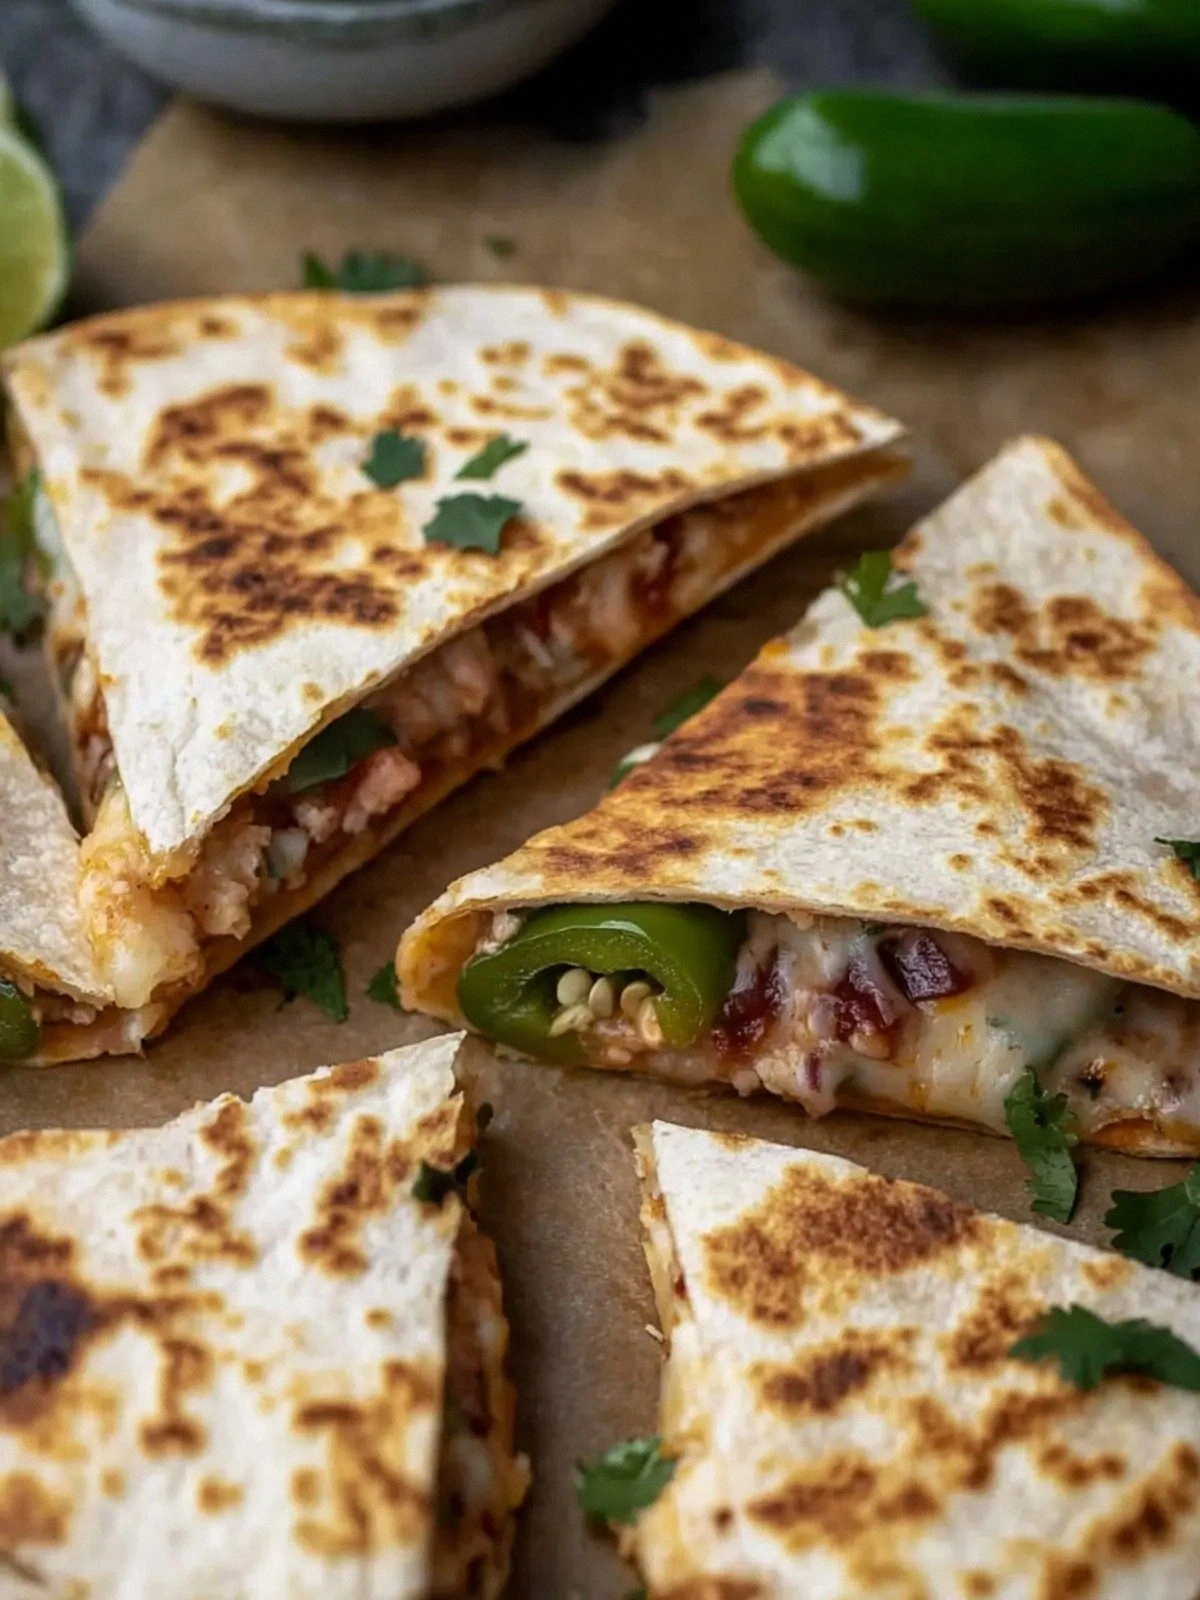
Picture this: you’re halfway through a late‑night binge‑watch, the TV’s glow is the only light in the room, and the fridge is a barren wasteland. You’re craving something that feels indulgent, yet you know you can’t afford a fancy take‑out. That’s when the idea hit me like a lightning bolt—Jalapeño Popper Ques, but with a crispy tortilla twist, a creamy center, and bacon that sings. I was about to throw in the towel, but then I remembered that one friend’s kitchen mishap where the bacon over‑cooked and the jalapeños burned. I decided to rescue the concept, tweak the flavors, and turn that disaster into a culinary triumph.
From the moment the skillet sizzles, you’ll hear a faint crackle that’s almost like a whisper of anticipation. The aroma—smoky bacon, sharp jalapeños, and the comforting scent of melted cheese—fills the air, turning the kitchen into a mini‑festival. Each bite is a symphony: the tortilla’s buttery crunch gives way to a velvety cream cheese core, then to a molten cheese bridge that glistens like molten gold. The jalapeños add a subtle, lingering heat that lingers on the palate, while the bacon provides a salty, umami counterpoint that keeps you coming back for more.
What makes this version stand out? It’s not just the ingredients; it’s the execution. I’ve stripped away the fluff, kept the process straightforward, and introduced a few game‑changing techniques that elevate the dish from “good” to “unforgettable.” I dare you to taste this and not go back for seconds. Trust me, the first bite will make you question every other jalapeño popper recipe you’ve ever seen.
In the next few pages, I’ll walk you through every single step—from selecting the best jalapeños to achieving that perfect golden crust. By the end, you’ll wonder how you ever made this any other way. So buckle up, grab your skillet, and let’s get cooking.
What Makes This Version Stand Out
- Flavor: The combination of creamy cream cheese, sharp jalapeños, and smoky bacon creates a layered taste profile that’s both comforting and exciting. The cheeses melt into a silky sauce that coats the tortilla like velvet, while the jalapeños add a bright, lingering heat that doesn’t overwhelm.
- Texture: The tortilla’s crisp edges shatter like thin ice, giving way to a molten center that oozes with cheese. The bacon is cooked to a perfect medium‑crisp, offering a satisfying crunch that contrasts with the creamy interior.
- Ease: No fancy equipment or obscure ingredients are required. All you need is a skillet, a few kitchen staples, and a willingness to follow a few simple steps.
- Uniqueness: By sandwiching the popper filling between two tortillas, you get a handheld, portable version of the classic appetizer that’s perfect for parties or a quick dinner.
- Crowd Appeal: Whether you’re hosting a game night or just craving comfort food, these ques are guaranteed to be a hit. The combination of heat, cheese, and bacon is universally loved.
- Ingredient Quality: Using fresh jalapeños, high‑quality cream cheese, and real mozzarella ensures that every bite bursts with authentic flavor. The bacon’s crispness is a testament to quality meat.
- Methodology: The cooking method—sequentially browning bacon, sautéing peppers, and then baking—ensures optimal flavor extraction and texture.
- Make‑Ahead: Once assembled, the ques can be stored in the fridge for up to 24 hours and reheated without losing their crispness.
Inside the Ingredient List
The Flavor Base
At the heart of this dish is the creamy filling that turns every bite into a rich, indulgent experience. Cream cheese serves as the backbone, providing a smooth, tangy canvas that balances the sharpness of the jalapeños. If you’re craving a bit more depth, consider adding a dash of smoked paprika or a splash of hot sauce to the mix. Skipping the cream cheese would leave the ques feeling dry and underwhelming; the filling is what makes the whole thing sing.
The Texture Crew
Bacon is the unsung hero that adds a satisfying crunch and a savory, smoky undertone. Cook it until it’s just about crisp, then let it rest on a paper towel to drain excess fat—this keeps the ques from becoming greasy. The tortillas, on the other hand, provide the essential structure. Opt for fresh, pliable tortillas; older ones can become brittle and break apart when you fold them. A small trick: lightly steam the tortillas for a few seconds to make them more flexible and less likely to tear.
The Unexpected Star
Jalapeños are the spice that sets this dish apart. They’re not just a heat source; they contribute a bright, vegetal note that cuts through the richness of the cheeses. Choose jalapeños that are firm and green for the freshest flavor. If you’re sensitive to heat, you can remove the seeds and membranes, but the subtle heat is part of the charm. A fun fact: jalapeños were once known as “peppers of the devil” in colonial America because of their fiery reputation.
The Final Flourish
The cheeses—mozzarella and Monterey Jack—add a gooey, melty layer that elevates the ques to a new level of indulgence. Mozzarella offers a mild, stretchy texture, while Monterey Jack brings a buttery, slightly sweet flavor. Together, they create a harmonious blend that’s both comforting and luxurious. If you’re looking for a dairy‑free twist, try a plant‑based cheese that melts well, but keep in mind that the flavor profile will shift.
Everything’s prepped? Good. Let’s get into the real action.
The Method — Step by Step
- Heat a large skillet over medium heat. Add the bacon strips in a single layer, cooking until they’re golden brown and crispy, about 5–7 minutes. Flip them halfway through so they cook evenly. Once done, transfer to a paper towel‑lined plate to drain the excess fat. This step locks in the bacon’s savory crunch and prevents the ques from becoming soggy.
- While the bacon rests, dice the jalapeños finely. If you prefer a milder heat, remove the seeds and membranes. Toss the diced peppers in a bowl with the garlic powder, onion powder, kosher salt, and pepper. The spices will coat the jalapeños, allowing their flavor to permeate the filling. Let the mixture sit for 5 minutes; this brief rest lets the flavors meld.
- In the same skillet, add a splash of olive oil or a dab of butter. Once hot, add the seasoned jalapeños. Sauté for 2–3 minutes until they soften slightly but still hold their shape. The goal is to release their heat without turning them mushy. Remove the pan from heat and set aside.
- In a medium bowl, combine the cream cheese, shredded mozzarella, and shredded Monterey Jack. Add the sautéed jalapeños and mix until the cheeses are fully incorporated and the mixture is creamy. The heat from the peppers will slightly melt the cheeses, creating a luscious, runny filling that’s perfect for filling tortillas.
- Lay one tortilla flat on a clean surface. Spread a generous layer of the cheese‑jalapeño mixture across the center, leaving a 1‑inch border around the edges. Sprinkle the cooked bacon strips evenly over the filling. Then top with the second tortilla, pressing gently to seal the edges. The cheese will act as a glue, keeping the ques together.
- Place the assembled ques in the skillet over medium heat. Cook for 3–4 minutes on each side, pressing lightly with a spatula to ensure even contact. The tortilla should develop a golden‑brown crust, and the cheese inside should start to melt and bubble. Keep an eye on the heat; if it gets too high, the cheese may burn before the tortilla finishes crisping.
- Once both sides are golden and the cheese has melted to a gooey consistency, remove the ques from the skillet. Let it rest for 1–2 minutes before cutting. This rest period allows the cheese to set slightly, preventing it from oozing out when you slice.
- Slice each ques into wedges and serve immediately. Pair them with a side of cool, creamy ranch or a tangy salsa to balance the heat. The contrast between the hot, creamy interior and the crisp tortilla makes for a delightful eating experience.
That’s it— you did it. But hold on, I’ve got a few more tricks that will take this to another level.
Insider Tricks for Flawless Results
The Temperature Rule Nobody Follows
Many cooks think a high heat is the key to a crispy tortilla, but that often leads to burnt edges and under‑cooked fillings. I’ve discovered that medium heat gives you the perfect balance—enough to brown the tortilla without scorching the cheese inside. If the skillet gets too hot, the cheese will burn before the tortilla finishes crisping. Keep the heat steady and let the tortilla do its work.
Why Your Nose Knows Best
Before you even touch the skillet, inhale the aroma of the bacon and jalapeños. The scent will tell you if the bacon is cooked to perfection. A sweet, smoky smell means it’s ready; a metallic, burnt scent indicates you’ve gone too far. Your nose is a reliable guide—trust it.
The 5‑Minute Rest That Changes Everything
After you remove the ques from the skillet, let it rest for exactly five minutes. During this time, the cheese continues to melt and set, creating a thicker, more cohesive filling. This rest also allows the tortilla to firm up slightly, preventing it from becoming soggy when you cut into it. I’ve seen people skip this step and end up with a mess; don’t be that person.
Use Fresh Jalapeños for Peak Flavor
Jalapeños that are still bright green and slightly firm provide the best flavor and heat. If they’re starting to turn red or feel soft, they’re past their prime. Fresh peppers hold their heat better and have a more vibrant taste. When you buy them, look for a firm, glossy exterior and a weight that feels substantial for the size.
Keep the Bacon Crispy, Not Greasy
Cook bacon until it’s just crisp, then lay it on a paper towel to absorb excess oil. If you let the bacon sit in its own fat, it’ll become greasy and the ques will feel heavy. The paper towel trick is simple but effective—just a few minutes, and you’ll have perfectly crisp bacon that adds texture without compromise.
Serve with a Cool Dip
Pair your ques with a cool, creamy dip like ranch or a tangy salsa. The dip balances the heat and adds a contrasting temperature that refreshes the palate. I’ve found that a simple homemade ranch, made with Greek yogurt and fresh herbs, works wonders.
Creative Twists and Variations
This recipe is a playground. Here are some of my favorite ways to switch things up:
Spicy Buffalo Bacon
Swap the regular bacon for a spicy buffalo‑flavored variety. The heat from the bacon will complement the jalapeños, creating a double‑layered spice experience. Add a drizzle of blue cheese dressing for a tangy finish.
Veggie‑Loaded Version
Throw in diced bell peppers, corn kernels, or black beans to the cheese mixture for a hearty, veggie‑rich filling. This variation adds texture and makes the ques more filling.
Cheesy Ques with a Twist
Replace the mozzarella and Monterey Jack with a blend of cheddar and pepper jack for a sharper, more robust cheese profile. The cheddar’s sharpness pairs well with the jalapeños’ bite.
Gluten‑Free Adaptation
Use gluten‑free tortillas and ensure all other ingredients are gluten‑free. The process stays the same, but the end result is just as delicious for those with dietary restrictions.
Breakfast Edition
Serve the ques with a side of scrambled eggs or a poached egg on top. The richness of the cheese and the bacon complements the protein, making it a perfect breakfast or brunch.
Mexican Street Food Style
Wrap the ques in a corn tortilla, sprinkle with fresh cilantro, and finish with a squeeze of lime. The lime’s acidity cuts through the richness, giving it a street‑food vibe.
Storing and Bringing It Back to Life
Fridge Storage
Store leftovers in an airtight container in the refrigerator for up to 24 hours. Reheat in a skillet over low heat until the cheese is melted and the tortilla is crisp. This method preserves the texture better than a microwave.
Freezer Friendly
Wrap each ques individually in parchment paper and place them in a freezer bag. Freeze for up to 2 months. When you’re ready to eat, thaw overnight in the refrigerator, then reheat as described above.
Best Reheating Method
Reheat on a skillet over medium heat, pressing lightly with a spatula. Add a splash of water to the skillet before covering it with a lid for 30 seconds; the steam will help the cheese melt without drying out the tortilla.