I was in the middle of a Friday night dinner rush, juggling a pot of pasta, a simmering sauce, and a stack of last‑night's leftovers when I realized I had run out of the one ingredient that turns a simple chicken breast into a showstopper: dill pickle juice. The kitchen smelled like a soggy sandwich and the air was thick with the scent of burnt garlic. My friend, a culinary skeptic, challenged me to make a dish that could stand up to the boldness of a grilled steak while still being approachable for a family dinner. I stared at the empty fridge, laughed, and decided that this was the moment to create the ultimate dill pickle Parmesan chicken.
The first thing I did was open the pickle jar, and the briny aroma hit me like a splash of citrus. The bright green liquid glistened under the kitchen lights, promising a tang that could cut through the richness of butter and Parmesan. As I sliced the chicken, the meat’s pink flesh glowed, and I could almost hear the sizzle that would soon greet it. The sound of the skillet heating was a low rumble, a prelude to the crackle that would announce the moment the batter hit the oil. I could already taste the savory, slightly sweet bite that would come after the chicken was coated in that golden, crunchy crust.
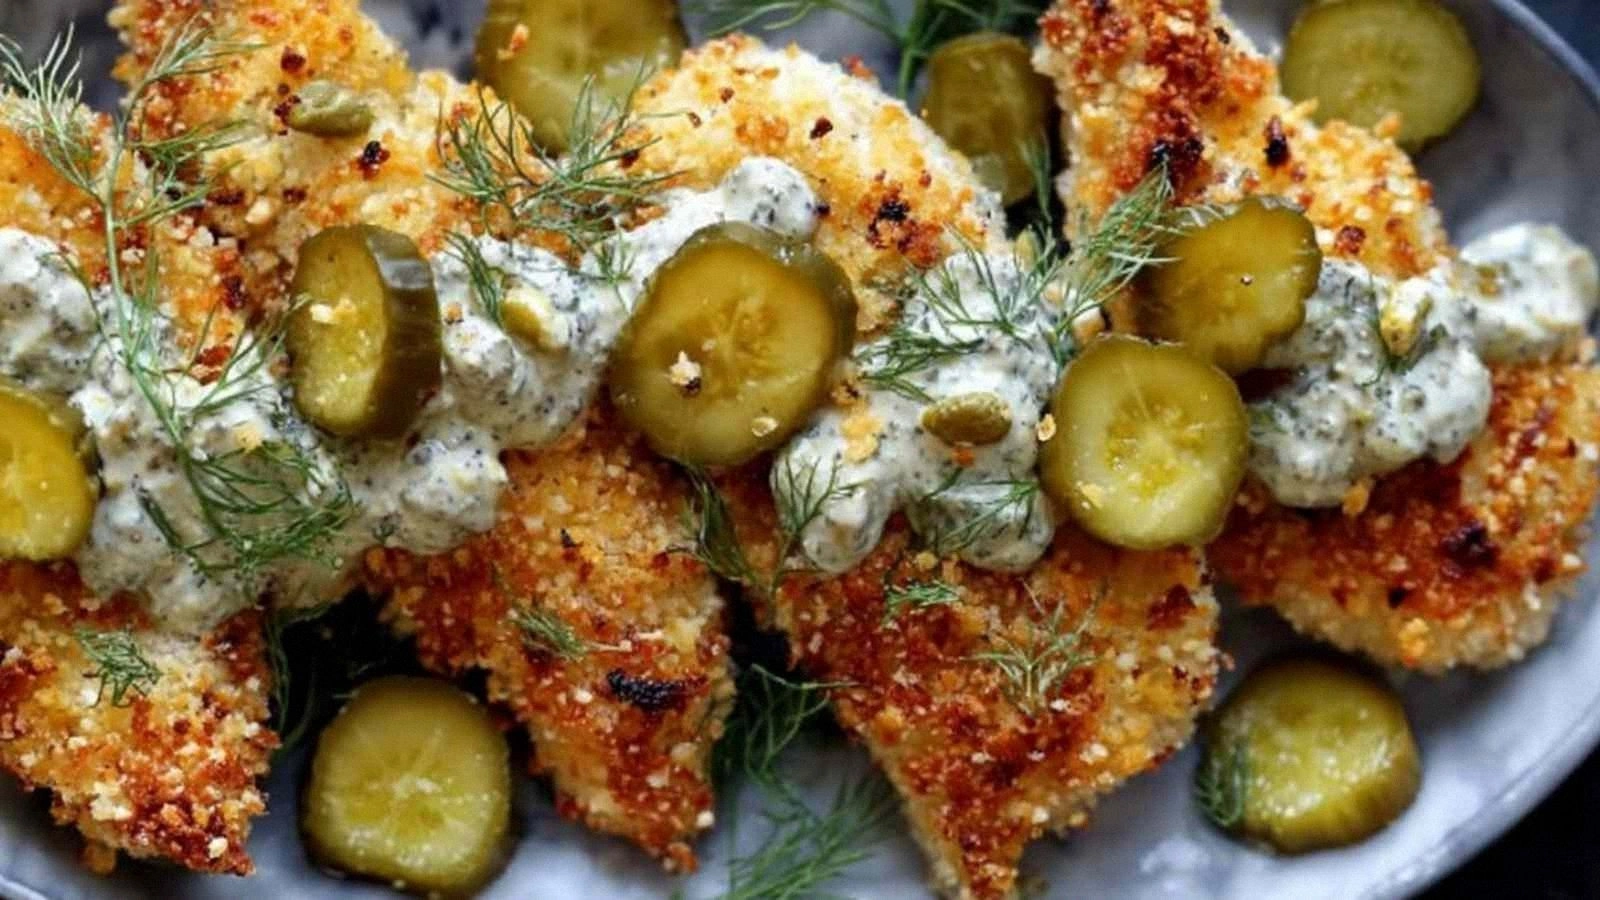
What makes this version stand out is the intentional marriage of two flavors that usually live in separate worlds: the sharp, fermented bite of dill pickle and the umami, melt‑away texture of Parmesan. The recipe doesn’t just rely on the pickle juice; it layers the seasoning, the flour, and the breadcrumbs to create a multi‑textured bite that feels like a crunchy, cheesy sandwich with a protein core. The result is a dish that is crisp on the outside, tender inside, and bursting with a tangy zest that lingers long after the last bite. It’s a dish that people will ask for again and again, and you’ll find yourself defending it as the best version of this classic chicken.
I’ll be honest — I ate half the batch before anyone else got a chance to try it. The next time I made it, I dared you to taste this and not go back for seconds. Picture yourself pulling this out of the oven, the whole kitchen smelling incredible, and the first bite sending a wave of crunchy, cheesy, briny bliss through your palate. If you’ve ever struggled with chicken that turns out dry or too greasy, you’re not alone — and I’ve got the fix. Okay, ready for the game‑changer? Let me walk you through every single step — by the end, you’ll wonder how you ever made it any other way.
What Makes This Version Stand Out
- Flavor: The dill pickle juice infuses the chicken with a bright, fermented tang that balances the richness of butter and Parmesan. This contrast elevates the dish beyond ordinary fried chicken.
- Texture: A double‑coating of flour and panko breadcrumbs creates a crust that is crunchy yet airy, with a buttery melt that gives way to a tender interior.
- Ease: The prep is straightforward—no fancy sauces or long marinating times—yet the outcome feels gourmet and restaurant‑grade.
- Uniqueness: Few recipes combine pickle juice and cheese in a crispy coating; this is a fresh take that surprises and delights.
- Crowd‑pleaser: Whether you’re feeding a family or hosting friends, the bright green glaze and savory crunch make it a conversation starter.
- Ingredient Quality: Using fresh, high‑quality Parmesan and real dill pickle seasoning ensures depth and authenticity in every bite.
- Make‑ahead Potential: You can prep the coated chicken ahead of time and finish cooking just before serving, making it perfect for busy evenings.
- Versatility: The dish pairs beautifully with pasta, rice, or a simple green salad, giving you endless serving options.
Inside the Ingredient List
The Flavor Base
Dill pickle juice is the star of this recipe. It not only adds a distinctive tang but also tenderizes the chicken by breaking down the muscle fibers. If you’re unable to find pickle juice, a splash of white wine vinegar mixed with a teaspoon of sugar can mimic the acidity and sweetness. Keep the juice cold; it helps keep the coating from sticking too early during frying. The amount—one cup—is generous enough to coat the chicken evenly without diluting the flavor.
The Texture Crew
All‑purpose flour forms the first barrier that captures the pickle juice and holds the breadcrumb coating in place. Panko breadcrumbs give the crust its signature lightness and crunch. The butter adds a silky richness that melts into the coating, while the olive oil provides a high‑smoke‑point fat for a golden finish. If you’re looking to cut calories, you can replace half the butter with a light olive oil or a non‑stick spray.
The Unexpected Star
The dill pickle seasoning—typically a blend of dill, garlic, and spices—injects an extra layer of complexity. It’s a subtle nod to the pickle jar’s flavor profile without overpowering the Parmesan. A pinch of smoked paprika can add a hint of smokiness if you prefer a more robust taste. When shopping for this seasoning, look for a brand that uses real dill and minimal additives for the freshest result.
The Final Flourish
Grated Parmesan cheese is the crowning glory, adding umami depth and a melt‑away finish. Use a sharp, high‑quality cheese to avoid a chalky aftertaste. The garlic powder and black pepper provide a savory backbone that balances the acidity of the pickle. Salt is essential, but remember that the pickle juice and seasoning already contain sodium, so adjust accordingly to avoid an overly salty dish.
Everything’s prepped? Good. Let’s get into the real action.
The Method — Step by Step
- Pat the chicken breasts dry with paper towels; this step is crucial for a crisp coating. Season both sides lightly with salt and pepper. The drier the surface, the better the flour will adhere.
- In a shallow dish, whisk together the dill pickle juice, garlic powder, dill pickle seasoning, and a pinch of black pepper. This liquid batter will soak the chicken and infuse it with flavor. Let the mixture sit for 5 minutes to allow the spices to meld.
- Place the flour in one bowl, beaten eggs in another, and panko breadcrumbs in a third. The flour will form a base layer that captures the pickle liquid; the eggs will bind the crumbs; and the breadcrumbs will give that satisfying crunch. Dip each breast first into the flour, shaking off excess, then into the egg wash, and finally into the breadcrumbs. Press gently to ensure an even coating.
- Remove the chicken from the skillet and place it on a wire rack set over a baking sheet. This prevents the bottom from becoming soggy and keeps the crust crisp. Let it rest for 2 minutes; the juices redistribute, keeping the meat moist.
- While the chicken rests, reduce the skillet’s heat to low and pour the remaining pickle liquid into the pan. Stir it with a wooden spoon, scraping up any browned bits. This creates a quick glaze that will coat the chicken when you serve it.
- Return the chicken to the skillet, spooning the glaze over each piece. The sauce should coat the coating like a glossy, tangy dressing. Let the chicken simmer in the glaze for 1–2 minutes, allowing the flavors to meld.
- Serve immediately, optionally garnishing with fresh dill or a squeeze of lemon for extra brightness. Pair it with a crisp green salad or a bowl of buttery mashed potatoes for a balanced meal.
That’s it — you did it. But hold on, I’ve got a few more tricks that will take this to another level.
Insider Tricks for Flawless Results
The Temperature Rule Nobody Follows
Many people think medium‑high heat is fine, but the secret to a perfect crust is a skillet that’s hot enough to sear the coating instantly yet not so hot that the butter burns. Aim for 375°F (190°C) on your stove; test with a drop of water—if it sizzles and evaporates quickly, you’re good.
Why Your Nose Knows Best
A seasoned chef’s nose can tell when the coating has browned just right. If you smell a faint nutty aroma, it’s time to flip. Over‑sizzling will result in a bitter bite that masks the dill.
The 5-Minute Rest That Changes Everything
Resting the chicken on a wire rack lets the steam escape, preventing a soggy bottom. I once skipped this step and the crust fell apart when I tried to slice it. Let it sit for at least 2 minutes before cutting.
Use Fresh Parmesan for Depth
A sharp, aged Parmesan brings a nutty flavor that balances the acidity of the pickle. If you only have instant cheese, the flavor will be flat and the coating will taste bland.
Add a Dash of Smoked Paprika
A half teaspoon of smoked paprika adds a subtle smokiness that complements the dill. It’s an optional tweak that turns an already great dish into a smoky‑savory masterpiece.
Creative Twists and Variations
This recipe is a playground. Here are some of my favorite ways to switch things up:
Spicy Pickle Parmesan Chicken
Add a teaspoon of cayenne pepper to the flour mixture and a pinch of red pepper flakes to the seasoning. The heat pairs beautifully with the tang and makes the dish ideal for a crowd that loves a kick.
Herb‑Infused Version
Replace the dill pickle seasoning with a blend of fresh basil, oregano, and thyme. The herbs give a Mediterranean vibe, while the pickle juice still offers that bright acidity.
Low‑Fat Variation
Swap the butter for a tablespoon of olive oil and use a non‑stick skillet. The coating will still crisp up nicely, and the dish will be lighter without compromising flavor.
Gluten‑Free Option
Use a gluten‑free flour blend and gluten‑free breadcrumbs. The texture will be slightly different, but the flavor profile remains unchanged.
Breakfast Brunch Twist
Serve the chicken with a side of fluffy scrambled eggs and a drizzle of maple syrup. The sweet‑savory combination turns this into a brunch‑worthy dish.
Storing and Bringing It Back to Life
Fridge Storage
Store leftovers in an airtight container for up to 3 days. Keep the chicken on a paper towel to absorb excess moisture and preserve the crispness. When ready to serve, reheat in a skillet over medium heat until warmed through.
Freezer Friendly
Freeze the coated chicken pieces on a parchment‑lined tray for 1–2 hours, then transfer to a freezer bag. Store for up to 2 months. When reheating, bake at 400°F (204°C) for 10–12 minutes or until the coating is crisp again.
Best Reheating Method
To restore the original crunch, reheat the chicken in a hot skillet or oven rather than a microwave. Add a splash of water to the pan before covering; the steam will keep the coating from drying out.