I was in the middle of a frantic week, juggling deadlines, a toddler’s tantrum, and a looming dinner party when I realized I had no idea what to serve. The fridge was a barren wasteland of wilted lettuce and a lone slice of provolone, and the pantry smelled faintly of last month’s oregano. In that moment of culinary crisis, I remembered a childhood memory of my grandmother’s Sunday lunches, where a simple sub roll filled with fresh veggies, cured meats, and a splash of Italian dressing was the star of the show. That memory sparked a daring idea: a sandwich that could be assembled in minutes, yet feel like a gourmet feast.
I grabbed the nearest sub rolls from the freezer, sliced a handful of crisp romaine, and diced a handful of ripe tomatoes that had just been harvested from my neighbor’s garden. The kitchen filled with the scent of fresh basil, the tang of olive oil, and the faint metallic hint of olives – a symphony of aromas that instantly lifted my spirits. I tossed the lettuce and tomatoes together, then added thin slices of red onion, bell pepper, and a generous handful of Kalamata olives. The mixture looked like a salad on a plate, but I was about to turn it into something far more exciting.
The real magic began when I slid slices of Genoa salami and capicola into the bowl, letting their savory juices mingle with the veggies. I then added shredded provolone cheese, which began to melt slightly in the warmth of the ingredients, creating a creamy, gooey layer that bound everything together. A drizzle of homemade Italian dressing – olive oil, red wine vinegar, garlic, oregano, and a touch of honey – poured over the mix, coating each piece like a glossy coat of velvet. The sandwich was ready to be assembled, but the real test was how to keep it from becoming soggy while still letting the flavors bloom.
I lined a baking sheet with parchment paper and pressed the sub rolls in halves, leaving a small opening on each side to let the fillings breathe. I filled the rolls with the salad mixture, making sure each layer was evenly distributed. The final touch was a sprinkle of salt and pepper, a dash of fresh oregano, and a squeeze of lemon juice to brighten the flavors. As I slid the sandwiches into a preheated oven, the aroma that filled the kitchen was unmistakably mouth‑watering, and I knew this was going to be the highlight of the evening.
I dare you to taste this and not go back for seconds. This is hands down the best version you'll ever make at home, and if you’ve ever struggled to keep a sandwich fresh, you’re not alone – and I've got the fix. Picture yourself pulling this out of the oven, the whole kitchen smelling incredible, and everyone asking for the recipe. Okay, ready for the game‑changer? Let me walk you through every single step – by the end, you'll wonder how you ever made it any other way.
What Makes This Version Stand Out
- Flavor Complexity: The combination of cured meats, fresh veggies, and a zesty dressing creates layers of taste that dance on the palate. Each bite offers a burst of savory, sweet, and tangy notes that keep you coming back for more.
- Texture Harmony: The crunch of lettuce, the softness of tomatoes, and the melt of provolone create a satisfying bite that feels both indulgent and light. The sandwich is never soggy thanks to the careful assembly and brief oven finish.
- Freshness Retention: By using a short bake time and a slight crust on the roll, the sandwich stays crisp while the fillings stay juicy. The Italian dressing’s acidity also helps preserve the veggies’ crunch.
- Ease of Prep: All ingredients are pre‑chopped or pre‑sliced, and the assembly takes less than ten minutes. The only “cooking” step is a quick oven pass that locks in flavors.
- Customization Flexibility: Swap out the meats for turkey or chicken, use different cheeses, or add roasted red peppers for a smoky twist. The base recipe is a canvas that invites experimentation.
- Make‑Ahead Potential: The sandwich can be assembled and refrigerated for up to two days, or frozen for up to a week. The flavors intensify, making it even more delicious on the second day.
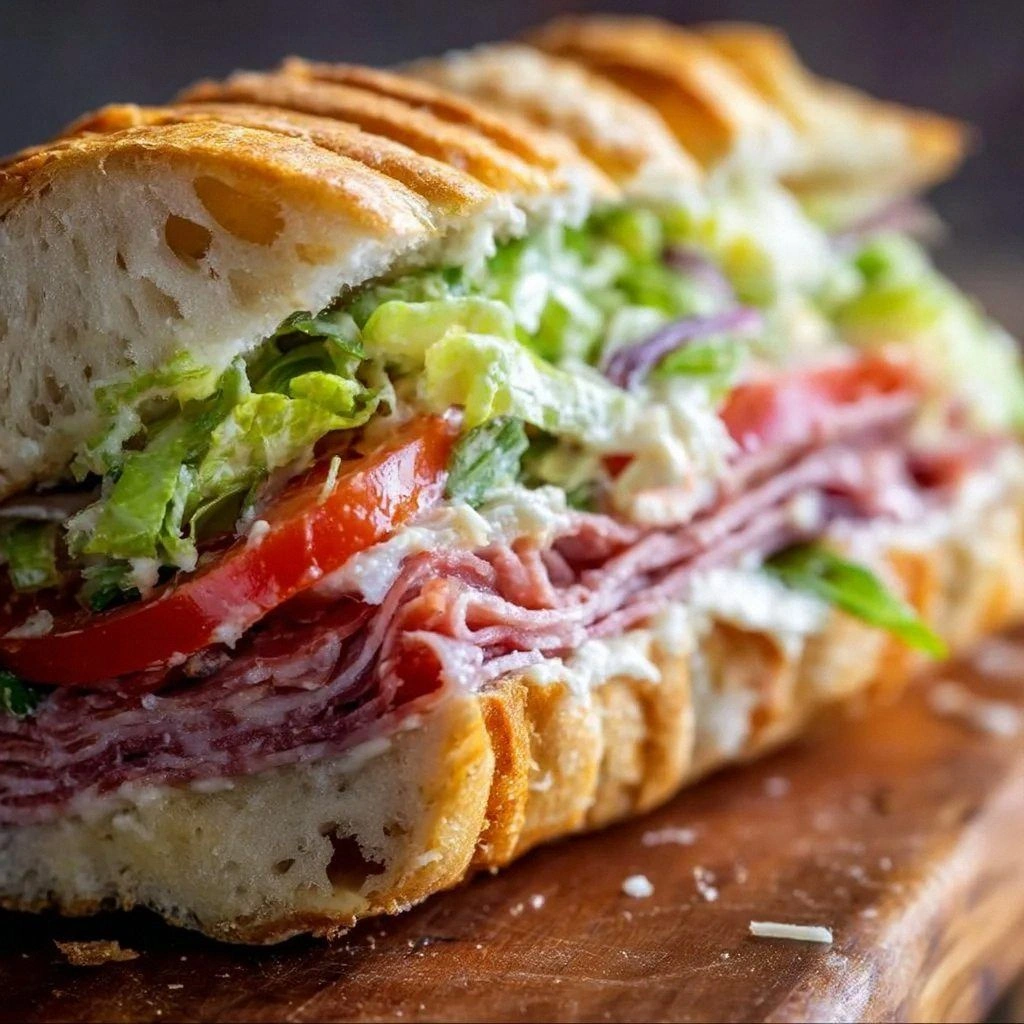
- Visual Appeal: The vibrant colors of the tomatoes, bell peppers, and olives against the golden crust of the roll make it Instagram‑ready. A quick drizzle of dressing adds a glossy finish that screams gourmet.
Inside the Ingredient List
The Flavor Base
The foundation of this sandwich is the Italian dressing. A simple blend of olive oil, red wine vinegar, minced garlic, dried oregano, and a touch of honey creates a tangy, aromatic sauce that coats the veggies and meats. If you’re short on time, store-bought Italian dressing works well, but a homemade version adds a personal touch that elevates the whole dish. Skipping the dressing will result in a dry, under‑seasoned sandwich, so make sure it’s generous but not overpowering.
The Texture Crew
Lettuce and tomatoes provide the essential crunch and juiciness that keep the sandwich lively. Romaine offers a crisp bite, while iceberg adds a milder crunch; choose based on your preference. Tomatoes should be ripe and slightly soft, allowing them to release juices that mingle with the dressing. Bell peppers add a sweet snap, and thinly sliced red onions contribute a subtle sharpness. Together, these vegetables create a vibrant, multi‑textured experience.
The Unexpected Star
Capicola and salami bring a savory depth that is quintessentially Italian. These cured meats are seasoned with spices and salt, delivering a rich, umami flavor that balances the fresh vegetables. If you prefer a leaner option, turkey or chicken salami can be used, though the flavor profile will shift slightly. The cheeses – a creamy provolone – add a silky texture that melts into the sandwich, binding all elements together.
The Final Flourish
Salt and pepper are the unsung heroes that tie everything together. A pinch of salt amplifies the flavors, while freshly cracked pepper adds a subtle heat. Be careful not to overdo it; the cured meats already contain significant sodium, so a light seasoning is sufficient. A final sprinkle of fresh oregano or basil adds a burst of herbal brightness that completes the sandwich’s profile.
Everything's prepped? Good. Let's get into the real action.
The Method — Step by Step
- Preheat your oven to 375°F (190°C). While the oven warms, slice your sub rolls in half lengthwise, leaving a small seam so the fillings can stay in place. This step ensures the roll will toast evenly without falling apart. The smell of baking bread will begin to fill the kitchen, signaling that the adventure is about to begin.
- In a large mixing bowl, combine the chopped lettuce, diced tomatoes, sliced bell peppers, thinly sliced red onion, and sliced olives. Toss gently so the vegetables are evenly distributed. The color contrast should be striking – a visual feast before the first bite. This is the moment you can hear the crispness of the veggies as they mingle.
- Add the sliced salami and capicola to the bowl, letting the meats soak up some of the dressing’s acidity. The cured meats will release their savory juices, creating a rich base that will coat the vegetables. This is the moment of truth where the sandwich starts to feel like a full‑blown Italian dish.
- Drizzle the Italian dressing over the mixture and sprinkle with salt, pepper, and a pinch of oregano. Toss everything again, ensuring every ingredient is coated. The dressing should look glossy, like a fine wine that has settled. The aroma will intensify, making you almost forget you’re about to eat.
- Lay the shredded provolone cheese over the top of the salad mixture, allowing it to melt slightly into the juices. The cheese will act as a binder, holding the ingredients together as the sandwich bakes. The cheese should begin to bubble, signaling that the oven is working its magic.
- Spoon the salad and cheese mixture into the prepared sub rolls, packing each bite with equal amounts of filling. The filling should be dense enough to hold together but not so packed that it spills. A quick press ensures the roll’s sides stay closed, preventing a messy sandwich.
- Place the assembled sandwiches on a parchment‑lined baking sheet and bake for 8–10 minutes, or until the roll edges turn golden and the cheese is fully melted. Keep an eye on the color; you want a crisp crust without burning. The oven timer will tick, building anticipation for the final product.
-
Remove the sandwiches from the oven and let them rest for 2 minutes. This brief rest allows the cheese to settle, preventing it from sliding out when you cut. The aroma will be at its peak, and you’ll be tempted to devour the whole thing before the rest even finishes.Watch Out: Be careful not to overbake, or the cheese will become rubbery and the sandwich will lose its juicy balance. The oven’s heat can quickly turn a perfect sandwich into a dry, over‑cooked mess.
- Slice each sandwich diagonally and serve immediately with a side of crispy potato chips or a light salad. The sandwich’s crunch pairs beautifully with the softness of the chips, creating a balanced bite. The final plating should look appetizing, with the colorful fillings peeking through the golden crust.
- If you have leftovers, store them in an airtight container in the refrigerator for up to 48 hours. For best flavor, reheat in a toaster oven at 350°F (175°C) for 5 minutes, or until the cheese is just melted again. This quick heat-up restores the sandwich’s original texture and taste, making it a perfect second‑day meal.
That's it — you did it. But hold on, I've got a few more tricks that'll take this to another level.
Insider Tricks for Flawless Results
The Temperature Rule Nobody Follows
Most people bake sandwiches at a high temperature, but that can dry out the fillings. I always set my oven to 375°F (190°C) and keep a close eye on the crust. This moderate heat allows the cheese to melt evenly while the roll crisps without burning. A quick 8–10 minute bake is enough to lock in moisture without compromising texture.
Why Your Nose Knows Best
If the sandwich smells like fresh basil and garlic, you’re on the right track. A subtle herbal aroma indicates the dressing has infused properly. If it smells too sharp or like raw onion, let the mixture rest for a few minutes to mellow the flavors. Trust your nose; it’s the best judge of seasoning.
The 5‑Minute Rest That Changes Everything
After baking, let the sandwich rest for at least 5 minutes before cutting. This short pause allows the cheese to set, preventing it from oozing out and keeping the sandwich intact. It also lets the flavors meld, resulting in a more cohesive bite. Skipping this step often leads to a soggy, messy experience.
The Cheese‑Chew Balance
Use a mix of provolone and a touch of mozzarella for a creamier texture. The mozzarella adds stretchiness, while provolone contributes a sharp, nutty flavor. If you’re avoiding dairy, try a plant‑based cheese that melts well, like a cashew‑based option. The key is to maintain a balance between melt and bite.
The Olive‑Oven Combo
Before adding the olives to the bowl, toast them lightly in a dry skillet for 30 seconds. This step releases their oils and enhances their flavor, giving each bite a richer, more aromatic profile. The toasted olives also hold up better during the bake, preventing them from becoming soggy.
The Fresh‑Meat Hack
If you’re using pre‑sliced meats, pat them dry with a paper towel. Moisture on the surface can cause the sandwich to become soggy and the roll to lose its crunch. A quick pat will keep the meats firm and the sandwich crisp.
Creative Twists and Variations
This recipe is a playground. Here are some of my favorite ways to switch things up:
Mediterranean Melt
Swap the provolone for feta cheese and add sun‑dried tomatoes. The briny feta pairs beautifully with the olives, creating a Mediterranean vibe. Serve with a side of hummus for an extra protein boost.
Spicy Kick
Add sliced pepperoncini or a sprinkle of red pepper flakes to the dressing. The heat will contrast with the sweetness of the tomatoes and the richness of the meats, giving the sandwich a fiery edge.
Vegan Delight
Replace all meat with marinated grilled tofu or tempeh, and use a dairy‑free cheese alternative. The tofu will absorb the dressing, while the cheese substitute will provide the creamy texture. The result is a plant‑based sandwich that still feels indulgent.
Breakfast Boost
Add a fried egg on top of the fillings before baking. The runny yolk will act as a natural sauce, adding richness and protein. This variation turns the sandwich into a hearty breakfast that satisfies even the biggest appetite.
Roasted Veggie Twist
Replace raw bell peppers with roasted red peppers for a smoky flavor. The roasting process brings out deeper sweetness and a charred nuance that pairs well with the cured meats. This version is perfect for when you’re craving a bit of depth.
Herb‑Infused Crunch
Add chopped fresh basil or mint to the salad mix for a fresh herbal note. The herbs will brighten the overall flavor profile and provide a fragrant aroma that enhances the eating experience.
Storing and Bringing It Back to Life
Fridge Storage
Store the assembled sandwich in an airtight container for up to 48 hours. If you prefer a crisper roll, separate the bread from the filling and assemble just before serving. Keep the container in the refrigerator, not the freezer, to preserve the fresh vegetables.
Freezer Friendly
Wrap each sandwich in parchment paper and then foil before freezing. This double wrap prevents freezer burn and keeps the flavors intact. When you’re ready to eat, thaw in the refrigerator overnight and reheat briefly.
Best Reheating Method
Reheat the sandwich in a toaster oven at 350°F (175°C) for 5–7 minutes, or until the cheese is melted again. Alternatively, use a microwave for 30 seconds, then finish in a toaster oven for a crisp crust. A tiny splash of water before reheating helps steam the sandwich back to its original moisture.
The trick to keep it from getting soggy is to add a small amount of water to the baking sheet or use a parchment‑lined tray. The steam created during the brief heating process will prevent the roll from drying out.
Now that you’ve mastered the classic, feel free to experiment and make the sandwich your own. Whether you’re serving it at a family gathering, a potluck, or a quick weekday dinner, this Italian Grinder Salad Sandwich will always impress. The combination of fresh ingredients, savory meats, and a zesty dressing creates a symphony of flavors that’s hard to beat. Enjoy every bite, and remember: the key to perfection is in the details, the timing, and a little love in the kitchen.