Picture this: I’m standing in my kitchen, a bag of frozen turkey thighs on the counter, the smell of dry herbs wafting in, and my phone buzzing with a last‑minute Thanksgiving request. “I need a turkey fix that’s quick, juicy, and can’t be outdone,” my friend texted. I stared at the thighs, remembered the disastrous last year’s dry roast, and said, “Hold on, I’ve got a game‑changer.”
My kitchen became a laboratory of aromas: the sharp tang of fresh thyme, the sweet, syrupy whisper of maple, and the metallic zing of Dijon mustard. The sound of sizzling oil in a cast‑iron skillet echoed like a drumbeat. The texture of the skin turning from dull to a crackling, caramelized shield was a promise of flavor. The first bite would be a burst of sweet, savory, and a hint of heat that would linger on the tongue. I could almost taste the applause from my family when the first spoonful hit their plates.
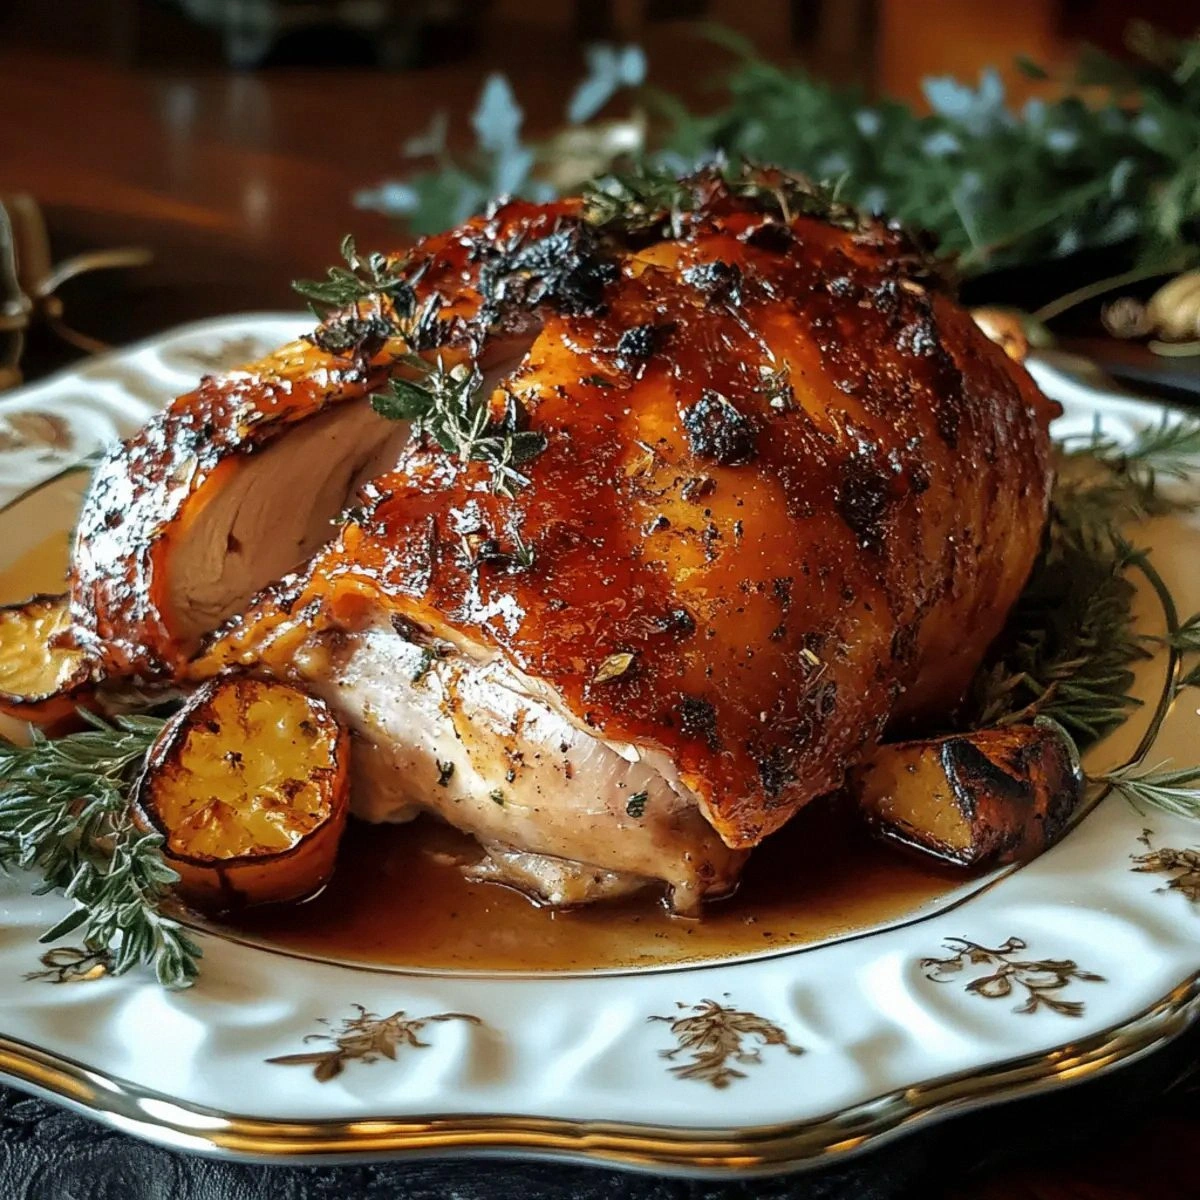
What makes this version stand out? It’s not just the glaze; it’s the way the maple syrup caramelizes into a glossy coating that clings to every inch of the thigh. The use of Dijon mustard adds a subtle tang that cuts through the richness, while the crushed red pepper flakes give a whisper of heat that balances the sweetness. The fresh thyme brings an earthy depth that keeps the dish grounded, and the garlic infuses the meat with a warm, comforting aroma. I dare you to taste this and not go back for seconds.
In short, this recipe is hands down the best version you’ll ever make at home. The combination of sweet maple, sharp Dijon, and aromatic herbs creates a flavor profile that is both familiar and adventurous. Picture yourself pulling this out of the oven, the whole kitchen smelling incredible, the thighs glowing with a caramelized sheen. Let me walk you through every single step — by the end, you’ll wonder how you ever made it any other way.
What Makes This Version Stand Out
- Flavor: The maple‑Dijon glaze creates a caramelized crust that locks in juices and delivers a sweet‑savory punch. Every bite is a contrast of silky sweetness and tangy depth.
- Texture: The skin crisps to a golden crunch while the meat remains melt‑in‑your‑mouth tender. The glaze’s natural sugars form a glossy barrier that keeps moisture from escaping.
- Ingredient Quality: Using fresh thyme and real maple syrup elevates the dish from ordinary to gourmet. No artificial additives, just pure, honest flavors.
- Ease: The recipe requires minimal prep and a single skillet, making it a breeze for busy holiday cooks. You’ll spend more time enjoying than waiting.
- Versatility: The glaze can be doubled or halved, and the thighs can be cooked on the stovetop or in the oven, giving you flexibility.
- Crowd‑Pleaser: The glossy glaze and aromatic herbs make it Instagram‑worthy, while the juicy interior satisfies even the most discerning palate.
- Make‑ahead Potential: Marinate the thighs a day ahead for deeper flavor. They can be cooked the next day, saving you time on the big day.
Inside the Ingredient List
Flavor Base
The foundation of this dish starts with the sweet and savory marriage of maple syrup and Dijon mustard. Maple syrup provides natural sweetness and a smooth, glossy coating that caramelizes beautifully in the oven. Dijon mustard adds acidity and a subtle peppery kick that cuts through the richness of the turkey, preventing it from feeling too heavy. Together, they form a glaze that’s both elegant and robust.
If you skip the mustard, the glaze will lose its bright, tangy edge, and the dish will taste more like a simple sweet glaze. You could substitute honey for maple, but the flavor profile will shift toward a more floral sweetness. The key is balancing the sweet with the sharp, so don’t skip the mustard.
When selecting maple syrup, look for pure, unfiltered varieties. The darker the syrup, the more robust the flavor, but a lighter syrup keeps the glaze bright. Avoid flavored syrups with added spices; they’ll muddle the dish’s subtlety. The right syrup is the secret to that glossy, caramelized finish.
Remember, the glaze isn’t just for flavor—it also creates a protective barrier that keeps the meat moist. The sugars in the maple syrup help the skin crisp up while sealing in juices. This is why the glaze is crucial to a juicy turkey thigh.
Everything’s prepped? Good. Let’s get into the real action...
Texture Crew
The turkey thighs are the star of this recipe. Bone‑in thighs keep the meat juicy and add a depth of flavor that boneless cuts can’t match. The bone also helps conduct heat evenly, ensuring a consistent doneness.
Using bone‑in thighs also means you can pull the meat off the bone after cooking, making serving easier and more visually appealing. If you prefer boneless, trim the bone and adjust cooking time to avoid overcooking.
Olive oil is added to the skillet to create a high‑heat surface that sears the skin into a crisp, caramelized shell. It also helps the glaze adhere to the meat, preventing it from sliding off during roasting.
Salt and black pepper are the classic seasonings that bring out the natural flavors of the turkey. Salt draws moisture from the skin, aiding crispness, while pepper adds a subtle heat that balances the sweetness.
Fresh thyme and garlic cloves add aromatic depth and a subtle herbaceous note that elevates the dish from good to unforgettable.
The Unexpected Star
Crushed red pepper flakes are the secret weapon that adds just the right amount of heat. They provide a quick, clean heat that doesn’t overwhelm the glaze’s sweetness.
If you’re a fan of heat, double the flakes, or if you prefer a milder dish, reduce them to a pinch. The flakes also add a slight crunch when they melt into the glaze, creating an interesting texture contrast.
Apple cider vinegar is used to cut through the sweetness and add a bright, tangy note. It also helps the glaze set into a glossy coating without becoming too syrupy.
Fresh parsley is the finishing touch that adds color, freshness, and a hint of herbal brightness. It also balances the richness with a clean, green finish.
All these ingredients work together to create a dish that’s both comforting and sophisticated.
Final Flourish
The final flourish comes in the form of a quick rest after roasting. Letting the thighs sit for 10 minutes allows the juices to redistribute, ensuring each bite is succulent.
During this rest, the glaze continues to thicken, creating a richer coating. A sprinkle of chopped parsley adds a fresh burst of color and flavor that brightens the dish.
When you plate the thighs, drizzle any remaining glaze over the meat for a glossy finish. This final step is what turns a good dish into a show‑stopper.
Everything’s prepped? Good. Let’s get into the real action…
The Method — Step by Step
- Preheat your oven to 400°F (204°C). Pat the turkey thighs dry with a paper towel; this step is essential for crisp skin. Season each thigh generously with salt and black pepper, making sure the seasoning penetrates the meat. Let the seasoned thighs rest at room temperature for about 10 minutes to allow the flavors to meld. This step is the foundation for a juicy, flavorful roast.
- In a small bowl, whisk together the maple syrup, Dijon mustard, apple cider vinegar, crushed red pepper flakes, and minced garlic until the mixture is smooth and glossy. This glaze will coat the thighs and create a caramelized crust. The acidity from the vinegar balances the sweetness, while the mustard adds a subtle tang. Keep the glaze ready to brush on the meat as it cooks.
- Coat the thighs evenly with the glaze, ensuring every surface is covered. Let the glazed thighs marinate in the refrigerator for 10–15 minutes; this short marination period allows the flavors to penetrate the meat. If you’re short on time, you can skip the marination step, but the glaze will still work its magic. This is the moment where the dish starts to feel like a masterpiece.
- Heat a cast‑iron skillet over medium‑high heat and add the olive oil until it shimmers. Place the thighs skin‑side down, pressing them gently to ensure even contact with the pan. Sear for about 4–5 minutes or until the skin turns a deep golden brown. Flip the thighs and add a few sprigs of fresh thyme to the skillet. The thyme infuses the oil, creating a fragrant base for the roast.
- Transfer the skillet to the preheated oven and roast for 25–30 minutes, basting with the glaze every 10 minutes. The internal temperature should reach 165°F (74°C) for safe consumption. The glaze will caramelize, creating a glossy, flavorful crust that keeps the meat moist. Keep an eye on the oven temperature; a lower heat can cause the glaze to burn.
- Remove the skillet from the oven and tent the thighs with foil. Let them rest for 10 minutes; this rest period allows the juices to redistribute, ensuring a succulent bite. While the thighs rest, sprinkle chopped parsley over them for a fresh burst of color and flavor. The rest period is crucial for a juicy result.
- Slice the thighs, drizzle with any remaining glaze, and plate alongside roasted vegetables or a simple green salad. The glaze’s glossy sheen will catch the light and look as good as it tastes. Serve immediately to enjoy the contrast of crispy skin and tender meat.
- If you have leftovers, store them in an airtight container in the refrigerator for up to 3 days. Reheat gently in a preheated oven at 300°F (149°C) for 10–12 minutes, or in a skillet over medium heat, adding a splash of water to keep the meat moist. Reheating in the oven will preserve the crispness of the skin, while a skillet will keep the glaze from drying out.
That’s it — you did it. But hold on, I’ve got a few more tricks that'll take this to another level. Stick with me, and you’ll master the art of turkey thighs that are juicy, flavorful, and unforgettable.
Insider Tricks for Flawless Results
The Temperature Rule Nobody Follows
Many cooks think a higher oven temperature guarantees crisp skin, but that’s a myth. Cooking at 400°F (204°C) allows the skin to brown slowly, creating a golden crust without burning the glaze. If you crank the heat too high, the sugars in the maple syrup will char before the meat is cooked through.
Why Your Nose Knows Best
The aroma of the glaze as it bakes is a real indicator of progress. When the maple syrup starts to bubble and the mustard gives off a nutty scent, it’s a sign that the glaze is caramelizing properly. If you don’t smell that sweet, smoky aroma, you might need to let it cook a bit longer.
The 5‑Minute Rest That Changes Everything
After pulling the thighs from the oven, cover them with foil and let them rest for exactly five minutes before slicing. This short rest period allows the juices to redistribute, preventing them from spilling onto the cutting board. A longer rest can result in a drier bite, while a shorter rest keeps the meat slightly juicy but less flavorful.
Letting the Thyme Do Its Thing
Adding fresh thyme sprigs to the skillet not only infuses the oil but also adds a subtle herbal aroma that permeates the dish. Keep the thyme sprigs whole; they’re easy to remove after roasting. If you prefer a stronger herb flavor, chop the thyme finely before adding it to the skillet.
Brushing the Glaze Right
When you brush the glaze on the thighs, do it in a thin, even layer. A thick coat can cause the sugars to burn before the meat is fully cooked. Brush the glaze after the thighs have seared for a few minutes, then again before they go into the oven. This layering builds flavor without compromising texture.
Using the Pan Sauce for Extra Flavor
After removing the thighs, keep the pan on low heat. Add a splash of chicken broth and scrape up the browned bits. Reduce the mixture until it’s silky; this pan sauce pairs beautifully with the glazed thighs and adds a savory depth that complements the sweet glaze.
Creative Twists and Variations
This recipe is a playground. Here are some of my favorite ways to switch things up:
Spicy Maple Bourbon Glaze
Swap the apple cider vinegar for bourbon and add a pinch of cayenne pepper. The bourbon adds a smoky depth, while the cayenne gives a bold kick. This variation is perfect for those who love a little extra heat.
Herb‑Infused Citrus Glaze
Replace the maple syrup with orange marmalade and add a squeeze of fresh lemon juice. The citrus brightens the dish and balances the richness. A handful of fresh rosemary will give it a fragrant, aromatic finish.
Smoky Chipotle Glaze
Blend a tablespoon of chipotle in adobo sauce into the glaze for a smoky, peppery flavor. The chipotle adds depth and a subtle heat that pairs well with the sweet maple. This version is great for a more adventurous palate.
Low‑Carb Keto Version
Use a sugar‑free maple syrup alternative and reduce the glaze’s volume. Replace the maple syrup with a small amount of erythritol or stevia. This keeps the dish keto‑friendly while preserving the sweet glaze’s essence.
Vegetarian “Turkey” Version
Swap the turkey thighs for thick slices of seitan or tempeh. Marinate them in the same glaze and roast until golden. The result is a plant‑based dish that mimics the texture and flavor of turkey.
Asian‑Inspired Glaze
Replace Dijon mustard with soy sauce and add a splash of sesame oil. Toss in a few dashes of sriracha for heat. The glaze will have an umami kick and a hint of spice, turning the dish into an Asian fusion favorite.
Storing and Bringing It Back to Life
Fridge Storage
Store leftover thighs in a tightly sealed container in the refrigerator for up to three days. Keep the glaze in a separate small container to avoid the meat becoming soggy. When you’re ready to eat, reheat gently to keep the skin crisp.
Freezer Friendly
Freeze the thighs in a single layer on a baking sheet before transferring to a freezer bag. They’ll stay good for up to two months. Thaw overnight in the refrigerator before reheating.
Best Reheating Method
Reheat the thighs in a preheated oven at 300°F (149°C) for 10–12 minutes, or in a skillet over medium heat with a splash of water to keep the meat moist. Adding a tiny splash of water before reheating steams the meat back to perfection and prevents the glaze from drying out.