Picture this: I’m in my cramped kitchen, the fridge is empty except for a lonely package of chicken thighs, and a sudden craving for something sweet, savory, and utterly addictive hits me like a bolt of lightning. I remember the last time I tried a honey garlic chicken recipe; it was a disaster, the sauce was a sticky mess, and the thighs were dry as a desert. That night, I vowed to turn that flop into a triumph. I spent the next hour rummaging through my pantry, hunting for the perfect balance of sweetness, umami, and a hint of citrus. The result? A sticky honey garlic chicken thigh that is hands down the best version you’ll ever make at home.
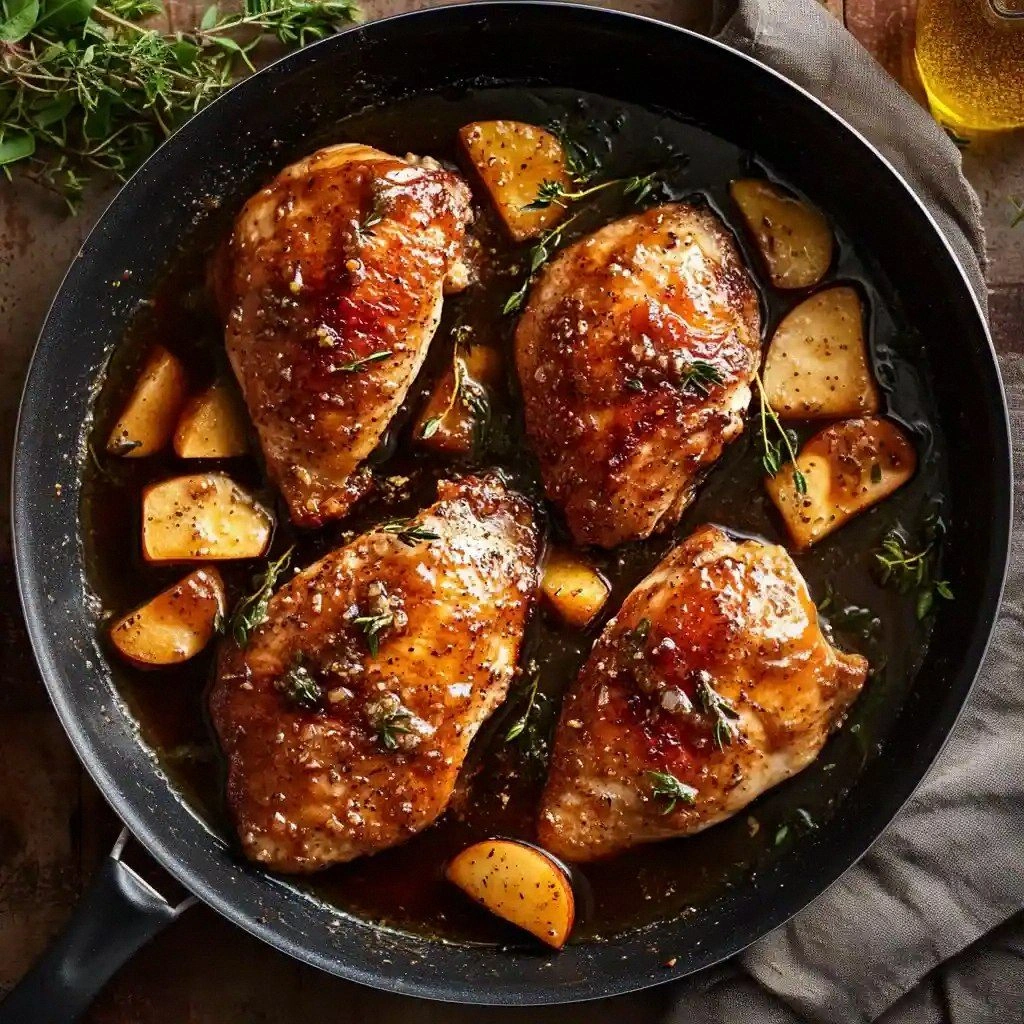
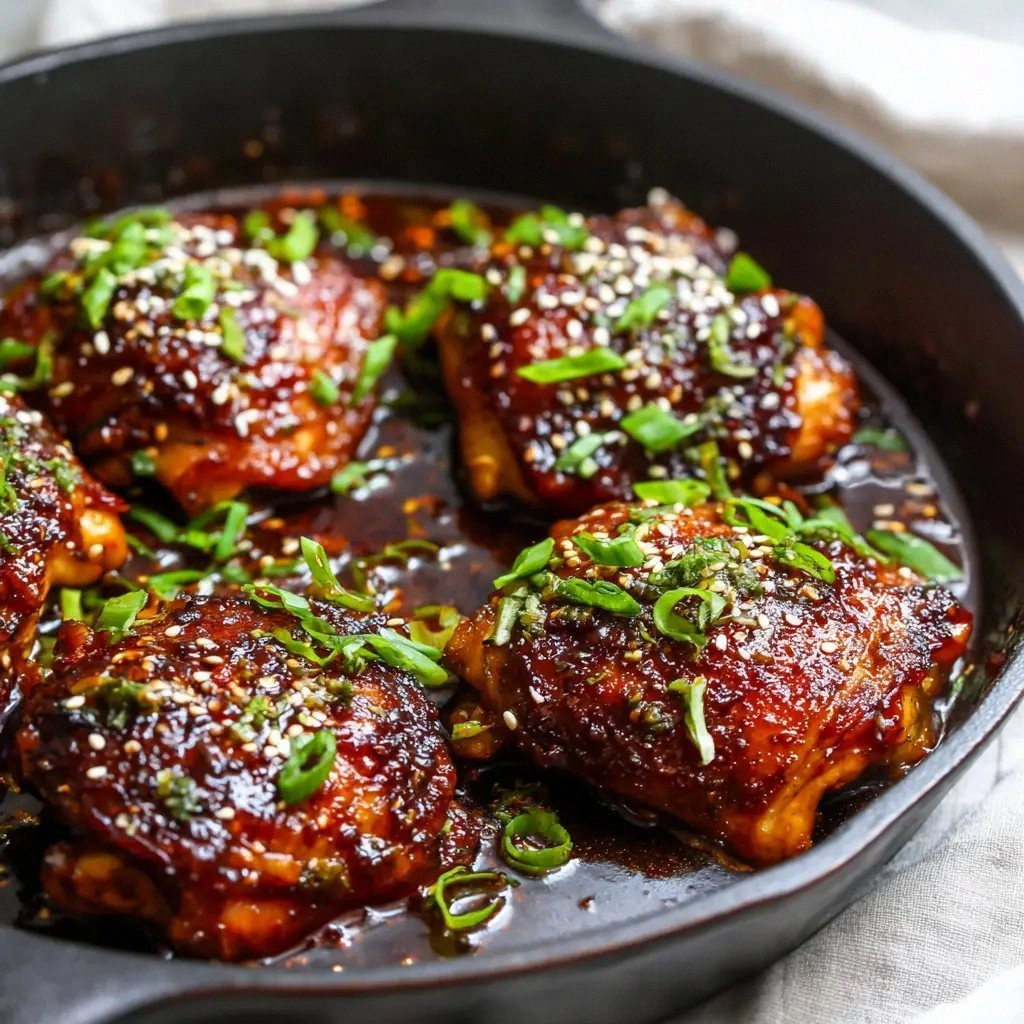
The first thing you notice is the golden-brown crust that forms on the thighs as they sizzle in the cast‑iron skillet. The aroma is a heady mix of caramelized honey and roasted garlic, with a faint tang of soy sauce that lingers in the air. When you lift a piece, the glaze clings to the meat like a velvet coat, and the bite is a delightful contrast between a tender, juicy interior and a crisp, slightly charred exterior. The sound of the sauce thickening is a satisfying hiss that tells you everything is going just right. I dare you to taste this and not go back for seconds; the flavor explosion is that good.
What makes this dish so special is that it doesn’t rely on a long, tedious cooking process. In under an hour, you can transform simple chicken thighs into a dish that feels like a restaurant‑grade entree. The sauce is a symphony of honey, soy, garlic, and vinegar, with a touch of sesame that adds a nutty finish. The coating of cornstarch gives the meat a silky texture that holds the sauce beautifully. And the best part? It’s easy to tweak the recipe to suit your taste or dietary preferences.
I’ll walk you through every single step, from the moment you open the bag of chicken to the final garnish. By the end, you’ll wonder how you ever cooked this dish any other way. So grab your skillet, and let’s dive into the magic of sticky honey garlic chicken thighs.
What Makes This Version Stand Out
- Taste: The sauce strikes a perfect balance between sweet and savory, with a subtle citrus kick from rice vinegar that cuts through the richness of honey and soy. The garlic is roasted, giving depth without overpowering.
- Texture: The cornstarch coating creates a silky, slightly crisp exterior that locks in juices, while the glaze coats the meat like a glossy lacquer.
- Ease: No need for a blender or fancy gadgets; a few simple steps and a cast‑iron skillet are all you need.
- Uniqueness: The addition of toasted sesame seeds and green onions gives a fresh crunch and bright color that elevates the dish.
- Crowd‑pleaser: This recipe has become the go‑to for family dinners and potlucks because everyone loves the sticky, flavorful coating.
- Ingredient Quality: Using fresh garlic, high‑quality honey, and low‑sodium soy sauce makes a noticeable difference in flavor.
- Cooking Method: The pan searing technique locks in moisture and creates a caramelized crust that adds depth.
- Make‑ahead Potential: The dish can be prepared ahead of time and reheated without losing its glaze.
Alright, let’s break down exactly what goes into this masterpiece…
Inside the Ingredient List
The Flavor Base
Honey is the star of the show, providing a natural sweetness that caramelizes beautifully when heated. Use a high‑quality, raw honey for the richest flavor; the subtle floral notes add complexity. If you’re watching sugar, consider a honey‑soy blend or a touch of maple syrup as a substitute, but keep the ratio roughly 2:1 honey to soy for balance.
Low‑sodium soy sauce gives depth without drowning the dish in salt. It’s essential for that umami punch that makes the sauce cling to the chicken. If you can’t find low‑sodium, use regular soy sauce and reduce the amount of added salt in the recipe by a quarter.
Rice vinegar adds a bright, acidic edge that lifts the sweetness and prevents the sauce from becoming too cloying. A splash of fresh lime juice can replace rice vinegar for a citrusy twist, but keep the acidity at a level that doesn’t overpower the honey.
The Texture Crew
Cornstarch is the secret weapon that transforms the sauce into a glossy, velvety coating. The first tablespoon is used to coat the chicken, creating a silky skin that holds juices. The second tablespoon is added to the sauce to thicken it to just the right consistency. If you’re gluten‑free, cornstarch works fine; just ensure it’s a pure starch, not a blend.
Neutral cooking oil—such as canola or grapeseed—provides a clean base for searing without adding flavor. It allows the natural taste of the chicken and the sauce to shine. Olive oil could be used, but it might introduce a fruity note that could clash with the honey.
The Unexpected Star
Toasted sesame seeds add a nutty aroma and a subtle crunch that contrasts with the silky glaze. Toast them in a dry pan until golden before adding them to the dish; this brings out their full flavor. If you’re allergic to sesame, chopped roasted almonds or cashews can be a good alternative, though the flavor profile will shift slightly.
The Final Flourish
Freshly chopped green onions provide a bright, herbal finish that cuts through the richness of the sauce. They also add a splash of color that makes the dish visually appealing. If you prefer a milder flavor, you can use scallions or even a small handful of chopped cilantro.
Everything's prepped? Good. Let's get into the real action…
The Method — Step by Step
- Begin by patting the chicken thighs dry with paper towels. A dry surface is key to achieving a crisp, caramelized crust. If you’re feeling fancy, season the thighs lightly with salt and pepper, but keep it subtle so the honey sauce can shine. This is the moment of truth—no shortcuts here.
- In a shallow dish, mix the 2 tablespoons of cornstarch with a pinch of salt. Toss each chicken thigh in the cornstarch until it’s evenly coated. Shake off any excess; this will give the thighs a silky coating that locks in juices. If you’re watching carbs, you can skip the cornstarch, but the texture will change.
- Heat the neutral oil in a large cast‑iron skillet over medium‑high heat. Once the oil shimmers, lay the chicken thighs skin‑side down. Don’t move them for the first 4–5 minutes; this allows the skin to crisp up beautifully. The sound of the sizzle is a sign that you’re on the right track.
- Flip the thighs after the skin has browned and the edges begin to pull away. Cook for another 4–5 minutes on the other side. The goal is a golden crust that’s slightly charred but still juicy inside. If the skillet gets too hot, lower the heat to prevent burning.
- While the chicken is resting, whisk together 1/3 cup honey, 1/3 cup soy sauce, 1 tablespoon rice vinegar, 4 minced garlic cloves, and 1 tablespoon of cornstarch in a small bowl. This will be your glaze. The cornstarch will help thicken the sauce as it cooks.
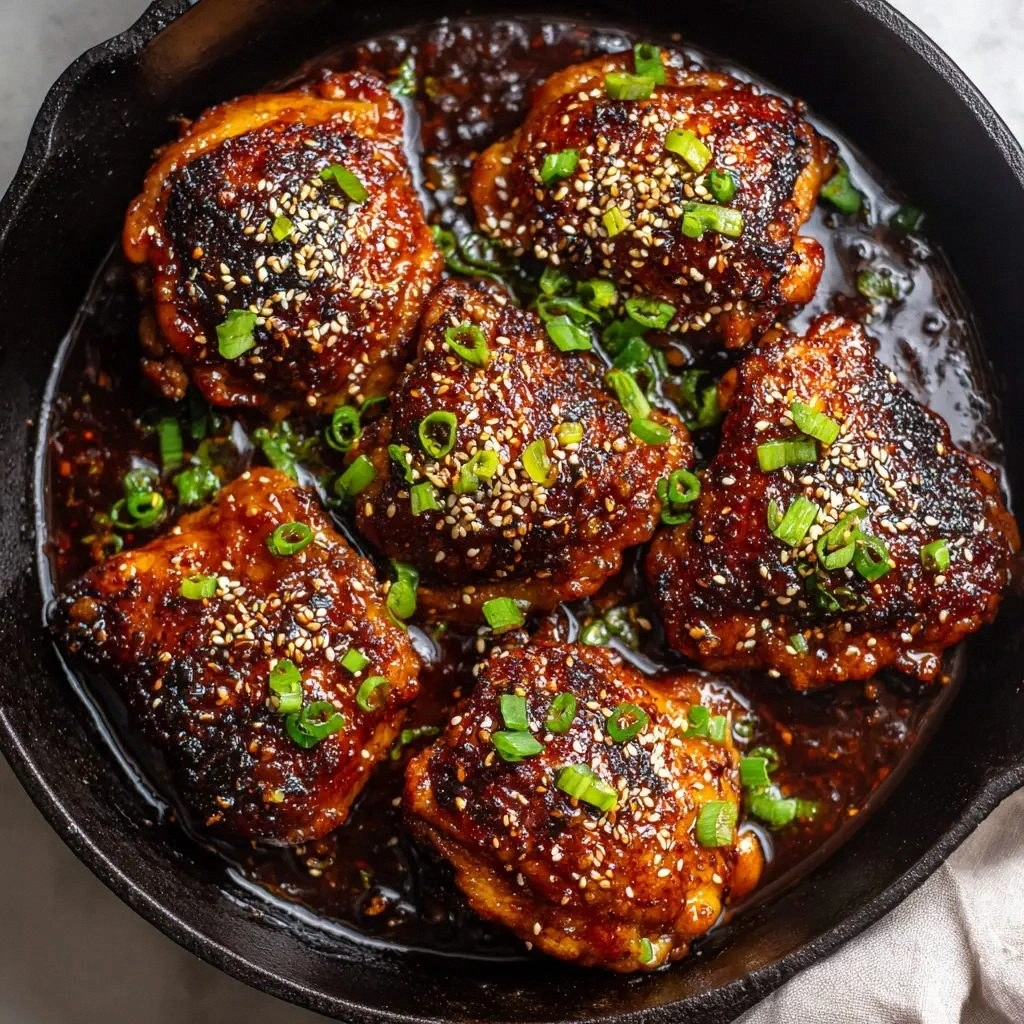
- Pour the glaze over the chicken thighs in the skillet. The sauce will bubble and coat the meat instantly. Stir gently to ensure every piece is coated. Let the sauce simmer for 3–4 minutes, allowing it to reduce and thicken. Watch the edges pull away from the pan—it’s a sign the glaze is getting perfect.
- Add the toasted sesame seeds and chopped green onions to the skillet. Toss everything together so the seeds coat the chicken and the onions distribute evenly. The sesame will toast further, adding a nutty aroma that permeates the dish.
- Once the sauce has thickened to a glossy sheen, remove the skillet from heat. Let the chicken rest for 2 minutes; this allows the juices to redistribute and the glaze to set. The final result is a sticky, savory masterpiece that’s ready to serve.
That’s it—you did it! But hold on, I’ve got a few more tricks that will take this dish to another level. Keep reading for insider tips that will make your sticky honey garlic chicken thighs even more unforgettable.
Insider Tricks for Flawless Results
The Temperature Rule Nobody Follows
Many people think searing at low heat is enough, but the secret is a high‑heat start that quickly locks in juices. Start the skillet on medium‑high, then reduce to medium once the chicken begins to brown. This prevents the sauce from burning and keeps the coating silky.
Why Your Nose Knows Best
Trust your nose when the glaze starts to thicken. A golden‑brown color and a caramel scent are the cues to reduce the heat. If the sauce smells burnt, pull it off the heat immediately to avoid bitterness.
The 5‑Minute Rest That Changes Everything
After you remove the skillet from the heat, let the chicken rest for 5 minutes. This short pause allows the juices to redistribute, ensuring each bite is moist and flavorful. Don’t skip this step; the glaze will set perfectly during this rest.
The Garlic‑Searing Technique
Roasting the garlic in the skillet before adding the glaze brings out its natural sweetness. Slice the cloves thinly and let them caramelize for 1–2 minutes. This subtle step adds depth without overpowering the dish.
The Sesame Seed Toast
Toast the sesame seeds in a dry pan until they’re golden before adding them to the sauce. This releases their oils and gives the dish a nutty aroma that complements the honey. If you forget to toast them, the seeds will taste raw.
Creative Twists and Variations
This recipe is a playground. Here are some of my favorite ways to switch things up:
Spicy Sriracha Twist
Add a tablespoon of sriracha to the glaze for a fiery kick. The heat pairs beautifully with the sweet honey, creating a balanced flavor profile that’s perfect for spice lovers.
Citrus‑Zest Variation
Replace the rice vinegar with freshly squeezed lemon juice and zest a half‑cup of lemon peel into the sauce. The citrus brightness cuts through the richness and adds a refreshing note.
Miso‑Infused Glaze
Stir in a tablespoon of white miso paste into the glaze for an umami boost. The miso adds depth and a subtle earthy flavor that complements the honey.
Thai Coconut Variation
Replace half the honey with coconut milk and add a pinch of curry powder to the glaze. The result is a creamy, aromatic dish that transports you to the islands.
Balsamic Reduction
Use balsamic vinegar instead of rice vinegar and reduce the sauce until it’s thick and syrupy. The fruity tang of balsamic adds a sophisticated twist to the classic honey garlic flavor.
Herb‑Infused Green Onion
Swap the green onions for a handful of fresh basil leaves. The aromatic basil adds a fresh, peppery flavor that pairs well with the honey glaze.
Storing and Bringing It Back to Life
Fridge Storage
Store leftovers in an airtight container in the refrigerator for up to 3 days. Keep the glaze separate if you plan to reheat, as it can become too thick. Reheat in a skillet over low heat, adding a splash of water to rehydrate the glaze.
Freezer Friendly
Freeze the cooked chicken thighs in a single layer on a parchment paper sheet for 1 hour, then transfer to a freezer bag. This prevents clumping and allows for quick reheating. Thaw in the refrigerator overnight before reheating.
Best Reheating Method
Reheat in a skillet over medium heat, adding a tablespoon of water or broth to loosen the glaze. Stir frequently until the sauce is hot and bubbly. The tiny splash of water before reheating steams the chicken back to perfection.