I still remember the day I accidentally created the most addictive chocolate muffins of my life. It was a steamy July afternoon, my kitchen felt like a sauna, and I had a zucchini the size of a baseball bat glaring at me from the counter. My neighbor had dropped it off with that smug "good luck using this" expression, and I was determined to prove her wrong. Three failed attempts at zucchini bread later—one soggy mess, one dry as the Sahara, and one that tasted like a salad bar—I was ready to admit defeat. Then I spotted the half-empty cocoa tin and thought, "What if I just... embrace the chaos?"
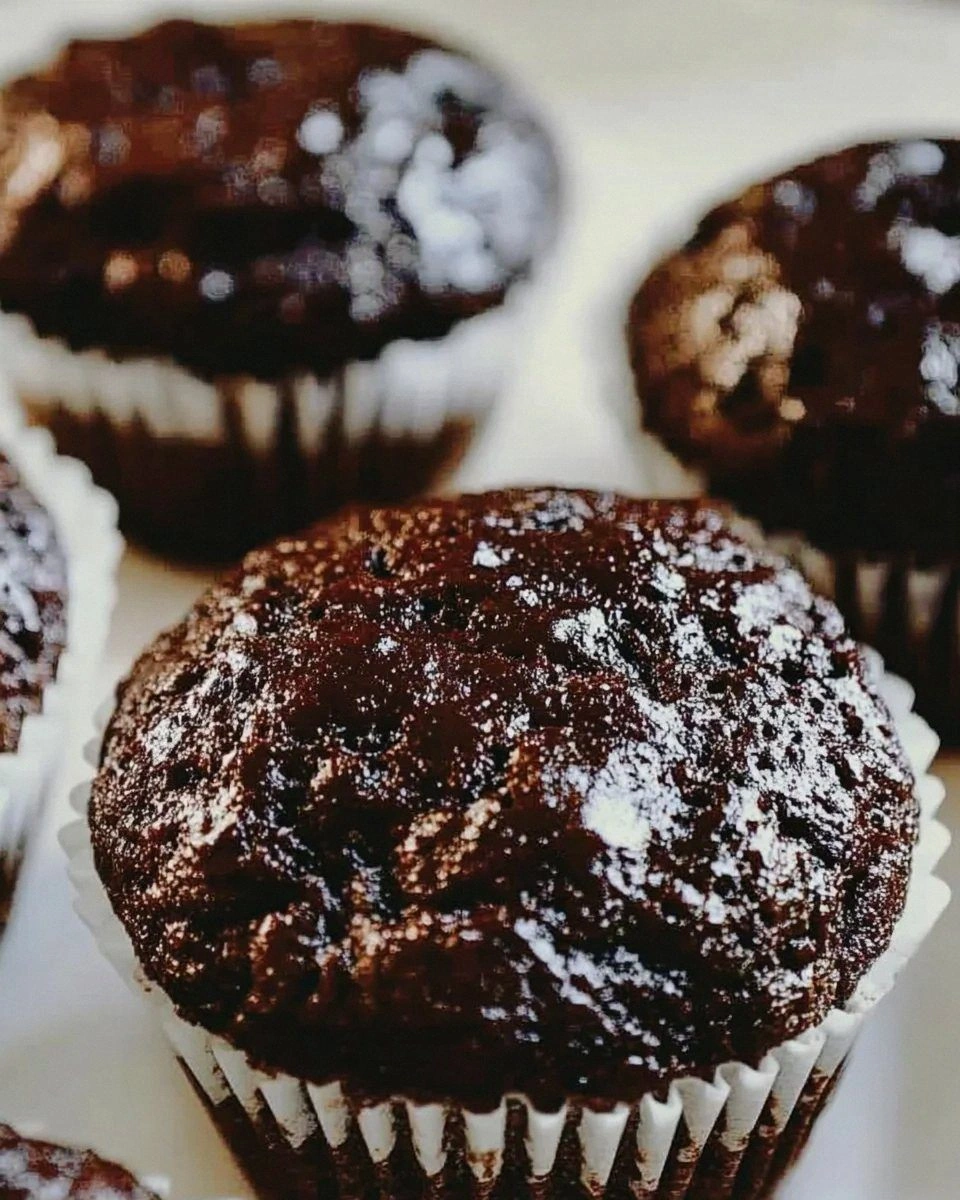
The moment I grated that monster zucchini into the chocolate batter, something magical happened. The kitchen filled with this intoxicating aroma of deep cocoa and something earthy-sweet that made my chocolate-obsessed brain do cartwheels. I pulled these muffins from the oven, and they were so glossy and domed they looked like they'd been professionally photographed. But here's the kicker: I ate four of them standing at the counter in my flour-dusted apron, completely forgetting I was supposed to be bringing dessert to a friend's dinner party. They never made it out of my kitchen.
These aren't your grandma's zucchini muffins that taste like health food in disguise. No, these are the kind of chocolate muffins that make people question everything they thought they knew about vegetables in desserts. The texture is so impossibly moist—think chocolate cake meets brownie meets that perfect bakery muffin you've been chasing your whole life. The zucchini melts away completely, leaving behind nothing but pure chocolate intensity and a tenderness that'll make you weak in the knees.
What makes this version absolutely bonkers is the technique I stumbled upon by complete accident. Instead of squeezing the life out of your zucchini like every other recipe demands, you keep all that moisture. The result? Muffins that stay bakery-fresh for days, with that perfect crackly top that shatters like thin ice when you bite into it. Let me walk you through every single step—by the end, you'll wonder how you ever made it any other way.
What Makes This Version Stand Out
- Intense Chocolate: We're using a triple-threat approach with both cocoa powder and melted chocolate, plus chocolate chips for those molten pockets of joy. The zucchini doesn't dilute the flavor—it somehow amplifies it, creating this deep, complex chocolate experience that regular muffins can't touch.
- Impossible Moisture: Most recipes tell you to squeeze your zucchini until it cries, but that's where they lose the magic. We embrace every drop of moisture, creating muffins that stay tender and fresh for days longer than any chocolate cake you've made.
- Bakery-Style Domes: The secret lies in starting with a screaming-hot oven that sets the edges quickly, then dropping the temperature to let the centers rise into those perfect, rounded tops you thought only professional bakers could achieve.
- One-Bowl Wonder: Despite tasting like you spent hours in the kitchen, this entire recipe comes together in one bowl with just a whisk and a spatula. No fancy equipment, no twenty different steps—just pure chocolate satisfaction with minimal dishes.
- Sneaky Nutrition: Each muffin packs nearly a full serving of vegetables, but you'd never know it. It's like hiding spinach in a chocolate milkshake—except this actually works, and your kids (or roommates, or skeptical spouse) will beg for more.
- Make-Ahead Champion: These freeze like a dream, defrost in minutes, and taste even better the next day when the flavors have had time to mingle and deepen. Bake a double batch on Sunday, thank yourself all week.
Alright, let's break down exactly what goes into this masterpiece...
Inside the Ingredient List
The Flavor Foundation
All-purpose flour forms the backbone of these muffins, but we're using a specific ratio that creates that perfect tender crumb. Too much flour and you get dense hockey pucks; too little and they collapse into chocolate soup. The magic number is 1¾ cups exactly—measured by spooning it into your cup and leveling off, never scooping directly from the bag. This prevents compacting and ensures your muffins rise into those perfect domes we're after.
Unsweetened cocoa powder is where the chocolate party really gets started, and not all cocoas are created equal. I'm obsessed with Dutch-processed cocoa for its deeper, more complex flavor that's almost reminiscent of Oreo cookies. Natural cocoa works too, but Dutch-processed gives you that sophisticated chocolate depth that makes people ask, "What kind of chocolate did you use?" The answer is always, "It's not the chocolate—it's the technique."
Granulated sugar does more than just sweeten these beauties. It creates that perfect crackly muffin top by caramelizing on the surface, giving you that slight crunch before you hit the tender interior. We're using exactly 1 cup—enough to balance the natural bitterness of cocoa without making these cloyingly sweet. Trust me, after testing everything from ¾ cup to 1½ cups, this is the sweet spot where chocolate shines without giving you a sugar headache.
The Moisture Makers
Fresh zucchini is obviously the star here, but there's a right way and a wrong way to handle it. You want young, firm zucchini—not those baseball bat monsters I started with. The smaller ones have tender skin and fewer seeds, plus they grate more evenly. Don't you dare peel it; that thin green skin adds gorgeous flecks throughout your muffins and contributes to the moisture that makes these so addictive.
Vegetable oil might seem boring, but it's crucial for that ultra-moist texture that keeps these muffins irresistible for days. Butter would firm up when cold, giving you that disappointing morning-after dryness. Oil stays liquid at room temperature, ensuring every bite is as tender as the first. Use a neutral oil like canola or grapeseed—save your fancy olive oil for salads where it can actually shine.
Eggs provide structure and richness, but we're using an extra yolk for added tenderness. That additional yolk is like insurance against dry muffins—it coats the flour proteins and prevents them from developing too much gluten, resulting in that melt-in-your-mouth texture that makes these disappear faster than you can say "vegetable."
The Chocolate Trio
Semi-sweet chocolate chips fold into the batter at the end, creating those pockets of molten chocolate that make people close their eyes when they bite into them. Use the good stuff here—Ghirardelli or Guittard if you can find them. Cheap chips have stabilizers that prevent them from melting properly, and we're not here for waxy chocolate disappointment.
Melted chocolate in the batter creates this fudgy, almost brownie-like interior that sets these miles apart from your average chocolate muffin. We're using 2 ounces of bittersweet chocolate—70% cacao if you can find it. This isn't just for flavor; the melted chocolate creates a tighter, more tender crumb that holds onto moisture like a sponge.
Espresso powder is my secret weapon for amplifying chocolate flavor without making anything taste like coffee. It's like turning up the volume on a great song—you notice the richness more, but you don't necessarily identify the espresso itself. Just ½ teaspoon makes the chocolate taste more chocolatey, if that makes sense. Skip it and your muffins will still be good, but add it and people will ask what makes them taste so incredible.
The Unexpected Stars
Baking powder and baking soda work together like a chemical comedy duo. The baking powder gives you that initial lift when the batter hits the hot oven, while the baking soda reacts with the cocoa's acidity to create extra bubbles and browning. Getting the ratio right took me six attempts—too much and you get bitter, metallic aftertaste; too little and you get sad, flat muffins that look like chocolate coasters.
Vanilla extract might seem unnecessary when you're dealing with this much chocolate, but it's like the conductor in an orchestra. You don't necessarily notice it when it's there, but you'd definitely miss it if it were gone. Use real vanilla extract, not the imitation stuff. The difference is subtle but real, especially in a recipe where every ingredient needs to pull its weight.
Everything's prepped? Good. Let's get into the real action...
The Method — Step by Step
- Preheat your oven to 425°F—not 350°F like every other muffin recipe on the planet. This high initial temperature is the secret to those towering, bakery-style domes. But here's the twist: you'll drop it to 375°F after 5 minutes. This creates that perfect contrast between a set exterior and a still-rising interior. Position your rack in the upper third of the oven, and if your oven runs hot (test it with an oven thermometer), drop those temperatures by 25 degrees.
- Prep your muffin tin with paper liners, but here's where I deviate from the norm—don't spray them with cooking spray. The muffins need something to grip onto as they rise, and greased liners make them slide and spread instead of climbing sky-high. If you're paranoid about sticking, you can use double liners, but honestly, these release so beautifully it's not necessary. This recipe makes exactly 12 standard muffins, so fill every cup even if you're tempted to skip one.
- In a large bowl, whisk together the flour, cocoa powder, sugar, baking powder, baking soda, salt, and espresso powder. Get aggressive with your whisking—you want everything evenly distributed because once the wet ingredients hit, you won't be able to overmix without developing tough gluten. The mixture should look like dark chocolate sand, with no streaks of lighter flour. This dry mix can actually be made ahead and stored for up to a week if you're a meal-prep wizard.
- Grate your zucchini now, and don't you dare squeeze it. You want about 1½ cups of lightly packed grated zucchini, which usually comes from one medium zucchini. If your zucchini is on the drier side (it bends but doesn't snap), you might need to add a tablespoon of water to compensate. The zucchini should release enough moisture to make the batter come together—if it doesn't, your muffins will be dry and sad.
- In a separate bowl (or a large measuring cup if you're lazy like me), whisk together the eggs, extra yolk, oil, melted chocolate, vanilla, and grated zucchini. The mixture will look like a chocolate zucchini smoothie, and that's perfect. Make sure your melted chocolate isn't hot enough to scramble the eggs—let it cool for about 5 minutes after melting. Everything should be room temperature for the best emulsion.
- Make a well in the center of your dry ingredients and pour in the wet mixture. Here's the crucial part: fold everything together with a spatula, not a whisk, and stop as soon as you don't see streaks of flour. The batter will be thick and lumpy—resist the urge to smooth it out. Overmixing is the enemy of tender muffins, and you're aiming for a batter that looks like chocolate chip cookie dough that's been left out too long.
- Fold in the chocolate chips with just 3-4 gentle strokes. They should be evenly distributed but not completely incorporated—some should be peeking out from the top because those exposed chips will create those gorgeous molten pockets on the surface. If you're feeling fancy, reserve a few chips to press into the tops of each muffin before baking. This creates that bakery-style appearance that makes people think you're a professional.
- Fill each muffin cup completely to the top, and I mean completely. These don't rise and then spread—they rise straight up like little chocolate towers. If you underfill them, you'll get sad, squat muffins that look like they gave up halfway. The batter should mound slightly in the center of each cup, creating that perfect dome shape that we're after.
- Bake for 5 minutes at 425°F, then—without opening the oven door—drop the temperature to 375°F and bake for another 15-18 minutes. This initial blast of heat sets the outside while the inside continues rising, creating those perfect domes. Don't be tempted to peek during the first 15 minutes—sudden temperature changes can cause them to collapse. They're done when the tops spring back lightly when touched and a toothpick inserted into the center comes out with just a few moist crumbs.
- Cool in the pan for exactly 5 minutes—no more, no less. Too short and they'll fall apart when you try to remove them; too long and the bottoms will steam and get soggy. They should release easily from the pan at this point. Transfer to a wire rack to cool completely, or if you're impatient (and let's be honest, you are), they're absolutely divine while still warm with a glass of cold milk.
That's it—you did it. But hold on, I've got a few more tricks that'll take this to another level...
Insider Tricks for Flawless Results
The Temperature Rule Nobody Follows
Room temperature ingredients aren't just a suggestion—they're the difference between muffins that rise like champions and ones that look like they've been sat on. Cold eggs don't incorporate properly, leading to streaky batter and uneven texture. Cold oil can seize your melted chocolate, creating little chocolate chips that refuse to melt. Take everything out of the fridge 30 minutes before you start, or if you're impatient like me, submerge your eggs in warm (not hot) water for 5 minutes and microwave your oil for 10 seconds.
Why Your Nose Knows Best
Don't rely solely on the timer—your nose is actually the most accurate indicator of doneness. When these muffins are perfectly baked, your kitchen will smell like the world's most sophisticated chocolate factory, with notes of vanilla and something mysteriously rich (that's the zucchini doing its magic). If you start smelling something that reminds you of hot chocolate with extra chocolate syrup, they're probably done. Overbaked muffins smell more like cocoa powder than chocolate—trust your nose and pull them out.
The 5-Minute Rest That Changes Everything
After cooling on the rack for 5 minutes, wrap these beauties in a clean kitchen towel while they're still slightly warm. This creates a gentle steaming effect that makes the tops perfectly soft and the insides even more tender. It's an old bakery trick that professional bakers use to get that perfect texture that makes people wonder how they achieved such softness. Just make sure they're not too hot or the towel will stick and create a chocolate mess you'll be finding for weeks.
The Zucchini Size Secret
Size matters more than you'd think when it comes to zucchini. Those tiny baby zucchinis are adorable but don't have enough moisture for these muffins. The giant ones that look like they could win a prize at the county fair are too mature—their flesh is dry and their seeds are huge. Aim for medium zucchinis about 6-8 inches long, with skin that's still tender enough to nick with your fingernail. If all you have is a monster zucchini, cut out the seeded core and just use the outer flesh.
The Storage Game-Changer
Here's where most people mess up: they store these in an airtight container while they're still warm, creating condensation that makes the tops sticky and the bottoms soggy. Let them cool completely on the rack, then store them in a container lined with paper towels, with another paper towel on top. They'll stay fresh for up to 5 days this way, though honestly, they've never lasted more than 2 days in my house. For longer storage, wrap them individually in plastic wrap and freeze—for best texture, defrost at room temperature rather than microwaving.
Creative Twists and Variations
This recipe is a playground. Here are some of my favorite ways to switch things up:
Triple Chocolate Chunk
Replace half the semi-sweet chips with white chocolate chips and the other half with dark chocolate chunks. The white chocolate adds creamy sweetness that plays beautifully against the bittersweet cocoa, while the dark chocolate chunks stay slightly firm, giving you three distinct chocolate experiences in every bite. It's like a chocolate symphony where every note hits perfectly.
Mexican Chocolate Fire
Add ½ teaspoon cinnamon, ¼ teaspoon cayenne pepper, and the zest of one orange to the dry ingredients. The warmth from the spices enhances the chocolate without overwhelming it, while the orange zest brightens everything up. It's like drinking the world's most sophisticated hot chocolate, but in muffin form. My spice-loving friends can't get enough of these.
Peanut Butter Swirl
Dollop 2 tablespoons of peanut butter over the top of each muffin before baking, then use a toothpick to create dramatic swirls. The peanut butter bakes into the top, creating these gorgeous marbled patterns and adding a salty-sweet element that makes these taste like a healthier version of those chocolate peanut butter cups you secretly love.
Raspberry Chocolate Decadence
Fold in 1 cup of frozen raspberries instead of chocolate chips. The tart berries create little pockets of bright flavor that cut through the rich chocolate, and as they bake, they create these beautiful magenta swirls throughout. It's like chocolate-covered raspberries decided to become a muffin, and honestly, it's a very good decision.
Coconut Chocolate Dream
Add ½ cup of shredded coconut to the batter and top each muffin with a sprinkle of coconut before baking. The coconut toasts on top, creating these golden, crispy flakes that contrast beautifully with the tender chocolate interior. It's like a Mounds bar and a chocolate muffin had a beautiful, delicious baby.
Espresso Explosion
Replace the espresso powder with 2 tablespoons of instant espresso granules and add ½ cup of espresso-soaked dried cherries. The coffee flavor is much more pronounced here, and the boozy cherries add these chewy, tart bursts that wake up your taste buds. It's basically breakfast for people who don't really like breakfast, which is my favorite kind of breakfast.
Storing and Bringing It Back to Life
Fridge Storage
These muffins actually benefit from a day in the fridge—the flavors deepen and meld into something even more spectacular. Store them in an airtight container with paper towels between layers for up to a week. The cold makes them slightly denser, but 10 seconds in the microwave brings them right back to that fresh-baked texture. Just don't overdo it or you'll get chocolate-scented hockey pucks.
Freezer Friendly
These freeze beautifully for up to 3 months. Wrap each muffin individually in plastic wrap, then place them all in a freezer bag. To defrost, let them sit at room temperature for about an hour, or if you're desperate (and we've all been there), microwave from frozen for 30-45 seconds. They'll taste almost exactly like fresh-baked, which is basically magic.
Best Reheating Method
For that fresh-from-the-oven experience, split them in half and toast them cut-side down in a dry skillet for 2-3 minutes. The cut surfaces get slightly crispy while the insides warm up, creating this amazing textural contrast. Serve with a pat of butter that melts into all the nooks and crannies, and you've got yourself a breakfast that rivals anything from a fancy bakery.