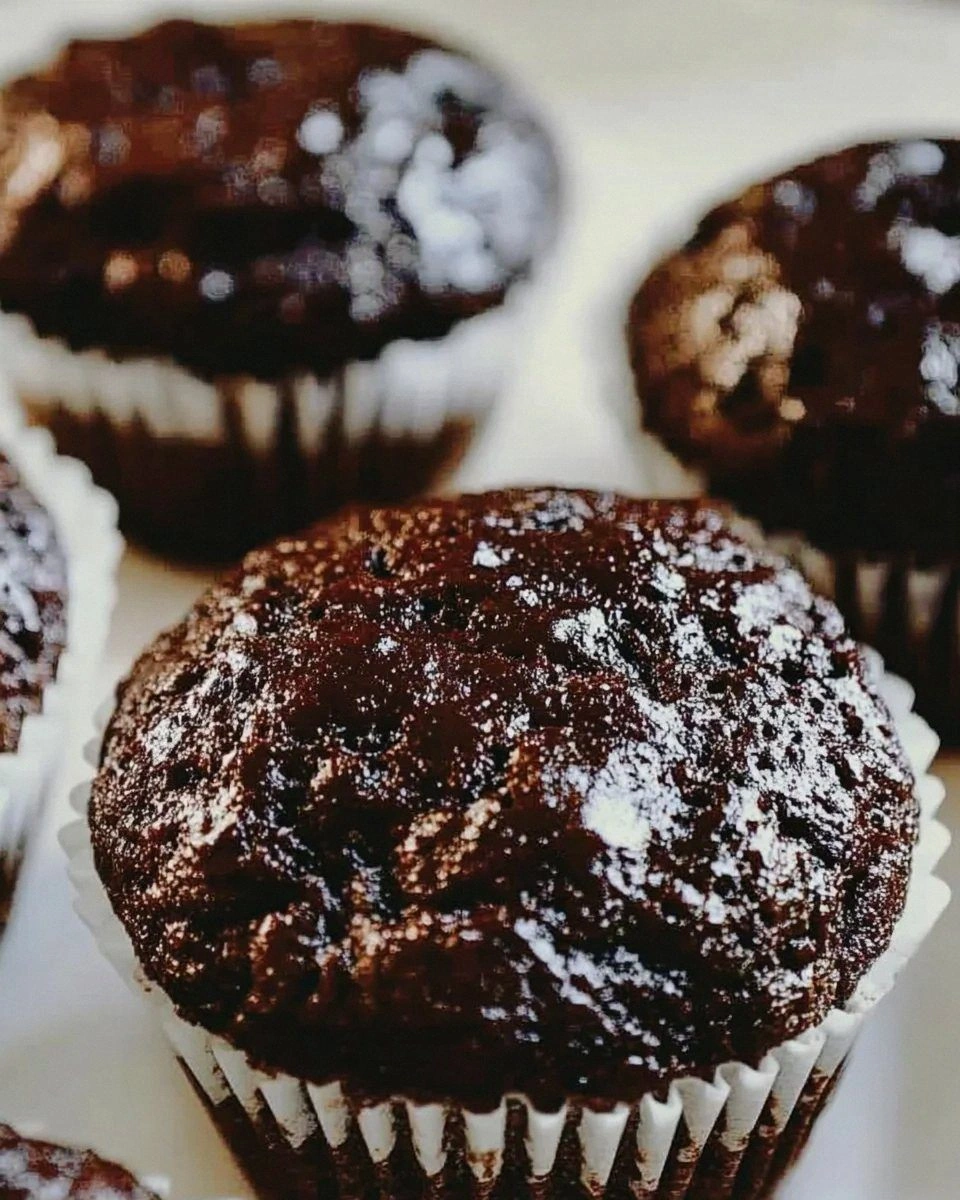
I still remember the day I accidentally created these espresso brownie cupcakes. It was one of those rainy Tuesday afternoons when the universe conspires against your plans — my coffee machine decided to stage a rebellion, my chocolate delivery was delayed, and I had promised my coworkers something spectacular for the morning meeting. Standing in my kitchen surrounded by half-opened cabinets and mounting desperation, I grabbed the nearest bag of espresso powder and a block of dark chocolate, thinking "well, how bad could it be?" The answer, my friends, was life-changing. What emerged from my oven thirty minutes later was neither fully brownie nor completely cupcake, but something infinitely better: a rich, fudgy hybrid that had my neighbors knocking on my door at midnight, demanding to know what magical creation was making their entire building smell like a chocolate factory collided with a coffee roastery.
Picture this: the first bite hits you like a velvet hammer of chocolate intensity, followed by the gentle warmth of espresso that blooms across your palate like a dark flower opening in slow motion. The edges are chewy and caramelized, creating that coveted brownie crust we all fight over, while the center stays impossibly moist — we're talking chocolate lava cake territory here. The espresso doesn't just add flavor; it performs alchemy, transforming ordinary cocoa into something that tastes like it was harvested from the gardens of chocolate royalty. I dare you to taste these and not immediately start planning when you can make them again. In fact, I'll be honest — I ate half the batch before anyone else got to try them, and I'm not even sorry about it.
What makes these cupcakes absolutely irresistible is the way they break all the baking rules while somehow achieving perfection. Most recipes get this completely wrong, either making them too cakey (a crime against brownie humanity) or so dense they could anchor a ship. This version? Pure magic. The batter comes together in one bowl, no fancy equipment needed, and the result is a dessert that sits somewhere between a molten chocolate cake and your favorite coffee shop brownie. Future pacing moment: imagine yourself pulling these out of the oven, the whole kitchen smelling like a chocolate factory married a coffee roastery, and knowing you're about to become a legend among your friends and family.
Stay with me here — this is worth it. The secret isn't just in the ingredients (though we'll get to those glorious details), but in the technique that most bakers completely overlook. We're talking about the temperature of your butter, the way you incorporate air, and that crucial five-minute rest that changes everything. By the end of this recipe, you'll wonder how you ever made it any other way, and more importantly, you'll have a dessert that makes people stop mid-conversation, close their eyes, and make that involuntary sound of pure pleasure. Let me walk you through every single step.
What Makes This Version Stand Out
Intensified Flavor: The espresso powder doesn't just add coffee taste — it amplifies the chocolate's natural complexity, creating depth that makes regular brownies taste flat and one-dimensional. It's like the difference between listening to music through phone speakers versus a concert hall sound system.
Fudgy Texture Guarantee: Forget dry, cakey disappointments. This recipe uses a precise ratio of butter to flour that ensures every bite is dense, rich, and melts on your tongue like chocolate truffles. The edges get that perfect chew while the center stays gooey and decadent.
One-Bowl Simplicity: Despite tasting like they came from a Parisian patisserie, these cupcakes require zero fancy techniques or equipment. Okay, ready for the game-changer? Everything mixes in one bowl, meaning fewer dishes and more time for important things like eating brownies.
Crowd-Pleaser Factor: I've served these at baby showers, poker nights, book clubs, and once at a very serious business meeting where they caused actual applause. The combination of familiar comfort food with sophisticated coffee notes hits every demographic from picky kids to food snobs.
Ingredient Quality Flexibility: While premium chocolate makes these transcendent, this recipe is forgiving enough to work with grocery store basics. The espresso powder does the heavy lifting, so even standard cocoa powder becomes extraordinary.
Make-Ahead Magic: These actually taste better the next day, making them perfect for entertaining. The flavors meld and deepen overnight, and they stay moist for days (though they've never lasted more than 24 hours in my house).
Breakfast Justification: With espresso in the name, you can totally rationalize eating these for breakfast. I'm not saying you should, but I'm also not saying I haven't watched grown adults do exactly that while making happy little humming sounds.
Inside the Ingredient List
The Flavor Base
Let's talk about the unsalted butter first because it's the foundation of everything rich and wonderful here. When you melt two full sticks of butter, you're not just adding fat — you're creating the velvety canvas that carries all the chocolate and coffee flavors. The melted form is crucial because it allows the sugar to dissolve partially, creating that shiny, crackly top that makes brownies look professionally done. Skip the butter and try oil instead? You'll lose that distinctive butter richness that makes these taste like they came from a boutique bakery. Always go for unsalted because different butter brands have wildly varying salt levels, and you want to control the seasoning yourself like the kitchen boss you are.
Granulated sugar isn't just sweetener here — it's a texture magician. Two cups might seem like overkill, but sugar does more than sweeten; it creates that perfect balance between fudgy and tender by interfering with gluten development. The crystals cut through the cocoa's natural bitterness while helping form that delicate, paper-thin crust on top. Don't even think about reducing it by more than a quarter cup unless you want dense, hockey-puck results that could double as paperweights.
The Chocolate Powerhouse
Unsweetened cocoa powder is where the real chocolate magic happens, and one cup creates the intense chocolate foundation that makes these cupcakes legendary. Dutch-processed versus natural cocoa? Either works here because the espresso powder balances the acidity, so use what you have. The cocoa provides the structure and that deep, complex chocolate flavor that makes milk chocolate taste like kid stuff. If you've ever wondered why some chocolate desserts taste flat while others sing, it's usually the quality and quantity of cocoa — don't skimp here or you'll end up with sad, weak chocolate flavor that tastes like disappointment.
Espresso powder is the unexpected hero that transforms ordinary chocolate into something that makes people close their eyes and sigh. One tablespoon might seem excessive, but it dissolves completely and amplifies the chocolate's natural complexity without making things taste like coffee cake. The science here is wild — coffee compounds actually bind to your taste buds differently than chocolate alone, creating new flavor molecules that your brain interprets as "more chocolatey than chocolate." Skip this ingredient and you'll have perfectly good brownies, but add it and you'll understand why people drive across town for your baking.
The Texture Architects
All-purpose flour is the scaffolding that prevents these from becoming chocolate soup, but we're using just enough — one cup — to keep things tender. Too much flour leads to cakey, dry results that crumble like sawdust. The key is measuring correctly by spooning flour into your measuring cup and leveling it off, because packing it down can add up to two extra tablespoons, turning your fudgy dreams into chocolate bread. If you live in a humid climate, consider using a tablespoon less because flour absorbs moisture from the air like a sponge.
Four large eggs provide structure, richness, and that gorgeous golden color that makes these look as luxurious as they taste. The proteins set during baking, creating the framework that holds everything together while the yolks add emulsifying power that keeps the butter and cocoa married in perfect harmony. Room temperature eggs incorporate more smoothly, preventing weird lumps that can create pockets of flour or cocoa in your finished cupcakes. If you've ever had brownies with weird rubbery bits, it's usually from cold eggs shocking the butter into solidifying too quickly.
The Final Flourish
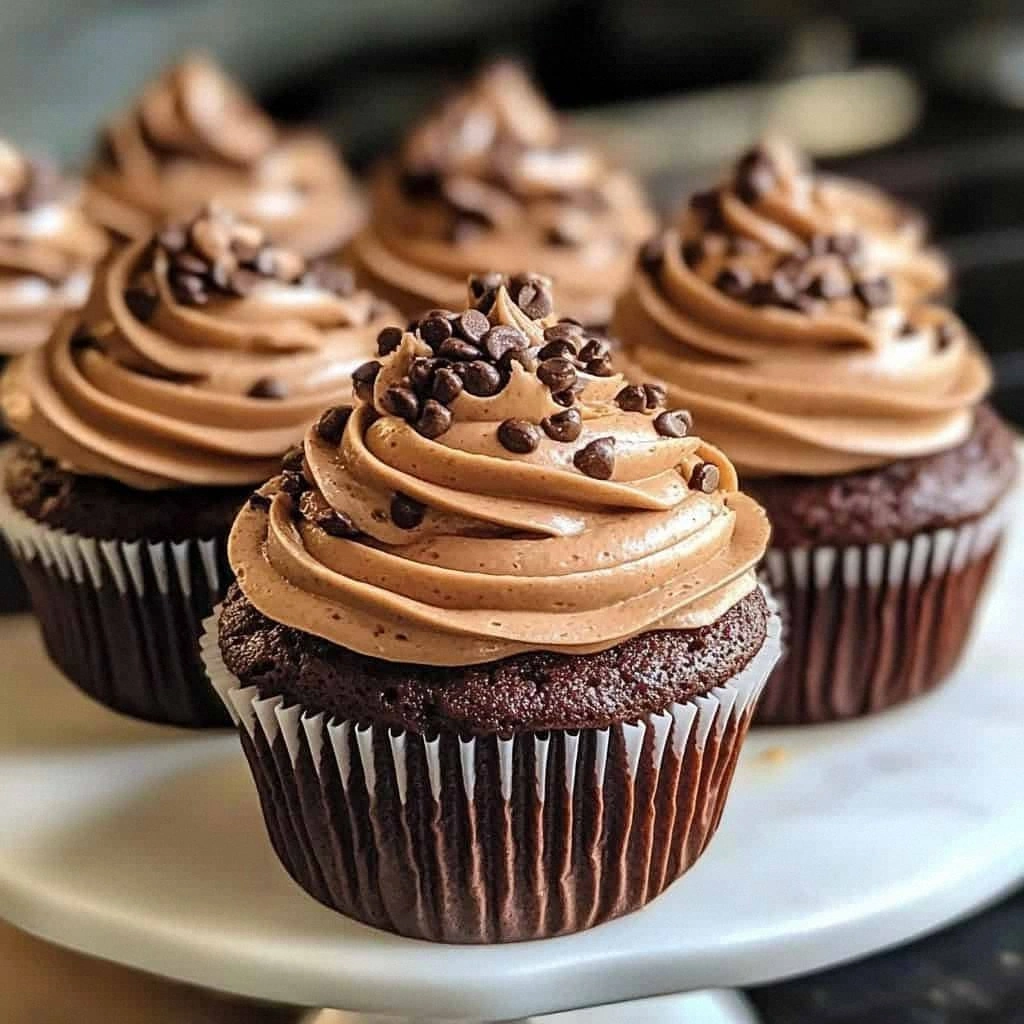
Chocolate chips might seem like overkill, but hear me out — those half-cup of melty pockets create textural contrast that takes these from great to legendary. They stay partially intact during baking, creating little chocolate lava bombs that surprise and delight with every bite. The optional nature is for purists, but I dare you to try it once and discover what you've been missing. Go for semisweet or bittersweet depending on your chocolate tolerance, and toss them in a teaspoon of flour first to prevent them from sinking to the bottom like chocolate treasure.
Vanilla extract might seem redundant when you're dealing with such intense flavors, but one tablespoon rounds everything out like a backstage manager making sure all the stars shine. It adds warmth and complexity that bridges the gap between the bitter cocoa and sweet sugar, creating harmony in what could otherwise be a flavor shouting match. Use real vanilla extract, not the imitation stuff, because we're already investing in premium chocolate and espresso — this isn't the place to get cheap.
Everything's prepped? Good. Let's get into the real action...

The Method — Step by Step
- Preheat your oven to 350°F (175°C) and line a 12-cup muffin tin with paper liners. This temperature is crucial — too hot and your edges will burn before the centers set, too cool and you'll get greasy, undercooked batter that collapses in the middle. Position your rack in the center of the oven because heat circulation is key for even baking. While the oven heats, place your butter in a large microwave-safe bowl and melt it completely, but don't let it bubble or brown — we're going for liquid gold here, not burnt butter bitterness that will fight with our chocolate.
- Whisk the melted butter with granulated sugar until the mixture looks like wet sand and feels slightly gritty between your fingers. This step is where most people rush, but take your time — the sugar needs to start dissolving in the warm butter, creating that signature shiny crust. The mixture should go from pale yellow to almost ivory as the sugar begins to break down. If you've ever wondered why some brownies have that beautiful crackly top while others look dull, this is the moment that determines your fate.
- Sift in the cocoa powder, espresso powder, salt, and baking powder all at once. Use a whisk to combine everything until you have a dark, glossy mixture that looks like melted chocolate. The sifting prevents those annoying cocoa lumps that never seem to dissolve no matter how much you mix. The batter will be thick and almost black — that's exactly what you want. That sizzle when the espresso powder hits the warm butter? Absolute perfection as the aromatics bloom and fill your kitchen with promises of chocolate heaven.
- Add the eggs one at a time, whisking vigorously after each addition until the batter becomes smooth and pudding-like. This is the moment of truth where your arm might get a workout, but each egg needs to be fully incorporated before adding the next. The batter will transform from thick and fudgy to silky and pourable. If you see any bits of butter solidifying, don't panic — just keep whisking and they'll incorporate. Room temperature eggs prevent the butter from seizing up, creating an emulsion that's smooth as silk.
- Stir in the vanilla extract, then add the flour all at once. Switch to a spatula and fold gently until no dry streaks remain, but stop as soon as the flour disappears. Overmixing develops gluten and creates tough, rubbery cupcakes that bounce when you drop them. The batter should be thick enough to mound on a spoon but still pourable. If you've ever struggled with dry brownies, this is usually where things went wrong — treat the flour like it's made of gold and fold like you're handling a cloud.
- Fold in the chocolate chips if using, distributing them evenly but quickly. The batter will start to thicken as it cools, so work fast. Tossing the chips in a teaspoon of flour prevents them from all sinking to the bottom, creating those delightful chocolate pockets throughout. Don't overmix now — you're just looking for even distribution. If the batter seems too thick to scoop, that's perfect — it should hold its shape when you drop it into the muffin cups.
- Divide the batter among the muffin cups, filling each about three-quarters full. This recipe makes exactly 12 generous cupcakes, so don't be shy about portioning. The tops should be slightly domed — they'll puff up during baking then settle into that perfect brownie-like crust. If you have extra batter (and you shouldn't), resist the urge to overfill or you'll end up with mushroom-shaped cupcakes that stick to the pan and break when you try to remove them.
- Bake for 22-25 minutes, rotating the pan halfway through for even browning. The edges should look set and slightly pulled away from the paper, while the centers still jiggle slightly when you gently shake the pan. Don't wait for a toothpick to come out clean — that's overcooked territory. The carryover heat will finish setting the centers as they cool. If you've ever struggled with dry brownies, it's usually because you waited too long to pull them out. They should look underbaked when you take them out — trust the process.
- Let the cupcakes cool in the pan for exactly 5 minutes — no more, no less. This is the crucial rest period where they finish setting but haven't started sticking to the pan. Then transfer to a wire rack to cool completely. Resist the urge to eat them warm or they'll fall apart into chocolate chaos. The waiting is the hardest part, but these beauties need to set up properly for that perfect fudgy texture.
That's it — you did it. But hold on, I've got a few more tricks that'll take this to another level...
Insider Tricks for Flawless Results
The Temperature Rule Nobody Follows
Here's where most home bakers go wrong: they ignore the temperature of their ingredients and wonder why their brownies never turn out like the pictures. Your butter should be melted but not hot — think warm bath temperature, not boiling. If it's too hot, it'll cook the eggs when you add them, creating scrambled chocolate eggs that no amount of whisking will fix. I learned this the hard way when I rushed and ended up with chocolate-flavored egg drop soup that went straight into the trash. Room temperature eggs incorporate smoothly, creating an emulsion that's worth the extra ten minutes of planning.
Why Your Nose Knows Best
Your sense of smell is actually the most reliable indicator of doneness for these cupcakes. When they're perfectly baked, your kitchen will smell like a chocolate factory with subtle coffee undertones — rich, deep, and slightly sweet. If you start smelling sharp or burnt notes, you've gone too far. A friend tried skipping this step once — let's just say it didn't end well, and we had to order pizza instead of celebrating with homemade dessert. The aroma should make you want to dive face-first into the oven, not send you running for ventilation.
The 5-Minute Rest That Changes Everything
That cooling period in the pan isn't just for show — it's where the magic happens. During these crucial five minutes, the cupcakes continue cooking from residual heat while the starches set up, creating that perfect fudgy center. Remove them too early and they'll collapse into chocolate puddles. Wait too long and they'll stick to the pan like they've been glued in place. I set a timer because I've been burned (literally and figuratively) by impatience too many times. This rest also allows the espresso flavors to bloom and marry with the chocolate, creating complexity that wasn't there when they first came out of the oven.
The Liners vs. No Liners Debate
Here's my hot take: always use liners, but not for the reason you think. Yes, they make cleanup easier, but they also create a slight insulation barrier that helps the edges stay tender while the centers cook through. Without liners, you get crispier edges (which some people love), but you also risk overbaking because the metal pan conducts heat directly to your precious batter. Plus, liners let you pull them out at exactly the right moment without breaking them apart. I've served these at parties where people fought over the slightly underbaked ones, and liners make it easy to identify which ones are which.
The Overnight Advantage
If you can resist eating them immediately (and that's a big if), these cupcakes actually improve overnight. The flavors meld and deepen, the texture becomes even fudgier, and something magical happens with the espresso and chocolate that creates new flavor compounds. Wrap them tightly once completely cool, and by morning you'll have something that tastes like it came from a professional bakery. This is my secret weapon for potlucks and dinner parties — make them the day before, let them rest, and watch people assume you bought them from some fancy chocolatier.
Creative Twists and Variations
This recipe is a playground. Here are some of my favorite ways to switch things up:
The Mexican Mocha Version
Add a teaspoon of cinnamon and a pinch of cayenne to the dry ingredients for a subtle warmth that builds slowly on your tongue. Replace half the chocolate chips with Mexican chocolate chunks if you can find them, or use cinnamon chips for extra spice. The espresso powder amplifies the cinnamon's natural sweetness while the cayenne provides a gentle heat that makes people wonder what makes these so addictive. Top with a dusting of cinnamon sugar while they're still warm for a churro-like crust that'll have everyone asking for the recipe.
The Salted Caramel Swirl
Before baking, drop teaspoon-sized dollops of thick caramel sauce on top of each cupcake, then use a toothpick to marble it through. Sprinkle with flaky sea salt for that sweet-salty magic that makes people weak in the knees. The caramel sinks slightly during baking, creating pockets of gooey sweetness that contrast beautifully with the rich chocolate. Use store-bought caramel to keep things simple, or make your own if you're feeling ambitious. The salt isn't optional here — it makes the chocolate taste more chocolatey and the caramel more complex.
The Peanut Butter Lover's Dream
Replace half the butter with creamy peanut butter for a Reese's cup situation that'll make you forget the original version exists. Swirl additional peanut butter on top before baking for visual appeal and extra peanut flavor. The espresso actually complements the peanut butter beautifully, creating a sophisticated version of a childhood favorite. Use natural peanut butter for a stronger peanut taste, or the regular kind for sweetness and better texture. Either way, you'll end up with something that tastes like a peanut butter cup went to finishing school.
The Mint Chocolate Edition
Add a quarter teaspoon of peppermint extract to the batter — a little goes a long way here. Replace the chocolate chips with Andes mint pieces or chopped up peppermint patties for extra minty pockets. The espresso provides a sophisticated backdrop that prevents these from tasting like toothpaste, while the mint adds a refreshing contrast to the rich chocolate. These are particularly dangerous in summer when you want something chocolatey but refreshing.
The Double Chocolate Chunk
Use dark cocoa powder instead of regular for an even more intense chocolate experience. Add both chocolate chips and chopped dark chocolate chunks for varied texture — the chips stay partially intact while the chunks melt into chocolate lava pockets. The espresso powder becomes even more important here, preventing the double chocolate from becoming one-note. These are for serious chocolate lovers only — casual sweet-tooth folks might find them overwhelming, but chocolate addicts will weep with joy.
The Boozy Adult Version
Replace one tablespoon of the vanilla with coffee liqueur like Kahlúa or Irish cream for a grown-up twist. The alcohol burns off during baking, leaving behind complex flavor notes that make people ask "what's that amazing taste?" Don't overdo it — too much liquid will affect the texture. These are perfect for dinner parties where you want to serve something familiar but elevated. Top with a coffee-infused whipped cream for the full experience.
Storing and Bringing It Back to Life
Fridge Storage
These cupcakes keep beautifully in the refrigerator for up to five days, wrapped tightly in plastic wrap or stored in an airtight container. The cold actually firms them up slightly, creating a truffle-like texture that's equally addictive as the room temperature version. Bring them back to room temperature for 30 minutes before serving, or eat them cold for a different experience. If they seem slightly dry after refrigeration (though they shouldn't), microwave them for exactly 8 seconds — no more or you'll have chocolate soup. The espresso flavor actually intensifies after a day or two in the fridge, making these perfect for make-ahead entertaining.
Freezer Friendly
These freeze like champions for up to three months — wrap each cupcake individually in plastic wrap, then place in a freezer bag with as much air removed as possible. Thaw overnight in the refrigerator, then bring to room temperature for the best texture. You can also freeze them in batches of two or three for emergency chocolate needs (we've all been there). Pro tip: freeze them slightly underbaked if you know you'll be freezing them — they'll finish setting during the thawing process. Never microwave from frozen unless you want chocolate-scented rubber.
Best Reheating Method
If you must reheat (though they're best at room temperature), wrap in a damp paper towel and microwave for 10-12 seconds. The damp towel creates a steam effect that restores moisture without making them soggy. For larger batches, wrap in foil and warm in a 300°F oven for 5-7 minutes. Add a tiny splash of water to the foil packet before sealing — it steams back to perfection. Never reheat more than once or you'll lose that precious fudgy texture that makes these special. If they've been frozen and thawed, they're actually best served slightly chilled for that truffle-like experience.