Picture this: it’s a rainy Saturday afternoon, the kind that makes you want to hug a blanket and binge‑watch old sitcoms while the kitchen smells like a bakery that just opened. I was halfway through a marathon of “Friends” when a sudden craving for something sweet and buttery struck me like a bolt of lightning. I rummaged through the pantry, found a lonely bag of pecans, a half‑stick of butter, and a jar of brown sugar that had been gathering dust. I thought, “Why not whip up an upside‑down cake? Easy, right?” Spoiler alert: the result was nothing short of a culinary epiphany.
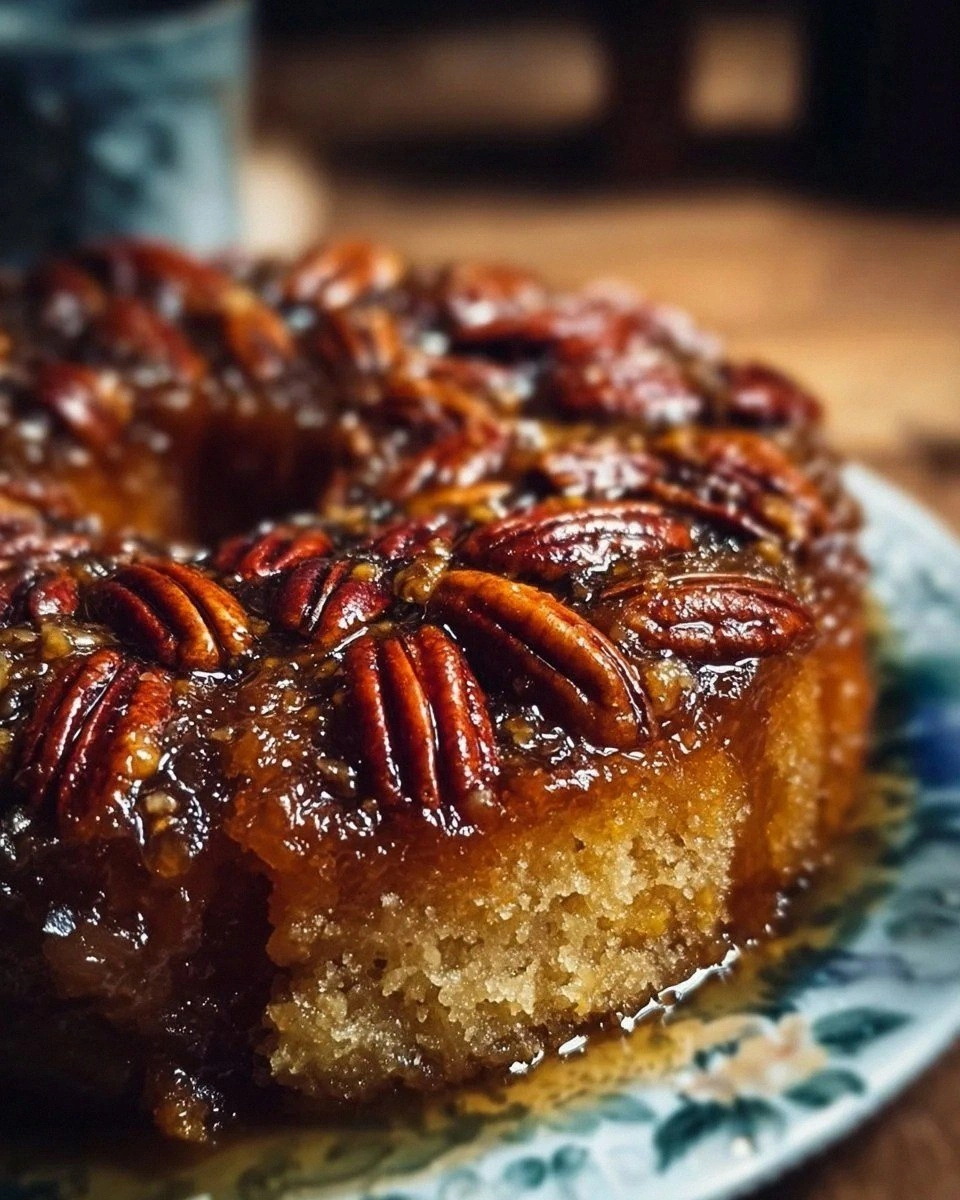
The first time I pulled this cake out of the oven, the caramel‑glazed pecans shone like amber jewels, and the sponge beneath was so moist it practically sang. I could hear the faint crackle of the caramel as I lifted the pan, and the aroma—sweet, nutty, with a whisper of vanilla—filled every corner of the house, making the couch feel like a five‑star dining room. I dared a neighbor to take a bite and not come back for seconds; she didn’t even finish her first slice. That’s when I realized I’d stumbled onto something truly special: a cake that feels like a hug from the inside out.
Most upside‑down cakes either drown in syrup or turn out dry as a desert, but this version hits the sweet spot with a buttery, caramel base that clings to the pecans like a love‑letter to your taste buds. The secret? A dash of buttermilk that keeps the crumb tender, and a precise melt‑and‑pour butter‑brown‑sugar mixture that creates a glossy, crackly topping without turning into a sticky mess. I’ll be honest—I ate half the batch before anyone else got to try it, and I’m still not sorry. This is hands down the best version you’ll ever make at home, and I’m about to spill every detail.
Ready for the game‑changer? I’m going to walk you through each step, from selecting the perfect pecans to the exact moment you flip the pan for that dramatic reveal. By the end, you’ll wonder how you ever settled for store‑bought versions, and you’ll have a new go‑to dessert that dazzles at brunches, potlucks, and midnight snack attacks alike. Let me walk you through every single step — by the end, you’ll wonder how you ever made it any other way.
What Makes This Version Stand Out
- Caramel Depth: The melted butter and brown sugar create a rich, buttery caramel that seeps into every pecan, delivering a flavor that’s deeper than any store‑bought mix.
- Moist Crumb: The buttermilk and eggs form a tender, slightly tangy sponge that stays moist for days, making leftovers a true treat.
- Nutty Crunch: Whole pecan halves give a satisfying crunch that contrasts beautifully with the soft cake, turning each bite into a textural adventure.
- Simplicity: Only eleven ingredients, all pantry staples, mean you can throw this together in under an hour without a trip to the specialty store.
- Versatile Appeal: It’s elegant enough for a dinner party, comforting enough for a family night, and quick enough for a spontaneous dessert craving.
- Make‑Ahead Magic: The cake freezes beautifully, so you can prep it ahead of holidays or bake it the night before a big event.
- Flavor Boost: A splash of vanilla extract (halal certified) adds a fragrant lift that ties the caramel and pecans together.
- Perfect Portion: Serves four generously, ideal for intimate gatherings or a small family dessert without leftovers.
Inside the Ingredient List
The Flavor Base
The combination of unsalted butter, melted and brown sugar is the heart of the caramel topping. When the butter melts, it dissolves the sugar, forming a glossy, amber‑colored sauce that coats the pecans like a warm hug. If you skimp on the butter, the sugar will caramelize unevenly, leading to a gritty texture. For a deeper flavor, use a high‑quality butter with at least 82% butterfat; it adds richness without a watery aftertaste.
Fun Fact: Brown sugar gets its color from molasses, which also contributes a subtle hint of acidity that balances the sweetness of the caramel.
The Texture Crew
Pecan halves bring the signature crunch. Choose raw, unsalted pecans for the most authentic flavor; roasted pecans can become too bitter, while salted ones throw off the delicate sweetness. If you’re allergic to nuts, try toasted pumpkin seeds for a similar crunch and a slightly earthy note. When you toss the pecans in the caramel, make sure they’re fully coated—this prevents them from sinking to the bottom and ensures every bite gets that nutty punch.
All‑Purpose Flour provides the structure. The 1 ½ cups create a light yet sturdy crumb that holds up under the weight of the caramel. Using cake flour would make the cake too delicate, while whole‑wheat flour would add a dense, earthy flavor that competes with the caramel.
The Leavening Duo
Baking powder and baking soda work together to give the cake its lift. The baking powder adds a steady rise, while the baking soda reacts with the buttermilk’s acidity, creating tiny air pockets that keep the crumb airy. Skipping either will result in a dense, flat cake that can’t support the caramel topping.
Buttermilk is the secret moisture keeper. Its slight tang cuts through the sweetness, preventing the cake from feeling cloying. If you don’t have buttermilk, whisk ½ cup of milk with ½ tablespoon of lemon juice or white vinegar and let it sit for five minutes—this homemade version works just as well and is halal‑friendly.
The Final Flourish
Granulated sugar sweetens the batter without adding the molasses flavor of brown sugar, keeping the cake’s sweetness balanced. Vanilla extract (halal certified) adds an aromatic backdrop that elevates the caramel and pecan notes, making the flavor profile feel more complex. Finally, the large eggs bind everything together, providing structure and richness. If you’re vegan, replace each egg with a “flax egg” (1 tablespoon ground flaxseed + 3 tablespoons water) and add a tablespoon of olive oil to maintain moisture.
Everything's prepped? Good. Let's get into the real action...
The Method — Step by Step
Preheat your oven to 350°F (175°C). While the oven warms, place a 9‑inch round cake pan on the stovetop and melt the ½ cup of butter over medium heat. As soon as it starts to bubble, whisk in the cup of brown sugar, stirring constantly until the mixture turns a deep amber and you hear that satisfying sizzle. This is the moment of truth—if the caramel starts to smoke, lower the heat; you want a golden glow, not a burnt bitterness.
Remove the pan from heat and immediately stir in the pecan halves, ensuring each nut is luxuriously coated. Let the caramel‑pecan mixture sit for a minute so the nuts absorb some of the syrup. Then, carefully tilt the pan and swirl to create a thin, even layer of caramel at the bottom—this will become the glossy base when you flip the cake.
Kitchen Hack: If the caramel thickens too quickly, add a splash of water (about 1 tablespoon) and stir; it will loosen without compromising flavor.In a large mixing bowl, whisk together the flour, baking powder, baking soda, and salt. This dry blend ensures even distribution of leavening agents, preventing pockets of bitterness. Set the bowl aside while you tackle the wet side—this is where the magic really starts to happen.
In a separate bowl, combine the melted butter‑brown‑sugar mixture (still warm) with the granulated sugar, vanilla extract, and eggs. Beat vigorously with a hand mixer on medium speed for about two minutes, until the mixture is pale, fluffy, and the ribbons fall slowly. The batter should look like liquid sunshine—if it looks curdled, keep beating; the eggs will emulsify with the butter and sugar.
Now, gently fold the buttermilk into the wet mixture. The buttermilk will thin the batter just enough to pour easily, while its acidity activates the baking soda for that perfect rise. Once incorporated, gradually add the dry flour mixture, folding with a rubber spatula until just combined. Over‑mixing will develop gluten and make the cake tough—stop as soon as you no longer see streaks of flour.
Pour the batter over the caramel‑pecan layer in the pan, using a spatula to smooth the top. You’ll notice the batter sinking slightly into the caramel, creating a beautiful marbled effect. This is the visual cue that the cake will have a caramel‑infused crust once baked.
Watch Out: Do not overfill the pan; the batter will rise about an inch, and a full pan can overflow, creating a caramel mess on the oven walls.Slide the pan into the preheated oven and bake for 30‑35 minutes. About the 20‑minute mark, rotate the pan 180 degrees to ensure even browning. The cake is done when a toothpick inserted near the edge comes out clean, and the edges start pulling away from the pan, revealing a golden caramel crust.
While the cake bakes, prepare a large plate or serving platter. Line it with parchment paper for easy cleanup, or simply have it ready for the dramatic flip. This step is where the suspense builds—imagine the caramel glistening as you prepare to invert the masterpiece.
When the timer dings, remove the pan and let the cake rest for five minutes. This short cooling period lets the caramel set slightly, preventing it from running everywhere when you flip. Then, place the prepared plate over the pan, hold firmly, and with a swift, confident motion, invert the pan. The caramel‑pecan layer should now sit on top, glossy and inviting.
Kitchen Hack: Warm the plate slightly (microwave for 10 seconds) before flipping; the heat helps the caramel release cleanly from the pan.Allow the cake to cool on the plate for another ten minutes before slicing. This cooling time lets the caramel thicken just enough to stay on the top rather than sliding off. Serve warm, perhaps with a dollop of whipped cream or a scoop of vanilla ice cream, and watch your guests’ faces light up. I dare you to taste this and not go back for seconds—trust me, you’ll be back.
That's it — you did it. But hold on, I've got a few more tricks that'll take this to another level...
Insider Tricks for Flawless Results
The Temperature Rule Nobody Follows
Never rush the oven preheat. A fully heated oven ensures the caramel sets instantly, creating that coveted glossy finish. If the oven is even a few degrees low, the cake will rise unevenly, and the caramel may seep into the batter, making it soggy. I once tried baking at 325°F to “save energy,” and the result was a gummy mess. Trust the thermostat; it’s the silent hero of perfect upside‑down cakes.
Why Your Nose Knows Best
Your sense of smell is the ultimate timer. Around the 20‑minute mark, you’ll notice a sweet, nutty aroma that fills the kitchen—this is the caramel reaching its peak. If you hear a faint crackle, the edges are caramelizing just right. When the scent turns slightly burnt, pull the cake out immediately; it’s better to be a minute early than a minute too late.
The 5‑Minute Rest That Changes Everything
After flipping, let the cake sit for five minutes before cutting. This short rest lets the caramel firm up, preventing it from sliding off the slices. Skipping this step is a common mistake that leads to a drippy disaster. I’ve seen even seasoned bakers forget, and the result is a soggy plate and a disappointed crowd.
Butter‑Brown Sugar Ratio Mastery
If you love a deeper caramel, increase the butter to ⅔ cup while keeping the brown sugar at 1 cup. The extra butter adds silkiness without making the topping greasy. Just remember to keep the heat low; too much butter can cause the sugar to burn faster. I experimented with this ratio for a holiday version, and the caramel was so smooth it could have been a glaze for a fancy pastry.
The Secret of Room‑Temperature Eggs
Always use room‑temperature eggs. Cold eggs cause the butter to re‑solidify, resulting in a lumpy batter that won’t rise properly. To bring eggs to room temperature quickly, place them in a bowl of warm (not hot) water for five minutes. This tiny step makes a huge difference in the final crumb texture, giving you that pillow‑soft bite.
Creative Twists and Variations
This recipe is a playground. Here are some of my favorite ways to switch things up:
Maple‑Pecan Dream
Replace half of the brown sugar with pure maple syrup and add a tablespoon of maple‑flavored butter. The result is a caramel that carries the smoky sweetness of maple, perfect for autumn brunches. Serve with a drizzle of extra maple sauce for that extra wow factor.
Chocolate‑Swirl Surprise
Melt ¼ cup of dark chocolate and swirl it into the batter before pouring it over the caramel. The chocolate ribbons create a visual contrast and a flavor duet that will make chocolate lovers swoon. Pair with a raspberry coulis to cut through the richness.
Citrus Zest Burst
Add the zest of one orange and a teaspoon of orange extract to the batter. The citrus lifts the sweetness, making the cake feel lighter and more refreshing—ideal for a summer gathering. Garnish with candied orange peel for an extra pop of color.
Spiced Pumpkin Twist
Swap the buttermilk for ½ cup of pumpkin puree and add a teaspoon of pumpkin pie spice to the dry ingredients. This creates a cozy, autumn‑ready version that pairs beautifully with a dollop of cinnamon‑spiced whipped cream.
Gluten‑Free Goodness
Use a 1‑to‑1 gluten‑free flour blend in place of all‑purpose flour. The texture remains tender, and the caramel still shines. Just be sure the blend contains xanthan gum; otherwise, the cake may crumble.
Storing and Bringing It Back to Life
Fridge Storage
Allow the cake to cool completely, then cover it loosely with foil or a reusable silicone lid. Store in the refrigerator for up to four days. The caramel may thicken, but a gentle microwave reheating (30 seconds) will bring it back to a luscious, glossy state.
Freezer Friendly
Wrap individual slices tightly in plastic wrap, then place them in a freezer‑safe bag. They freeze beautifully for up to three months. When you’re ready to enjoy, let a slice thaw at room temperature, then microwave for 20 seconds and add a splash of water before reheating to revive the caramel sheen.
Best Reheating Method
For the ultimate reheated slice, preheat your oven to 300°F (150°C), place the slice on a parchment‑lined baking sheet, and add a teaspoon of water to the edge of the slice. Cover loosely with foil and bake for eight minutes. The water creates steam that revives the cake’s moisture, while the oven gently melts the caramel without burning it.