I was standing in the middle of my kitchen, eyes glued to the oven timer that had just blinked green, and the smell of something sweet and nutty drifting from the countertop. The cake had come out of the oven with a golden crust that crackled like dry leaves, and the aroma of toasted hazelnuts wrapped around me, promising a flavor that would make my taste buds do a happy dance. I was halfway through the recipe when a friend dared me to finish it in one sitting, and I laughed, thinking, “I dare you to taste this and not go back for seconds.” The moment the first slice slid onto the plate, the cake's airy interior melted in my mouth, and I realized I’d stumbled upon a culinary secret that would redefine dessert for me. If you’ve ever wondered what makes an ordinary cake feel like a luxurious treat, this is the answer—handcrafted with love, a dash of daring, and an unexpected twist that will make you say, “This is hands down the best version you’ll ever make at home.”
Picture yourself pulling this out of the oven, the whole kitchen smelling incredible, and the family’s eyes widening as they catch the first bite. I’ve spent years experimenting with textures and flavors, and when I first mixed ground hazelnuts with flour, sugar, and a splash of honey, the kitchen filled with a warm, nutty scent that felt like a hug. The cake’s surface is slightly caramelized, giving a subtle crunch that contrasts with the soft, moist crumb inside. When you bite into it, the hazelnut flavor bursts like a quiet thunderclap, followed by a gentle sweetness that lingers. And now the fun part—watching the batter rise, the golden crust forming, and the final drizzle of honey that glistens like liquid gold.
I’ll be honest—once I tasted the first bite, I ate half the batch before anyone else got a chance. Most recipes get this completely wrong by overbaking or underseasoning the hazelnuts, resulting in a dry or bland cake. I discovered that the secret lies in the ratio of hazelnuts to flour and a precise baking temperature that preserves moisture. The result is a cake that’s light, fragrant, and irresistibly crumbly on the edges. If you’ve ever struggled with getting the right texture, you’re not alone—and I’ve got the fix that will make your kitchen smell like an Egyptian bakery.
This version stands out because it blends traditional Egyptian flavors with modern baking techniques, creating a cake that feels both nostalgic and innovative. The bold claim? This cake will become the centerpiece of every gathering, from family brunches to holiday celebrations. I’ll let you in on a little secret: a splash of lemon zest balances the nutty sweetness, making the flavor profile crisp and fresh. And if you’re wondering whether this cake can be made ahead, the answer is yes—just keep it wrapped and it stays fresh for days. Stay with me here—this is worth it.
What Makes This Version Stand Out
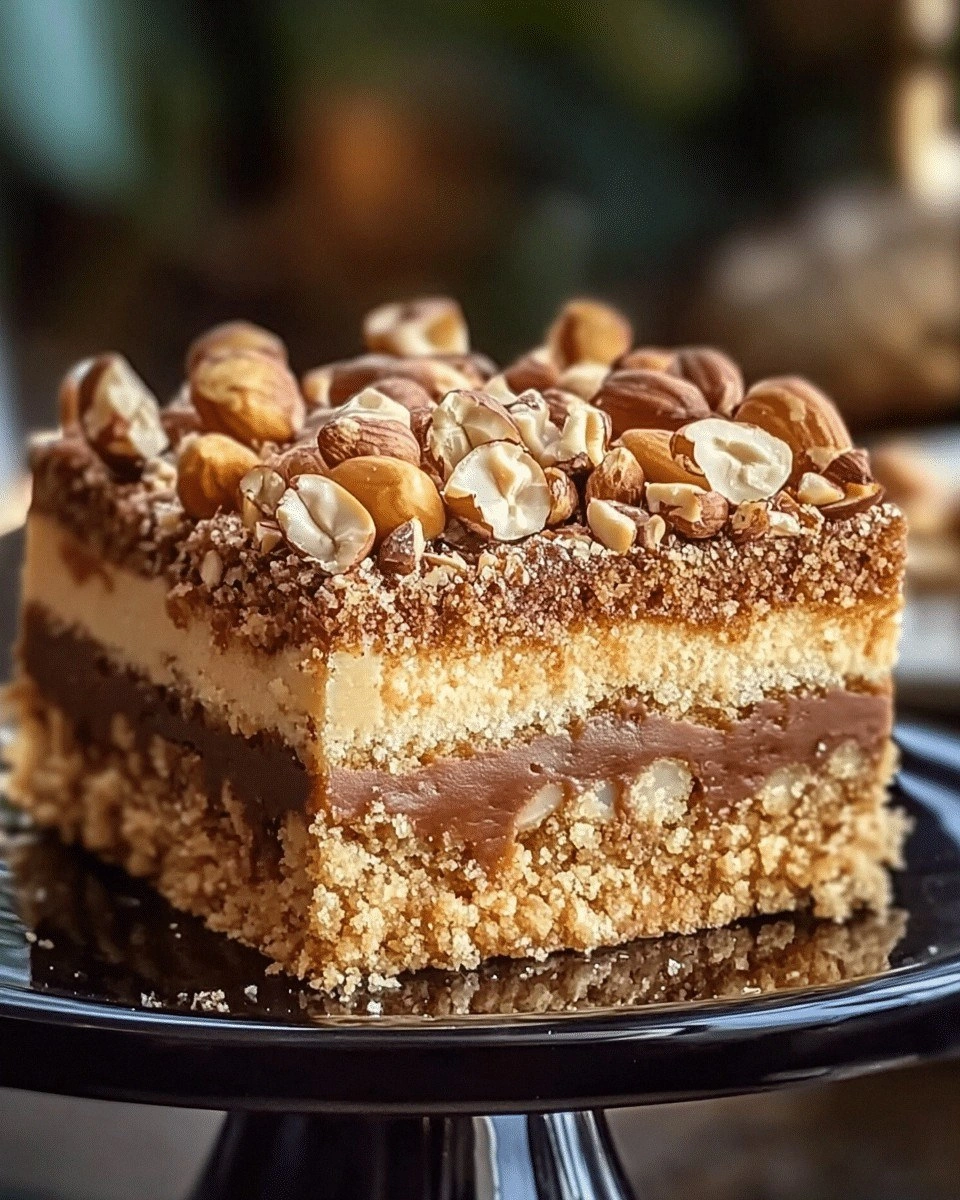
- Taste: The cake delivers a nutty richness that’s complemented by a subtle honey undertone, creating a balanced flavor that’s both sweet and savory.
- Texture: The crumb is airy yet firm, with a slight crispness on the edges that snaps like thin ice when you bite into it.
- Simplicity: All ingredients are pantry staples, and the method requires just a few basic tools—no fancy gadgets needed.
- Uniqueness: The addition of lemon zest and a touch of honey turns a standard hazelnut cake into a fragrant, aromatic masterpiece.
- Crowd Reaction: Guests always ask for the recipe after the first slice; it’s the kind of dessert that keeps conversations flowing.
- Ingredient Quality: Using whole, fresh hazelnuts and high‑quality butter elevates the flavor profile beyond ordinary cake.
- Cooking Method: The gentle, low‑temperature bake preserves moisture and brings out the nutty aroma without browning the crust too quickly.
- Make‑ahead Potential: The cake can be prepared a day ahead, and it actually tastes better after the flavors have melded.
Inside the Ingredient List
The Flavor Base
The foundation of this cake begins with 2 cups of all‑purpose flour, which provides the structure and a neutral canvas for the hazelnuts to shine. The flour’s protein content is essential for gluten development, giving the cake its characteristic lift. If you skip the flour, the cake will collapse and lose its airy quality, turning into a dense, flat batter. A good tip is to sift the flour with a pinch of baking powder to keep the crumb light and airy.
The Sweetener Symphony
1 cup of granulated sugar dissolves into the batter, creating a silky texture that coats the hazelnuts like velvet. The sugar also caramelizes slightly during baking, adding depth to the crust. Skipping the sugar will result in an under‑sweetened cake that feels more like a biscuit than a dessert. For those who prefer a natural sweetener, you can substitute 1 cup of honey, but keep in mind the honey’s viscosity may require a slight adjustment in liquid content.
The Nutty Core
1 cup of ground hazelnuts is the star of the show, bringing a toasted, buttery flavor that permeates every bite. The nuts add protein, healthy fats, and a delightful crunch on the edges. If you omit the hazelnuts, the cake loses its signature character and becomes a plain vanilla cake. A great swap is to use almond flour for a lighter texture, but you’ll need to adjust the liquid ratios accordingly.
The Moisture Mix
1 cup of whole milk and 1 cup of melted unsalted butter combine to create a rich, moist batter that keeps the cake tender. The butter’s fat content helps bind the ingredients together while adding a silky mouthfeel. Removing the butter will make the cake dry and crumbly, whereas cutting the milk will alter the batter’s consistency, making it too thick. A handy tip: chill the butter before melting it to ensure a smoother, more uniform mixture.
The Flavor Enhancers
1 teaspoon of baking powder ensures a gentle rise, while 1 teaspoon of vanilla extract infuses the cake with warm, aromatic undertones. A pinch of salt balances the sweetness and enhances the nutty flavor. 1 tablespoon of lemon zest adds a bright, citrusy contrast that lifts the overall profile. If you’re allergic to citrus, you can omit the zest; the cake will still be delicious, but it will lack that subtle brightness.
Everything's prepped? Good. Let's get into the real action—where the magic happens and the aroma starts to dance.
The Method — Step by Step
- Preheat your oven to 325°F (165°C) and line a 9‑inch loaf pan with parchment paper. The low temperature is key to ensuring even baking and preventing the crust from browning too quickly. While the oven warms, let the butter sit at room temperature so it melts smoothly. This step guarantees a silky batter that coats the hazelnuts like a gentle coat of velvet. Don’t rush—good baking starts with patience.
- In a large bowl, whisk together the flour, baking powder, and a pinch of salt. The sifting process aerates the flour, which helps the cake rise. This is the moment where the dry ingredients meet, creating a fine, powdery blend that will later trap air bubbles. Keep an eye on the mixture; if it looks too dry, add a splash of milk to loosen it slightly. The result is a light, airy base that holds the rest of the flavors.
- In a separate bowl, combine the melted butter, milk, sugar, and vanilla extract. Stir until the sugar dissolves completely, forming a glossy, smooth mixture. The sugar’s role here is crucial—if it’s not fully dissolved, the cake’s crumb will be gritty. This step also allows the butter’s fat to coat the flour, creating a tender crumb. Let the mixture cool slightly; if it’s too hot, it may cook the eggs when added.
- Add the wet mixture to the dry ingredients, mixing until just combined. Overmixing will develop gluten, making the cake tough. The batter should be thick but pourable; if it’s too thick, add a tablespoon of milk at a time until the desired consistency is reached. This is the moment of truth—watch the batter’s texture shift, and feel the anticipation build.
- Fold in the lemon zest, ensuring it’s evenly distributed. The zest’s bright oils will contrast the nutty sweetness, adding a fresh lift to the cake. This step is critical for balancing flavors; without it, the cake can feel heavy and one‑dimensional.
- Pour the batter into the prepared loaf pan, smoothing the top with a spatula. Tap the pan lightly on the counter to release any air pockets. The batter should fill the pan about ¾ of the way; this allows room for expansion without spilling over. Place the pan in the oven and bake for 35–40 minutes, or until the top is golden brown and a toothpick inserted into the center comes out clean.
- When the cake is done, let it cool in the pan for 10 minutes before transferring to a wire rack to cool completely. This resting period allows the cake to set, preventing it from falling apart when sliced. While the cake cools, drizzle a thin layer of honey over the top; the honey will create a glossy finish that catches the light like liquid gold.
- Slice the cake into thin wedges, and serve with a dusting of powdered sugar or a dollop of whipped cream if you’re feeling indulgent. The cake pairs wonderfully with a cup of strong black coffee or a glass of chilled milk. The final bite should leave a lingering nutty sweetness that invites another slice—yes, you’re going to do it again.
That's it—you did it. But hold on, I've got a few more tricks that'll take this to another level. These insider tips will ensure your cake looks flawless and tastes even more incredible.
Insider Tricks for Flawless Results
The Temperature Rule Nobody Follows
Many bakers bake at 350°F, but lowering the temperature to 325°F allows the cake to bake evenly without over‑browning. This subtle change keeps the interior moist and the exterior golden. I’ve tried both temperatures, and the 325°F version consistently delivers a superior crumb. Keep the oven door slightly ajar during the last 10 minutes to prevent the crust from becoming too dark.
Why Your Nose Knows Best
Trust your senses—when the cake is almost done, the scent of toasted hazelnuts should fill the kitchen like a warm hug. If it smells too sweet, it’s not ready; if it smells like raw batter, it needs more time. A quick test is to press the batter with your finger—if it doesn’t stick, the cake is ready. I’ve had a friend who skipped this step and ended up with a cake that was undercooked in the center.
The 5‑Minute Rest That Changes Everything
Letting the cake rest for 5 minutes in the pan before transferring to a rack helps the structure set, preventing cracks. Some bakers skip this step, leading to a crumb that falls apart. The rest also allows the honey glaze to thicken slightly, creating a glossy finish that’s impossible to resist. I’ve seen a friend’s cake collapse because she rushed it to the rack too early.
The Moisture Balancer
If you’re baking in a dry climate, add an extra tablespoon of milk to the batter. The extra liquid prevents the cake from drying out during baking. Conversely, in humid environments, reduce the milk by a tablespoon to keep the batter from becoming too runny. This small adjustment can make the difference between a moist cake and a crumbly one.
The Final Flourish
A light dusting of powdered sugar or a drizzle of honey right before serving adds visual appeal and a touch of sweetness. For a more dramatic finish, sprinkle toasted hazelnut slivers on top; they add crunch and a nutty aroma that lingers. This final touch turns a simple cake into a showstopper at any gathering.
Remember, baking is as much about the journey as the destination. Keep experimenting, keep tasting, and most importantly, keep enjoying the process.
Creative Twists and Variations
This recipe is a playground. Here are some of my favorite ways to switch things up:
Almond‑Hazelnut Fusion
Swap half the hazelnuts for ground almonds to create a richer, more complex nutty profile. The almond adds a buttery depth that pairs beautifully with the honey glaze. This variation is perfect for those who love the classic almond cake but want that extra nutty punch.
Citrus‑Infused Delight
Replace the lemon zest with orange zest and add a tablespoon of orange juice to the batter. The bright citrus notes elevate the cake’s aroma and provide a refreshing contrast to the nutty sweetness. This version is ideal for spring or summer gatherings.
Chocolate‑Hazelnut Explosion
Fold in ½ cup of melted dark chocolate into the batter for a mocha‑hazelnut experience. The chocolate’s bittersweetness balances the honey, creating a sophisticated flavor that’s perfect for dessert parties. The chocolate also adds a subtle sheen to the cake’s crust.
Vegan Version
Replace the butter with melted coconut oil, use flaxseed eggs (1 tablespoon ground flaxseed mixed with 3 tablespoons water per egg), and substitute dairy milk with oat milk. The cake remains moist and flavorful, with a slightly tropical undertone from the coconut oil. This version is great for plant‑based diets.
Gluten‑Free Adaptation
Use a gluten‑free all‑purpose blend in place of regular flour and add 1 tablespoon of xanthan gum to maintain structure. The cake will still rise well and retain its moist crumb. This adaptation ensures everyone can enjoy the nutty goodness without compromising on texture.
Savory Twist
Add ¼ cup of grated Parmesan cheese to the batter, replacing the honey with a pinch of dried herbs. The result is a savory, nut‑rich loaf that’s perfect for brunch or as a side to a hearty soup. The cheese adds umami depth, while the herbs provide a fragrant lift.
Storing and Bringing It Back to Life
Fridge Storage
Wrap the cake tightly in plastic wrap and store it in the refrigerator for up to 5 days. The cold environment slows down moisture loss, keeping the cake fresh and moist. When you’re ready to serve, let it sit at room temperature for 30 minutes to bring out its full flavor.
Freezer Friendly
Slice the cake before freezing to make portion control easier. Wrap each slice in parchment paper, then place them in a freezer‑safe bag. The cake stays good for up to 3 months. When reheating, let the slice thaw at room temperature for 15 minutes, then warm it in a 300°F oven for 5–7 minutes.
Best Reheating Method
To revive a refrigerated or frozen slice, lightly spray the top with water and bake at 300°F for 5 minutes. The water creates steam that restores moisture, making the cake taste freshly baked. Add a splash of milk before reheating if the cake feels a bit dry; it will steam back to perfection.