Introduction
I was standing in my kitchen, staring at a ruined loaf that had turned into a sticky, soggy mess. The oven had overcooked it, and the crust had cracked like brittle bone. I was about to throw it in the trash when a friend dared me to try a new recipe that promised a buttery, sweet bread that would make me forget the disaster. I couldn't resist the challenge, and the moment I sliced that first piece, the aroma of brown sugar and toasted nuts flooded my senses, turning my frustration into pure delight.
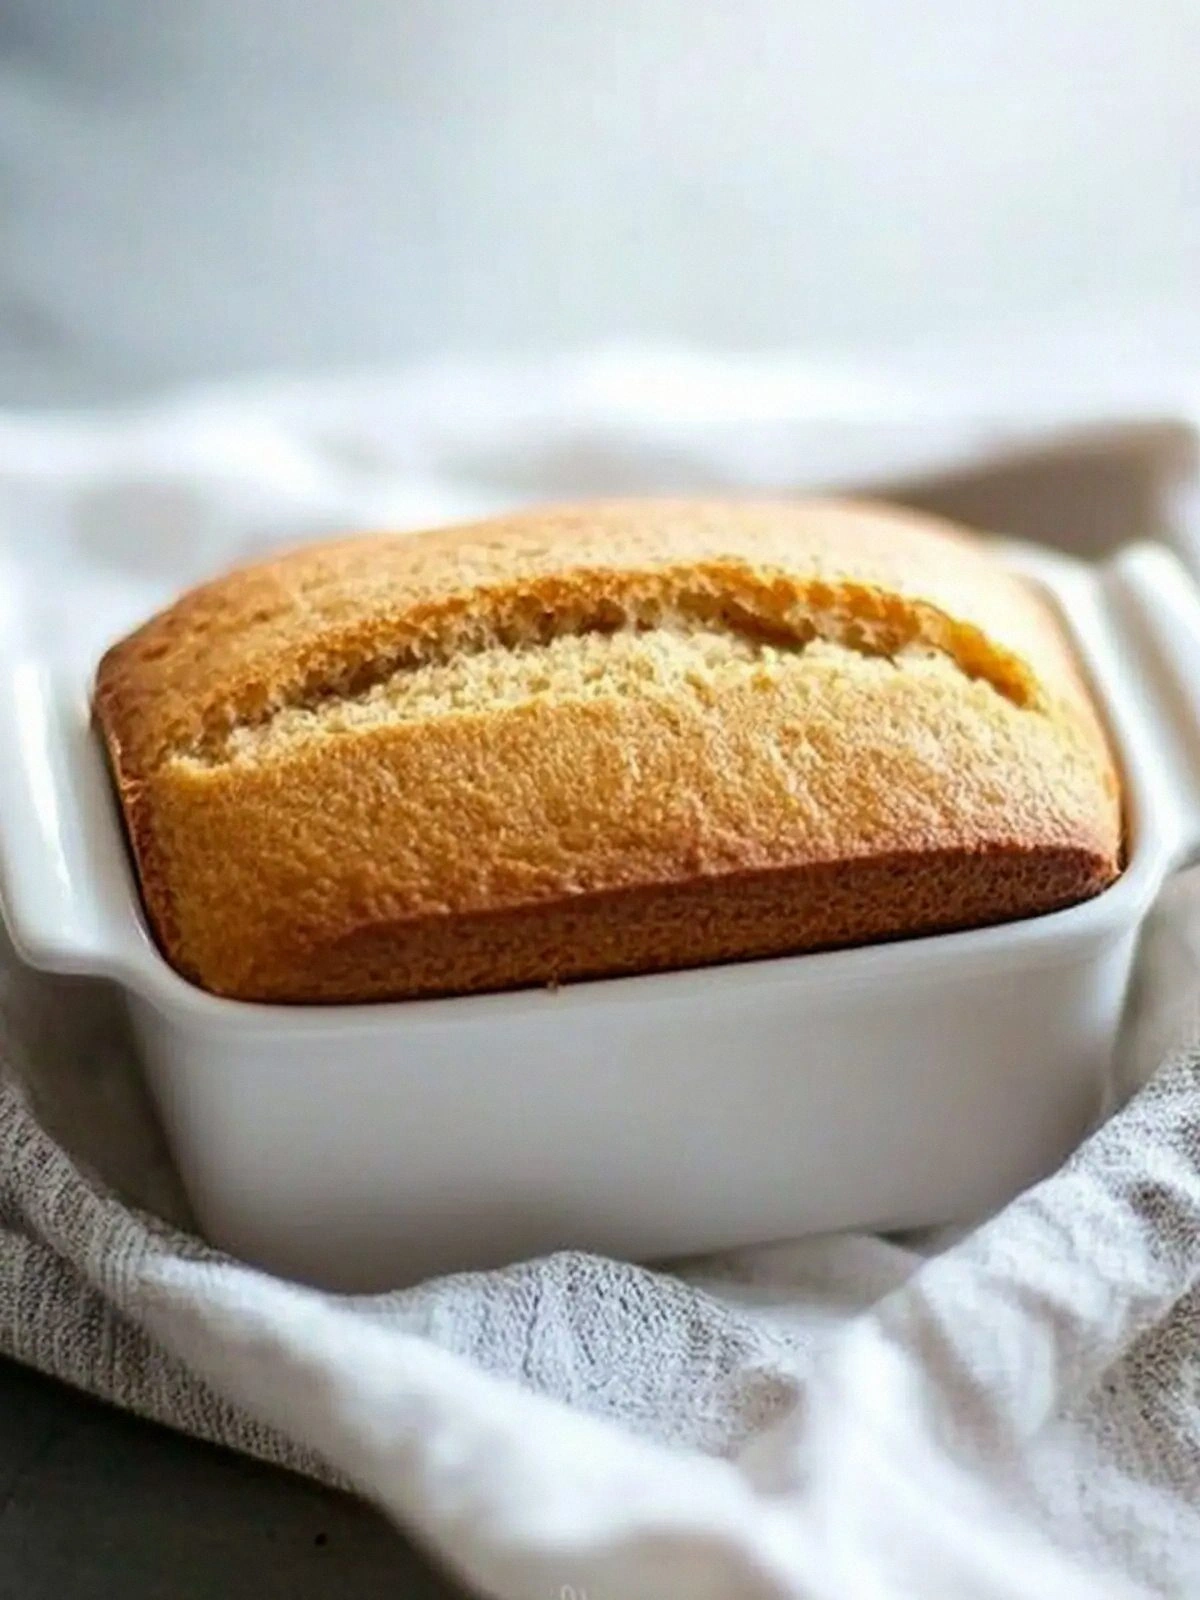
Picture the golden crust, crisp enough to crack under your knife, but with a moist interior that melts like a dream. The scent of caramelized sugar wafts through the kitchen, mingling with a faint hint of vanilla and cinnamon that I added on a whim. The first bite delivers a sweet, slightly tangy flavor that lingers on the tongue, and the crumb is airy yet dense enough to hold a generous spread of butter. I swear, if you taste this, you’ll be tempted to go back for seconds— and then thirds— because it’s simply too good.
What makes this version stand out is that it balances sweetness and texture with a simple technique that most recipes skip. Instead of a heavy, doughy bread, this loaf uses a batter that behaves like a cake, giving it a tender crumb that feels like a cloud. I added a splash of espresso to deepen the flavor, a trick that most people overlook. The result? A loaf that feels both indulgent and comforting, the best of both worlds.
And here's the kicker: I used a small skillet to toast the nuts before folding them in, which adds a smoky crunch that elevates every bite. That extra step might seem trivial, but it’s the secret that makes this loaf truly memorable. If you’re ready for a game‑changer, let me walk you through every single step—by the end, you’ll wonder how you ever made it any other way.
What Makes This Version Stand Out
- Flavor: The light brown sugar creates a caramelized sweetness that pairs perfectly with a subtle hint of espresso, turning each bite into a small, indulgent treat.
- Texture: Unlike dense, heavy loaves, this batter behaves like a cake, resulting in a tender crumb that feels like a cloud.
- Ease: No kneading or proofing—just whisk, fold, bake. The entire process takes less than an hour.
- Versatility: Add nuts, raisins, or chocolate chips for a personalized twist; the base remains flawless.
- Crowd‑pleaser: Friends and family will ask for the recipe after the first slice, and you’ll be the hero of every gathering.
- Ingredient Quality: Using high‑quality light brown sugar and fresh eggs ensures a depth of flavor that generic brands can’t match.
- Make‑ahead Potential: Bake the loaf, cool, then slice and freeze; thawed slices stay moist and delicious.
Alright, let's break down exactly what goes into this masterpiece…
Inside the Ingredient List
The Flavor Base
Light brown sugar is the heart of this loaf, providing a deep caramel note that lingers on the palate. Its molasses content brings a subtle tang that balances the sweetness. If you skip it, the bread will taste flat and less complex. For a richer flavor, opt for organic or fair‑trade sugar.
The Texture Crew
All‑purpose flour gives the structure, but the absence of gluten‑forming kneading keeps the crumb tender. Baking powder is the leavening agent that makes the loaf rise without the need for yeast. If you prefer a gluten‑free version, replace the flour with a 1:1 blend of oat and rice flours, but keep the baking powder unchanged.
The Unexpected Star
A splash of espresso, though optional, adds depth and a hint of bitterness that counterbalances the sugar. If you’re not a fan, a teaspoon of vanilla extract or a pinch of cardamom can replace the espresso’s role. This small addition is why many people say this loaf feels like a secret indulgence.
The Final Flourish
Vegetable oil keeps the bread moist and gives it a silky mouthfeel. Milk adds a subtle richness and helps the batter bind. The optional chopped nuts introduce a crunchy texture and nutty aroma that elevate the overall experience. If you’re allergic, simply omit them; the loaf still turns out divine.
Everything's prepped? Good. Let's get into the real action…
The Method — Step by Step
- Preheat your oven to 350°F (175°C) and grease a 9×5 inch loaf pan with butter or non‑stick spray. In a large mixing bowl, whisk together the flour, baking powder, and salt until well combined; this ensures even distribution of leavening. The batter’s foundation is simple, but the quality of each dry ingredient makes all the difference. Keep this dry mixture aside while you prepare the wet components. This step sets the stage for a perfectly risen loaf.
- In a separate bowl, beat the eggs until they’re frothy, then whisk in the milk and vegetable oil until the mixture is smooth. Add the light brown sugar gradually, stirring continuously to prevent clumps; the batter should look glossy. If you’re adding espresso, stir it in now to distribute the flavor evenly. The wet mixture should be thick but pourable, ready to mingle with the dry ingredients. This is the moment where the sweet aroma begins to rise.
- Combine the wet and dry mixtures by pouring the wet into the dry and stirring with a spatula until just combined. Overmixing will develop gluten and make the loaf tough; a few lumps are fine. The batter should be thick yet pourable, like a thick custard. This step is critical for achieving that cake‑like crumb. Remember, less is more when it comes to mixing.
- Fold in the optional chopped nuts, ensuring they’re evenly distributed. The nuts add a satisfying crunch and a subtle buttery flavor that complements the brown sugar. If you’re opting out, simply skip this step and enjoy the plain version. This is where you can personalize the loaf for your taste or dietary preferences. The nuts also help anchor the crumb, preventing it from becoming too loose.
- Pour the batter into the prepared loaf pan, smoothing the top with a spatula to create an even surface. The batter should fill the pan to about ¾ full; this allows room for expansion during baking. The top will become golden brown, and the aroma will intensify as it bakes. This step might feel mundane, but it’s where the batter transforms into a loaf. Be patient and let the batter settle before placing it in the oven.
- Bake for 35–40 minutes, or until the top is a deep golden brown and a toothpick inserted into the center comes out clean. The crust will feel firm to the touch, and the interior should emit a warm, sweet scent. Watch out: if you open the oven too early, the loaf can collapse or develop a hollow center. Keep the door closed for the majority of the baking time. This is the moment of truth—your loaf is almost ready to meet the world.
- While the bread is baking, heat a small skillet over medium heat and toast the nuts lightly for 2–3 minutes, stirring frequently. The toasted nuts will bring out a deeper flavor and a pleasant crunch. This is a quick kitchen hack that adds a layer of complexity to the loaf. Once toasted, let them cool before folding them back into the batter if you chose to add them later. The aroma of toasted nuts is irresistible and will make the bread even more tempting.
- Remove the loaf from the oven and let it cool in the pan for 10 minutes; this allows the structure to set and makes slicing easier. After 10 minutes, transfer the loaf to a wire rack to cool completely; this prevents condensation from making the crust soggy. While the bread cools, you can slice it and arrange it on a platter for a stunning presentation. The aroma will linger in the kitchen, creating a cozy, home‑baked atmosphere. This step ensures a perfect crumb and a beautiful crust.
- Slice the loaf and serve warm with butter, honey, or your favorite spread. If you like a sweet glaze, dust the top with a little extra sugar or drizzle a simple syrup. The bread can also be toasted for a crunchy finish. This final touch makes the loaf even more irresistible. Enjoy the moment—your homemade masterpiece is ready to be devoured.
Insider Tricks for Flawless Results
The Temperature Rule Nobody Follows
Many bakers bake at 375°F, but this loaf thrives at 350°F. Lower heat allows the batter to rise evenly without overbrowning the crust. If you’re using a convection oven, reduce the temperature by 25°F to avoid scorching. This trick keeps the interior moist and the exterior golden.
Why Your Nose Knows Best
Before you pull the loaf out of the oven, inhale deeply; a sweet, caramelized scent signals that the crumb has set. If the smell is too mild, bake a few more minutes. Your nose is a reliable indicator of doneness, often more accurate than a toothpick.
The 5‑Minute Rest That Changes Everything
Letting the loaf rest in the pan for 10 minutes before transferring to a rack prevents it from collapsing. The residual heat continues to cook the interior, sealing the crumb. If you skip this step, the bread can feel gummy and the crust may crumble.
Keep It Cool, Keep It Fresh
After cooling, slice the loaf and place it in a zip‑lock bag with a slice of apple; the apple releases ethylene, which helps keep the bread soft longer. Store the bag in a cool, dark place. This hack extends freshness without refrigeration.
Microwave Magic for Reheating
To warm a slice, wrap it in a damp paper towel and microwave for 15–20 seconds. The dampness prevents the bread from drying out. This method keeps the crumb fluffy and the crust crisp.
Creative Twists and Variations
This recipe is a playground. Here are some of my favorite ways to switch things up:
Nutty Banana Bread
Add mashed ripe bananas and replace half the oil with butter. The banana adds natural sweetness and a moist texture. This version is perfect for breakfast or a quick snack.
Chocolate Chip Delight
Fold in dark chocolate chips and a pinch of sea salt. The chocolate melts into pockets of gooey sweetness while the salt balances the richness. Ideal for chocolate lovers.
Spiced Apple Cinnamon
Sauté diced apples with cinnamon and a touch of maple syrup before folding them in. The apple caramelizes in the oven, creating a fragrant, spiced loaf that’s great for fall.
Almond Joy Twist
Replace the nuts with toasted coconut flakes and add a splash of coconut milk. The coconut adds a tropical flavor that pairs beautifully with the brown sugar.
Savory Herb Variation
Omit the sugar and add fresh rosemary, thyme, and grated Parmesan. The loaf becomes a savory bread that pairs with soups or salads. A bold take that surprises the palate.
Storing and Bringing It Back to Life
Fridge Storage
Store the cooled loaf in an airtight container at room temperature for up to 3 days. If you need to keep it longer, slice and wrap each piece in parchment before placing them in a zip‑lock bag. The parchment prevents moisture buildup, keeping the crust crisp.
Freezer Friendly
Wrap the loaf tightly in foil, then place it in a freezer bag. Freeze for up to 3 months. When ready to eat, thaw at room temperature for 2 hours, then warm a slice in the oven for 5 minutes to restore the crispness.
Best Reheating Method
Add a tiny splash of water to the bottom of a skillet before reheating slices; the steam keeps the crumb moist. Warm on medium heat for 2–3 minutes, flipping once. The bread should feel warm and slightly crisp on the outside while remaining soft inside.