Picture this: you’re stuck in a late‑night craving vortex, the kind that makes you scroll through endless snack ideas while the house is quiet except for the hum of the fridge. I was there, staring at a bag of frozen onion rings and a half‑eaten jar of jalapeño poppers, wondering if there was a way to combine the two without ending up with a soggy mess. The moment I tossed those two concepts together in my head, I felt like a culinary mad scientist about to unleash something legendary. The kitchen erupted with the scent of onions caramelizing, the sharp bite of jalapeños, and the buttery richness of melted cheese, all while the sound of a sizzling pan kept a steady beat like a drum solo.
My first attempt was a disaster – I tried stuffing raw onion slices with popper filling and then baking them, only to end up with wilted onions that fell apart like soggy tissue paper. I laughed, I cried, and I dared you to taste this and not go back for seconds. After a few more trials (and a lot of burnt fingers), I discovered the secret: a double‑dip coating that locks in the flavor, a precise fry temperature that creates a crunch that shatters like thin ice, and a popper filling that’s so creamy it slides over the onion like silk. This version stands out because it respects the integrity of the onion ring while delivering the punchy heat and cheesy decadence you expect from a jalapeño popper.
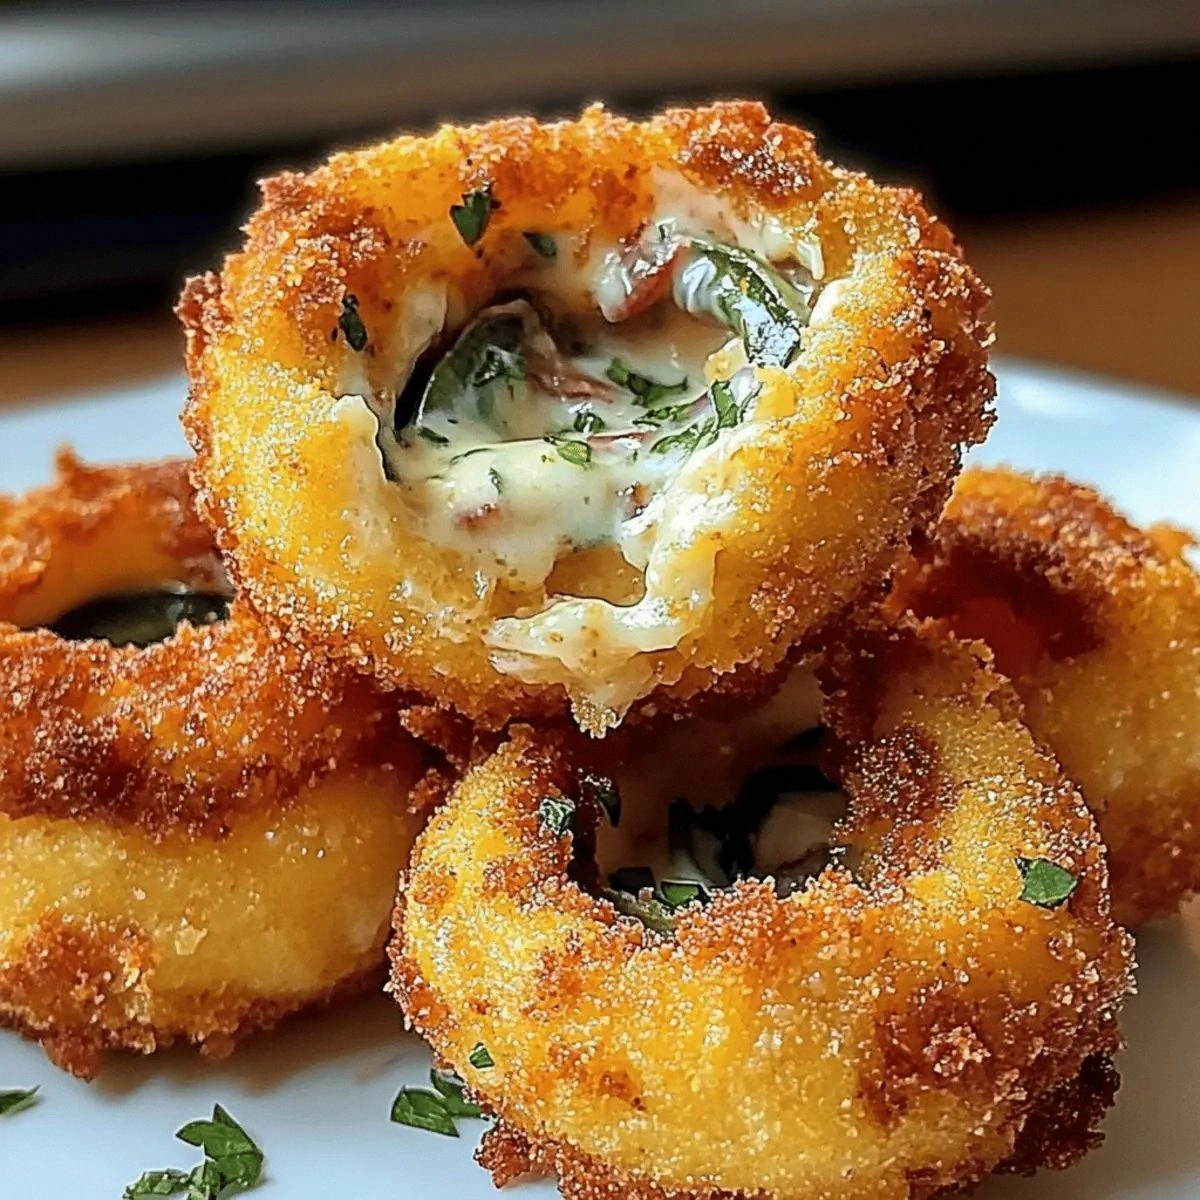
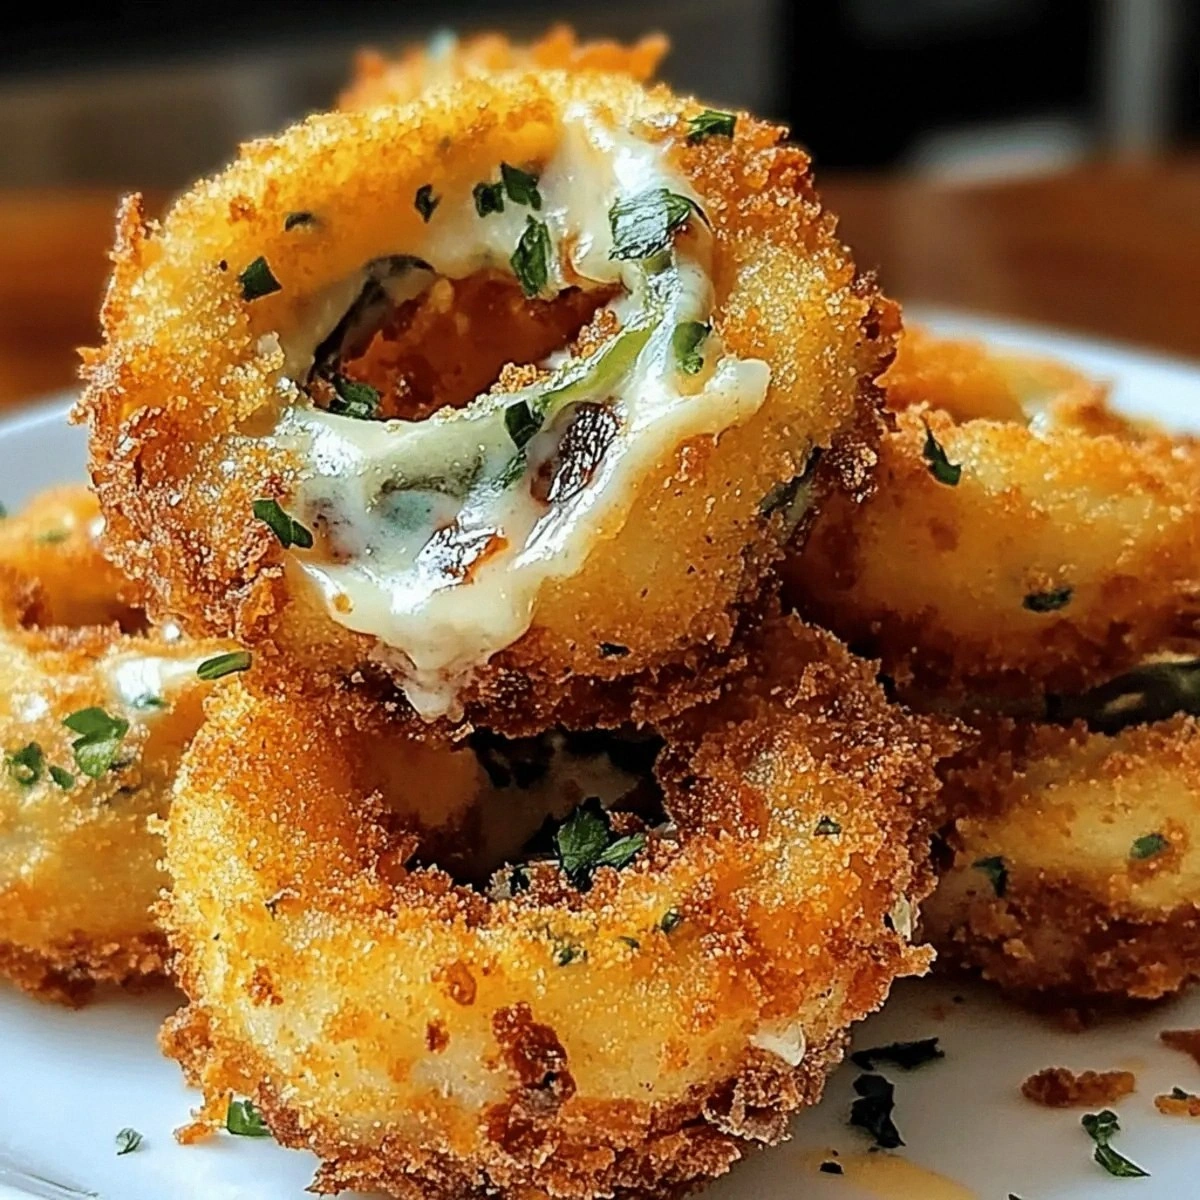
What really sets this snack apart is the balance of textures – the outer crust is golden and crackly, the onion inside stays sweet and tender, and the cheese‑bacon‑jalapeño core is gooey, smoky, and just the right amount of spicy. I’m going to let you in on a little trick: I use a splash of buttermilk in the egg wash to add a subtle tang that cuts through the richness, a move most recipes completely miss. The result? A bite that feels like a fiesta in your mouth, with each element playing its part perfectly. I’ll be honest — I ate half the batch before anyone else got to try it, and that’s a testament to how addictive this snack truly is.
Okay, ready for the game‑changer? Let me walk you through every single step — by the end, you’ll wonder how you ever made it any other way. Picture yourself pulling these golden rings out of the oil, the whole kitchen smelling like a street‑food carnival, and the first bite delivering that perfect crunch followed by a molten, spicy center. Stay with me here — this is worth it.
What Makes This Version Stand Out
- Flavor Explosion: The combination of jalapeño heat, smoky bacon, and sharp cheddar creates a layered taste that keeps you reaching for more.
- Texture Symphony: A crisp, seasoned breadcrumb crust gives way to a tender onion interior and a creamy, stretchy cheese core.
- Simple Yet Sophisticated: All ingredients are pantry‑friendly, yet the technique elevates the dish to restaurant quality.
- Unexpected Twist: The buttermilk‑egg wash adds a tang that balances the richness, a detail most recipes overlook.
- Crowd‑Pleaser: Whether it’s a game night, a backyard BBQ, or a midnight snack, these rings disappear fast – I dare you to taste this and not go back for seconds.
- Ingredient Quality: Using fresh jalapeños and real cheddar, instead of processed cheese spreads, makes a world of difference.
- Cooking Method: Deep‑frying at the right temperature locks in moisture while delivering that addictive crunch.
- Make‑Ahead Friendly: You can prep the stuffing and coat the rings ahead of time, then fry them fresh when guests arrive.
Inside the Ingredient List
The Flavor Base
The two medium jalapeños are the heart‑pounding engine of this snack. Their bright, vegetal heat cuts through the richness of the cheese and bacon, creating a balanced flavor profile. If you’re wary of spice, slice them thin and remove the seeds – you’ll still get that signature jalapeño punch without overwhelming heat. Fresh jalapeños also bring a crisp, almost grassy note that dried powders can’t match. When selecting jalapeños, look for firm, glossy skins; a slight give indicates ripeness, while any soft spots signal they’re past their prime.
The Texture Crew
Onions are the unsung heroes here. Large onions provide a natural sweetness that caramelizes during frying, offering a mellow counterpoint to the spicy filling. Slice them into thick rings, about ½‑inch, to ensure they stay sturdy during the stuffing process. If you use sweet onions, expect an even richer caramel flavor; yellow onions give a classic bite. The 1 cup of flour and 1 cup of seasoned breadcrumbs form the crunchy armor that protects the delicate onion interior while delivering that addictive snap.
The Unexpected Star
Cream cheese is the silky glue that binds the cheddar, bacon, and jalapeño together. Its mild tang prevents the filling from becoming cloyingly rich, while its smooth texture makes it easy to pipe into the onion rings. When you’re at the store, opt for full‑fat cream cheese – the extra fat means a richer, melt‑in‑your‑mouth filling. If you’re feeling adventurous, blend in a spoonful of sour cream for an extra tangy twist.
The Final Flourish
Bacon bits add that smoky, salty crunch that makes every bite feel like a celebration. Using cooked bacon bits (instead of raw) ensures they’re already crisp, so they don’t sog the filling. The 1 tsp garlic powder infuses the coating with a subtle aromatic depth, while the pinch of salt and pepper lets you fine‑tune the seasoning to your taste. Finally, the 2 large eggs, whisked with a splash of buttermilk, create a binding wash that adheres the breadcrumb coating and adds a faint tang that brightens the overall flavor.
Everything's prepped? Good. Let’s get into the real action…
The Method — Step by Step
Start by peeling the onions and slicing them into thick, uniform rings about half an inch wide. Separate each ring carefully; you’ll need about 12 rings for a solid batch. Place the rings on a paper towel to dry – this step is crucial because excess moisture will cause the coating to slip. As the rings sit, the scent of raw onion fills the kitchen, a reminder of the sweet caramelization to come.
While the onions rest, prep the jalapeño popper filling. Dice the jalapeños (seeds removed if you prefer milder heat) and set them aside. In a mixing bowl, combine the 8 oz of cream cheese, 1 cup shredded cheddar, 1 cup cooked bacon bits, and the diced jalapeños. Add the 1 tsp garlic powder, then season with salt and pepper to taste. Use a hand mixer or a sturdy spoon to blend until the mixture is smooth, glossy, and just a little stiff – this texture makes it easier to pipe.
Now comes the stuffing. Take a small spoonful of the cheese mixture and gently press it into the center of each onion ring, creating a small well. Don’t overfill; you want the filling to stay inside during frying. Once all rings are stuffed, set them aside on a tray lined with parchment paper.
Prepare three shallow dishes for the coating station. In the first, place 1 cup flour seasoned with a pinch of salt and pepper. In the second, whisk together 2 large eggs with a splash of buttermilk – the acidity helps the breadcrumbs adhere and adds a subtle tang. In the third, spread out 1 cup seasoned breadcrumbs. This three‑step dip is the secret to that flawless, crunchy exterior.
Coat each stuffed onion ring first in the flour, shaking off any excess, then dip it into the egg‑buttermilk wash, and finally roll it in the breadcrumbs until fully covered. For an extra crunch, double‑dip: repeat the egg wash and breadcrumb step once more. The coating should look thick and slightly clumped – that’s the promise of crunch.
Heat 2 cups of oil in a deep, heavy‑bottomed skillet or a Dutch oven to 350°F (175°C). Once the oil shimmers, gently lower a few coated rings into the pan, being careful not to overcrowd – they need space to fry evenly. Fry for 2‑3 minutes per side, or until the breadcrumbs turn a deep golden‑brown and the onions become translucent. Listen for that satisfying sizzle; that’s the sound of flavor locking in.
Using a slotted spoon, transfer the fried rings to a paper‑towel‑lined plate to drain excess oil. Sprinkle a light pinch of sea salt while they’re still hot – this final seasoning lifts the whole flavor profile. Let them rest for a minute; the interior cheese will settle and become even more gooey.
Serve immediately with a side of cool ranch or a zesty chipotle mayo for dipping. The contrast between the hot, crunchy ring and the cool, creamy dip is pure magic. And remember, this next part? Pure magic. The first bite should deliver a crackle, a burst of smoky bacon, and a wave of jalapeño heat that makes your taste buds dance.
Insider Tricks for Flawless Results
The Temperature Rule Nobody Follows
Keeping the oil at a steady 350°F is non‑negotiable. If the temperature spikes, the coating will burn before the onion cooks; if it drops, the rings become greasy. Use a deep‑fat thermometer and adjust the heat in small increments. I once tried a “set it and forget it” approach and ended up with soggy, oil‑soaked rings that tasted like a bad fast‑food fry.
Why Your Nose Knows Best
Before you flip the rings, trust your nose. When the oil starts to emit a nutty, slightly sweet aroma, you’re in the sweet spot. If you smell a faint burnt scent, the heat is too high. This sensory cue is more reliable than a timer because it accounts for variations in oil volume and pan material.
The 5‑Minute Rest That Changes Everything
After frying, let the rings rest for exactly five minutes on a wire rack. This short rest allows the interior cheese to settle, preventing it from oozing out when you bite. It also gives the breadcrumb coating a chance to firm up, ensuring that satisfying crunch lasts longer.
Seasoned Breadcrumbs vs. Plain
Don’t skimp on seasoned breadcrumbs. Their built‑in herbs and spices add layers of flavor that plain breadcrumbs simply can’t provide. If you only have plain breadcrumbs, mix in a teaspoon of smoked paprika, a pinch of dried oregano, and a dash of garlic powder to mimic the seasoned version.
Double‑Dip for Extra Crunch
The double‑dip technique (flour → egg → breadcrumbs → egg → breadcrumbs) creates a sandwich‑like coating that’s ultra‑crunchy. It’s the difference between “good” and “mind‑blowing.” I tried single‑dipping once and felt like I was missing that signature snap.
Creative Twists and Variations
This recipe is a playground. Here are some of my favorite ways to switch things up:
Cheesy Chipotle
Swap the shredded cheddar for smoked gouda and add a teaspoon of chipotle in adobo to the filling. The smoky heat deepens the flavor, perfect for a backyard BBQ.
Veggie‑Boosted
Replace the bacon bits with finely diced roasted red peppers and a handful of chopped spinach. You’ll still get that creamy texture, but with a fresh, earthy twist.
Southern Fried
Use a buttermilk brine for the onion rings before coating, and add a dash of Cajun seasoning to the breadcrumbs. The result is a Southern‑style crunch with a spicy kick.
Spicy Sweet
Mix a tablespoon of honey into the breadcrumb mixture and add a pinch of cinnamon. The sweet‑heat combo pairs beautifully with the jalapeño’s heat.
Gluten‑Free
Swap the flour and breadcrumbs for a blend of almond flour and gluten‑free panko. The texture remains crisp, and the flavor gets a nutty undertone.
Mini Bites
Cut the onions into smaller “onion pearls” and stuff them with the same filling. These bite‑size versions are perfect for cocktail parties and look impressive on a platter.
Storing and Bringing It Back to Life
Fridge Storage
Place cooled, unfried stuffed rings in an airtight container lined with parchment paper. They’ll keep for up to 2 days. When ready to eat, re‑fry or bake until golden.
Freezer Friendly
Freeze the stuffed, coated rings on a baking sheet before transferring them to a zip‑top bag. They’ll stay fresh for up to 3 months. No need to thaw – drop them straight into hot oil for a crisp finish.
Best Reheating Method
Re‑heat in a preheated oven at 375°F for 8‑10 minutes, or quickly shallow‑fry for 2 minutes per side. Add a tiny splash of water to the pan before reheating; the steam helps restore the interior’s moisture while the crust stays crunchy.