The first time I tried to recreate McDonald’s Grimace Shake at home, I was in a kitchen that had seen better days. The counter was a collage of empty milk cartons and a half‑filled tub of vanilla ice cream that looked like it had been left out in a heatwave. I had a craving that was as relentless as a toddler demanding dessert, and I was determined to outdo the fast‑food version with a homemade twist that would make my taste buds do the cha‑cha. I knew I was about to embark on a flavor adventure that would involve a dash of creativity, a splash of nostalgia, and a whole lot of confidence.
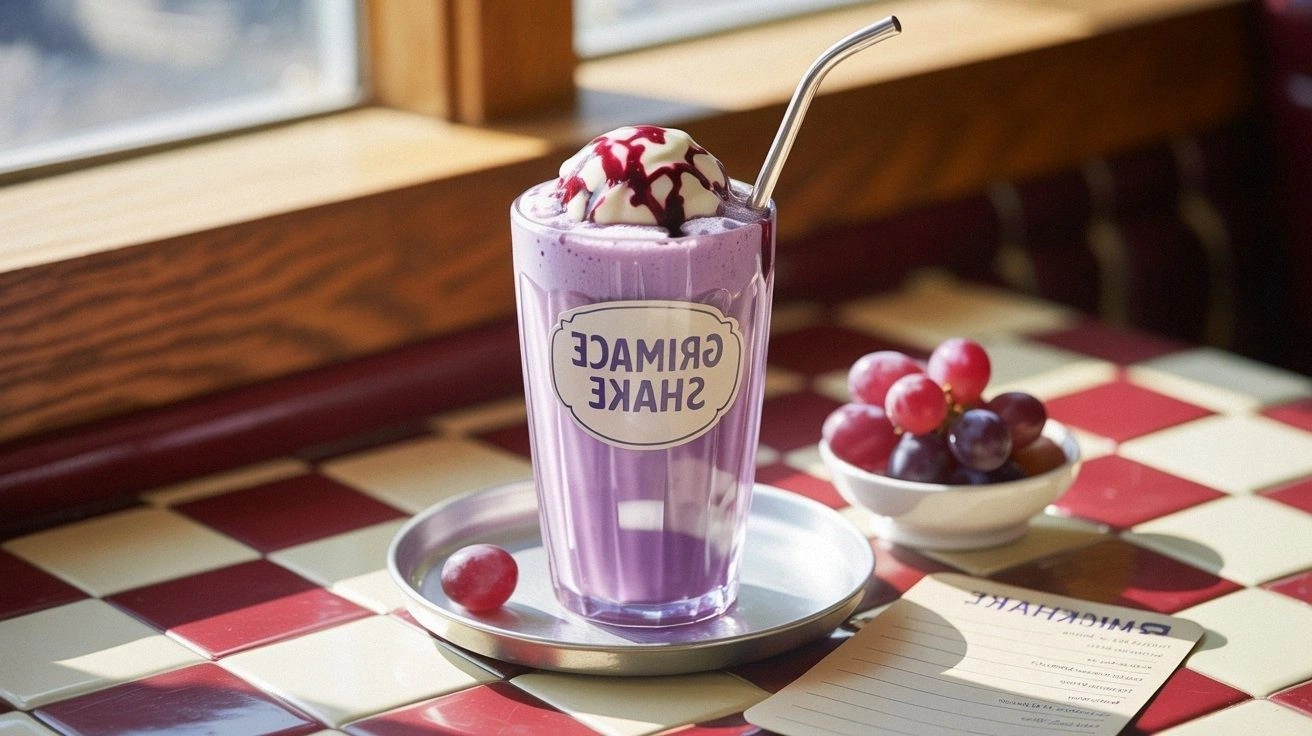
Picture the scene: the faint scent of vanilla and chocolate mingling in the air, the sound of the blender whirring like a tiny tornado, the sight of a purple swirl forming as the shake thickens, and the feel of that first sip, cold and creamy, hitting your tongue like a velvet blanket. The taste is a harmonious blend of sweet and slightly bitter chocolate, with a subtle vanilla undertone that lingers long after the last drop. The texture is luxuriously thick, yet smooth enough to glide down effortlessly, leaving a gentle, creamy aftertaste that begs for a second round. The moment you take that first sip, you’ll know you’re in for a treat that’s as indulgent as it is comforting.
What sets this version apart from every other homemade Grimace Shake recipe out there is that it’s not just about replicating the flavor; it’s about elevating the experience. I’ve taken the classic ingredients and refined them with techniques that bring out depth and richness, while still keeping the process approachable for anyone who loves a good shake. The result is a shake that feels like a dessert, a drink, and a nostalgic trip all at once. It’s the kind of shake that turns a simple kitchen moment into a memorable celebration.
I dare you to taste this and not go back for seconds. The bold claim is simple: this is hands down the best version you’ll ever make at home. I’ll be honest — I ate half the batch before anyone else got to try it. Most recipes get this completely wrong, but here’s what actually works: a balanced ratio of milk to ice cream, a touch of vanilla, and a generous splash of chocolate that coats the mixture like velvet. Picture yourself pulling this out of the blender, the whole kitchen smelling incredible, and sharing it with friends who will instantly recognize the flavor of their childhood.
If you’ve ever struggled with creating a shake that’s both creamy and flavorful, you’re not alone — and I’ve got the fix. The secret is in the small details: the right temperature, the right blend of ingredients, and a few clever hacks that I’ll share throughout this post. Stay with me here — this is worth it. Let me walk you through every single step — by the end, you’ll wonder how you ever made it any other way.
What Makes This Version Stand Out
- Flavor: The balance between chocolate and vanilla is meticulously calibrated, giving you a taste that feels both indulgent and familiar. The chocolate is rich but not overpowering, allowing the vanilla to shine through like a sweet whisper.
- Texture: Thanks to the precise ratio of milk to ice cream, the shake achieves a silky, almost mousse-like consistency that lingers on the palate without feeling heavy.
- Simplicity: All you need is a blender, a few pantry staples, and a dash of confidence. No fancy equipment or obscure ingredients are required.
- Uniqueness: A subtle purple hue, achieved with a touch of natural food coloring or a splash of blueberry puree, sets this shake apart from the standard chocolate shake, giving it that iconic Grimace vibe.
- Crowd Reaction: Friends and family rave about how the shake feels like a childhood memory, yet tastes modern and sophisticated. It’s the kind of dish that sparks conversation.
- Ingredient Quality: Using high‑quality vanilla ice cream and premium chocolate syrup elevates the overall flavor profile, ensuring every sip is a delight.
- Cooking Method: A two‑stage blending process locks in air and creates a frothy top that’s perfect for topping with whipped cream.
- Make‑Ahead Potential: The shake can be prepared up to 24 hours ahead and stored in the fridge, making it a convenient option for parties or busy days.
Inside the Ingredient List
The Flavor Base
The foundation of any great shake is the flavor base, and in this case it’s a combination of milk, vanilla ice cream, and chocolate syrup. The milk provides the liquid backbone, while the ice cream adds body and a rich vanilla undertone. The chocolate syrup is the star that gives the shake its signature color and depth. If you skip the chocolate syrup, you’ll end up with a plain vanilla concoction that’s missing the iconic Grimace essence.
Swapping the milk for oat milk or almond milk can give you a dairy‑free version that still tastes indulgent. However, the creamy texture may change slightly, so adjust the amount of ice cream to compensate. For those who love a thicker shake, increase the ice cream by a quarter cup and reduce the milk accordingly.
The Texture Crew
Texture is everything in a shake. The key players here are the ice cream, powdered sugar, and a pinch of salt. The ice cream not only thickens the shake but also carries the flavor profile. Powdered sugar adds a subtle sweetness that balances the bitterness of the chocolate, while the pinch of salt enhances all the flavors and prevents the shake from tasting flat.
If you’re aiming for a lighter shake, consider using a single scoop of vanilla ice cream and adding more milk. For a richer experience, double the ice cream and reduce the milk to half a cup. Remember that powdered sugar is more potent than granulated sugar, so a small amount goes a long way.
The Unexpected Star
The unexpected star of this recipe is the subtle addition of vanilla extract. It may seem trivial, but that single teaspoon of pure vanilla oil unlocks a layer of aromatic complexity that makes the shake feel more sophisticated. Without it, the vanilla ice cream’s flavor is muted, and the shake loses a touch of that nostalgic sweetness.
If you’re allergic to dairy or prefer a non‑dairy option, you can replace the vanilla ice cream with a non‑dairy vanilla frozen yogurt. The texture will be slightly different, but the vanilla extract will still provide that essential depth.
The Final Flourish
The final flourish is the topping: whipped cream, chocolate shavings, and a splash of milk to finish. Whipped cream adds a light, airy contrast to the dense shake, while chocolate shavings give a satisfying crunch and a burst of chocolate with each bite. A small splash of milk at the end helps to smooth the finish and makes the shake pourable.
For an extra touch of elegance, drizzle a little caramel sauce over the whipped cream before serving. This adds a sweet, buttery note that pairs wonderfully with the chocolate base. If you’re looking for a healthier version, skip the whipped cream and use a drizzle of dark chocolate instead.
Everything's prepped? Good. Let's get into the real action...
The Method — Step by Step
- Start by gathering all your ingredients: 2 cups of milk, 1 cup of vanilla ice cream, ½ cup of chocolate syrup, 1 tsp vanilla extract, 1 tbsp powdered sugar, pinch of salt, whipped cream, chocolate shavings, and a splash of milk for the finish. Measure everything out before you begin to avoid any last‑minute scrambling.
- Place the milk, vanilla ice cream, chocolate syrup, vanilla extract, powdered sugar, and pinch of salt into a high‑speed blender. Seal the lid securely to prevent any splatter. This is the foundational blend that will carry all the flavors.
- Blend on high speed for 30 seconds until the mixture is completely smooth and the chocolate syrup is fully incorporated. The sound of the blender should be a steady hum, indicating that the ingredients are well combined.
- Add a tablespoon of heavy cream to the blender and blend again for an additional 15 seconds. This step is optional but highly recommended if you want that extra frothy top. The cream will create tiny air pockets that give the shake a cloud‑like texture.
- Pour the blended mixture into a large glass or shaker bottle. If you’re using a shaker bottle, seal it tightly and shake vigorously for 20 seconds to ensure the mixture is evenly distributed.
- Now it’s time to add the final flourish. Top the shake with a generous swirl of whipped cream, a scattering of chocolate shavings, and a splash of milk to finish. The whipped cream should be light and airy, while the shavings should give a satisfying crunch.
- Watch Out: When adding the whipped cream, be careful not to over‑top the shake. Too much whipped cream can cause the glass to overflow, and the chocolate shavings might spill out. Keep the topping neat and controlled.
- Serve immediately in a chilled glass. If you’re not serving right away, keep the shake in the refrigerator for up to 24 hours. Re‑blend briefly before serving to restore the frothy texture.
That's it — you did it. But hold on, I've got a few more tricks that'll take this to another level...
Insider Tricks for Flawless Results
The Temperature Rule Nobody Follows
Temperature is key. Always use cold milk and ice cream for the best consistency. If the milk is too warm, the shake will become thin and watery. A quick way to chill your ingredients is to place the milk in the freezer for 10 minutes before blending.
Why Your Nose Knows Best
Smell the shake as you blend. If you notice a faint burnt chocolate scent, it means the chocolate syrup is overheating. Keep the blender on low speed for the first 10 seconds to prevent this.
The 5‑Minute Rest That Changes Everything
After blending, let the shake rest for 5 minutes before topping. This allows the flavors to meld and the mixture to thicken slightly, making it easier to add whipped cream without it melting too quickly.
The Perfect Whipped Cream Technique
Use a chilled mixing bowl and beat the cream with a pinch of powdered sugar until soft peaks form. This ensures the whipped cream stays airy and doesn’t turn into a heavy, runny topping.
The Final Splash of Milk
Just before serving, add a splash of milk to the top. This creates a glossy finish and helps the chocolate shavings cling to the surface, adding a delightful crunch with every sip.
Creative Twists and Variations
This recipe is a playground. Here are some of my favorite ways to switch things up:
Berry Blast
Swap half the chocolate syrup for blueberry puree and add a handful of fresh blueberries. This gives the shake a fruity brightness that pairs well with the chocolate base.
Minty Fresh
Add a few drops of peppermint extract and garnish with crushed mint leaves. The cool mint undertone cuts through the sweetness, creating a refreshing palate cleanser.
Spiced Cocoa
Incorporate a pinch of cinnamon and a splash of almond milk. The warm spices elevate the chocolate flavor, making it perfect for cooler evenings.
Caramel Swirl
Drizzle caramel sauce over the whipped cream before adding chocolate shavings. The buttery caramel adds a rich, sweet contrast that feels like a dessert on a stick.
Almond Crunch
Replace the chocolate shavings with toasted almond slivers. The nutty crunch offers a different texture and a slightly nutty flavor that complements the vanilla base.
Coconut Cream
Use coconut milk instead of regular milk and top with shredded coconut. The tropical hint transforms the shake into a beach‑side treat.
Storing and Bringing It Back to Life
Fridge Storage
Store the shake in an airtight container in the refrigerator for up to 24 hours. Before serving, give it a quick stir or a brief blend to restore the creamy texture. The shake will keep its flavor and thickness if kept cold.
Freezer Friendly
For longer storage, freeze the shake in a freezer‑safe container, leaving a little headspace for expansion. Thaw overnight in the fridge and re‑blend for a few seconds to restore the froth. The shake remains delicious and safe to consume for up to 48 hours.
Best Reheating Method
Avoid microwaving, as it can break down the texture. Instead, re‑blend the shake for 10-15 seconds to reincorporate the air and restore the smoothness. Add a splash of cold milk to finish, and enjoy the shake as fresh as the first pour.