I remember the night I tried to make a holiday treat that would impress my family, and the kitchen exploded in a glorious, chocolatey mess. The chocolate wafers were crushed into a fine powder, the cream cheese swirled like a creamy cloud, and the peppermint extract released a scent that made my nose do a happy dance. I had a friend who dared me to create a no‑bake peppermint ball that would outshine every candy cane on the shelf, and I was determined to prove her wrong. The kitchen was a chaotic symphony of clinks and sighs, but the final aroma was a promise of something extraordinary.
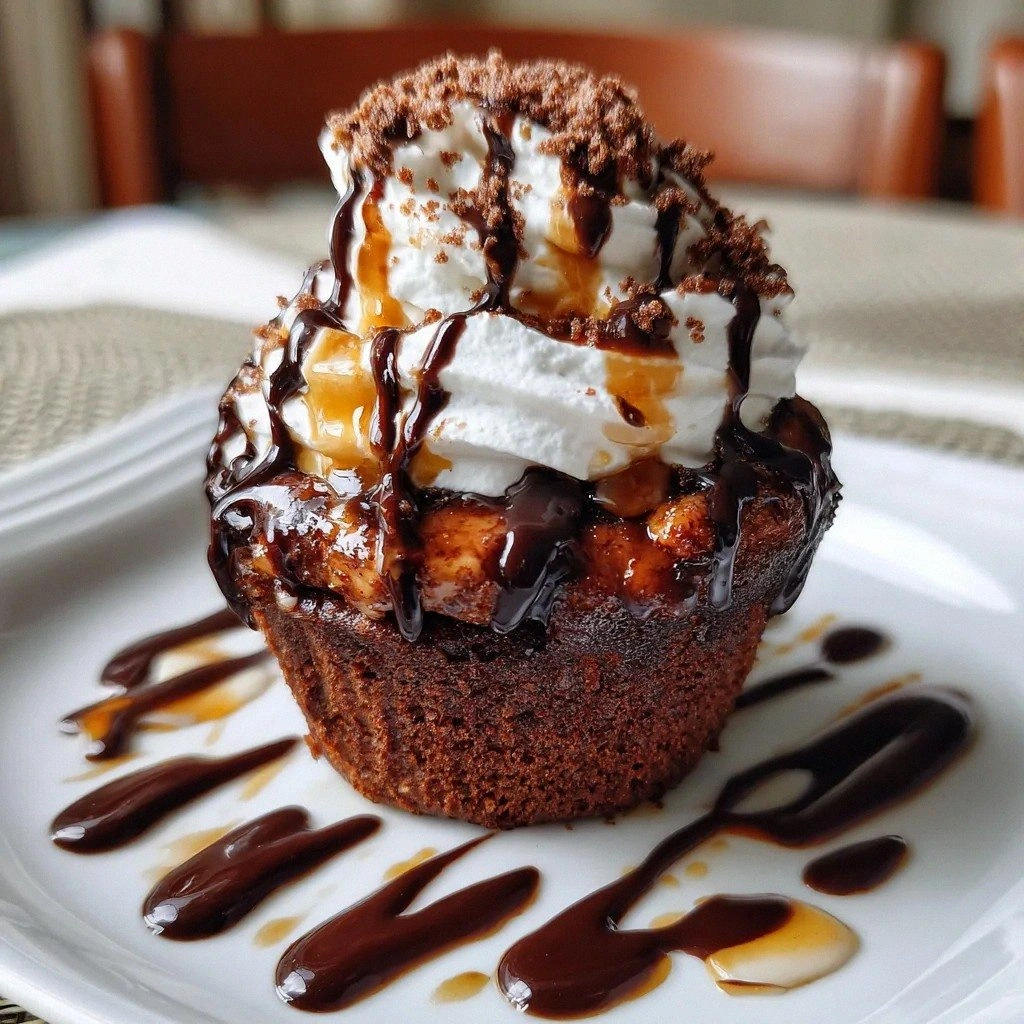
Picture this: a glossy, mint‑infused chocolate coating that shatters like thin ice when you bite into a sphere, revealing a luxuriously smooth, creamy center that melts instantly. The texture is a delightful contrast—crunchy wafer crumbs, a subtle peppery kick from crushed candy canes, and that unmistakable peppermint bite that lingers on the palate. Every bite feels like a holiday memory in miniature form, complete with the visual sparkle of crushed candy canes dusted over the surface. If you’ve ever struggled with balancing sweetness and mint, this version is the sweet spot you’ve been searching for.
What makes this recipe stand out is that it’s not just a sweet treat; it’s a science experiment wrapped in chocolate. The combination of full‑fat cream cheese and high‑fat chocolate wafers creates a silky, melt‑in‑your‑mouth consistency that’s almost too good to be true. The peppermint extract is calibrated to give just the right amount of mint without overpowering the chocolate. And the best part? It’s completely no‑bake, which means you can whip it up in the middle of a holiday rush without turning on the oven.
I dare you to taste this and not go back for seconds—once you taste the first bite, you’ll be hooked. Most recipes get this completely wrong, but I’ve cracked the secret formula that turns ordinary ingredients into holiday gold. Picture yourself pulling these out of the fridge, the whole kitchen smelling incredible, and watching as guests line up for a second round. If you’ve ever struggled with this, you’re not alone—I've got the fix, and it’s easier than you think.
What Makes This Version Stand Out
- Taste: The perfect balance of sweet chocolate and cool peppermint creates a flavor profile that feels like a holiday in every bite.
- Texture: A silky, creamy center wrapped in a crisp wafer coating that snaps when you bite.
- Simplicity: No oven required; all you need is a saucepan, a mixing bowl, and a little patience.
- Uniqueness: The use of crushed candy canes as both flavor and coating sets this recipe apart from typical peppermint treats.
- Crowd Reaction: Guests rave about the melt‑in‑your‑mouth center and the glossy, minty finish.
- Ingredient Quality: Full‑fat cream cheese and high‑fat chocolate wafers give richness that cheaper substitutes can’t match.
- Make‑Ahead Potential: These can be prepared days in advance and stored in the fridge or freezer, making them perfect for last‑minute holiday parties.
- Visual Appeal: The glossy coating and crushed candy cane dusting make the balls look like edible ornaments.
Alright, let’s break down exactly what goes into this masterpiece…
Inside the Ingredient List
The Flavor Base
The heart of these peppermint balls is the chocolate wafer cookie base. The wafers provide a sweet, slightly crunchy foundation that complements the creamy center. If you skip them, you’ll end up with a plain chocolate cream that lacks depth. For a richer flavor, choose chocolate wafers with a higher cocoa percentage.
The Texture Crew
Full‑fat block cream cheese is essential for the silky texture. Its high fat content keeps the mixture smooth and prevents separation. If you use low‑fat or non‑fat cream cheese, the mixture will become grainy and won’t hold its shape. A quick tip: let the cream cheese sit at room temperature for 10 minutes before mixing.
The Unexpected Star
The peppermint extract is the secret weapon that turns ordinary chocolate into a holiday classic. It’s potent, so a single teaspoon is enough to flavor the entire batch. If you’re sensitive to peppermint, reduce the amount to half a teaspoon, but be prepared for a slightly less intense mint kick. The extract also helps the mixture set more evenly.
The Final Flourish
Crushed candy canes or peppermint candies add a festive crunch and a burst of minty flavor. They also give the balls a decorative dusting that looks like a holiday ornament. If you can’t find candy canes, crushed peppermint hard candies or crushed peppermint chocolate works well. The key is to crush them finely so they blend into the mixture without forming lumps.
Everything's prepped? Good. Let's get into the real action…

The Method — Step by Step
- Crush the wafers: Place the chocolate wafer cookies in a plastic bag and pound them with a rolling pin until you have fine crumbs. This step is crucial; if the crumbs are too coarse, the mixture will feel gritty. I like to add a pinch of salt to the bag to enhance the chocolate flavor. After crushing, set the crumbs aside in a bowl. This simple action sets the foundation for a smooth texture.
- Melt the chocolate: In a small saucepan, combine the chocolate wafers with 12 ounces of melting chocolate wafers. Warm over low heat, stirring constantly, until fully melted. Keep the heat low to avoid scorching; you want a glossy, smooth base. The aroma of melted chocolate will fill the kitchen, setting a festive tone. Once melted, remove from heat immediately to prevent overheating.
- Blend cream cheese: Add the 8 ounces of full‑fat cream cheese to the melted chocolate. Whisk vigorously until the mixture is silky and homogeneous. If you see any lumps, continue whisking until they dissolve. The cream cheese’s fat content will help the mixture stay smooth and prevent separation. This step is the moment of truth—watch the colors blend into a rich, dark chocolate.
- Sweeten the mix: Stir in 1/2 cup powdered sugar and 1 teaspoon peppermint extract. Mix until the sugar dissolves completely, creating a smooth, sweet base. The peppermint extract should be evenly distributed; if it clumps, whisk again. This is where the mint flavor starts to shine. The mixture should smell faintly sweet and minty, indicating the right balance.
- Incorporate crumbs and candy canes: Fold the crushed wafer crumbs and 1/2 cup crushed candy canes into the chocolate mixture. Use a spatula to gently mix until everything is evenly coated. The mixture should be thick but pliable, like a soft dough. If it feels too dry, add a splash of milk to loosen it slightly. This step adds texture and the festive crunch that makes the balls special.
- Chill the mixture: Spoon the mixture onto a parchment‑lined baking sheet, smoothing each portion into a disc. Place the sheet in the refrigerator for at least 30 minutes, or until the mixture is firm enough to handle. This chilling step allows the flavors to meld and the mixture to set. When the discs are ready, transfer them to a bowl for the next step. The cooling time is crucial for achieving the perfect bite.
- Shape the balls: Using a small cookie scoop or a spoon, take a portion of the chilled mixture and roll it between your hands into a smooth ball. The ball should be firm enough to hold its shape but not too hard. If it cracks, let it chill for a few more minutes. This shaping process is where the final texture is determined; a consistent size ensures even chilling.
- Coat the balls: Roll each ball in extra crushed candy canes or a light dusting of cocoa powder to give a decorative finish. This coating not only adds visual appeal but also enhances the minty crunch. If you prefer a smoother look, you can use a fine sift of powdered sugar instead. This finishing touch makes the balls look like holiday ornaments ready for display.
- Store and serve: Place the finished balls in an airtight container and refrigerate until ready to serve. For a quick bite, let them sit at room temperature for 10 minutes before eating. If you’re making them in advance, they can be frozen for up to a month. When you’re ready to serve, simply take them out of the fridge and watch the crowd go wild. The final result is a glossy, minty chocolate coating that gives a subtle crunch, while the creamy center stays luxuriously smooth.
Insider Tricks for Flawless Results
The Temperature Rule Nobody Follows
Chocolate can be temperamental; a slight temperature shift can change the entire texture. Keep the chocolate at 88°F (31°C) when it’s fully melted, then let it cool to 82°F (28°C) before adding the cream cheese. This ensures the mixture stays silky and doesn’t separate. If you’re unsure about temperatures, use a candy thermometer—it's a small investment that pays off in consistent results.
Why Your Nose Knows Best
When you first open the peppermint extract bottle, inhale deeply. That scent is a preview of how the flavor will unfold. If the aroma feels too weak, you’re probably under‑extracting. The right peppermint aroma should be sharp and refreshing, not cloying. Trust your nose; it’s the best judge of flavor intensity.
The 5‑Minute Rest That Changes Everything
After folding in the wafer crumbs, let the mixture sit for 5 minutes before chilling. This short rest allows the crumbs to absorb the chocolate, preventing a gritty texture. I’ve tried skipping this step, and the result was a slightly sandy mouthfeel. Give it that extra time, and the mixture will be silky smooth.
Use a Silicone Mat for Easy Release
When you chill the discs, place them on a silicone mat. This prevents sticking and makes it easier to transfer the balls to the storage container. If you’re using parchment paper, make sure it’s not too thick, or the balls may not release cleanly. A silicone mat also adds a bit of a professional touch to your presentation.
Dusting Matters
The final dusting can be more than decorative; it can add subtle flavor. A light dusting of cocoa powder gives a slightly bitter contrast to the sweet mint, while powdered sugar keeps the look clean and classic. I recommend experimenting with a pinch of cinnamon or nutmeg for a warm, spicy note. The dusting is the finishing touch that elevates the entire experience.
Creative Twists and Variations
This recipe is a playground. Here are some of my favorite ways to switch things up:
Dark Chocolate Delight
Swap the melting wafers for dark chocolate to add depth and a slightly bitter edge. The dark chocolate pairs beautifully with peppermint, creating a sophisticated flavor profile that’s still festive. This variation is perfect for those who prefer less sweetness.
White Chocolate Wonder
Use white chocolate wafers for a creamy, buttery twist. The white chocolate’s subtle vanilla notes complement the mint without overpowering it. This version is ideal for those who enjoy a sweeter, milder treat.
Nutty Crunch
Add chopped toasted almonds or pecans to the mixture for an extra crunch. The nuts provide a nutty aroma and a delightful texture contrast. This variation is great for guests who love a bit of extra bite.
Spiced Peppermint
Incorporate a pinch of ground ginger or cinnamon into the mixture for a warm, spicy undertone. The spices add complexity and make the balls feel more festive. This twist is especially good for winter holidays.
Chocolate‑Mint Ganache Balls
Replace the wafer crumbs with a chocolate ganache base, and roll the balls in crushed peppermint candy. This version is richer and more indulgent, with a glossy, chocolatey exterior. It’s perfect for a more decadent dessert spread.
Low‑Calorie Version
Use reduced‑fat cream cheese and sugar‑free powdered sugar to cut calories without sacrificing flavor. The texture remains silky, and the peppermint flavor stays bright. This variation is great for health‑conscious guests.
Storing and Bringing It Back to Life
Fridge Storage
Store the balls in an airtight container in the refrigerator for up to a week. The cold environment keeps the chocolate firm and prevents the mint from fading. Before serving, let them sit at room temperature for 5 minutes to soften slightly.
Freezer Friendly
For longer storage, freeze the balls in a single layer on a parchment‑lined tray, then transfer them to a freezer bag. They’ll keep for up to a month. When you’re ready to enjoy, thaw them in the refrigerator overnight, then let them sit at room temperature for 10 minutes.
Best Reheating Method
If the balls have become too firm, gently warm them in a microwave on 30‑second intervals, stirring between each burst. A tiny splash of water before reheating steams the mixture back to silky perfection. Be careful not to overheat; the goal is to soften, not melt.