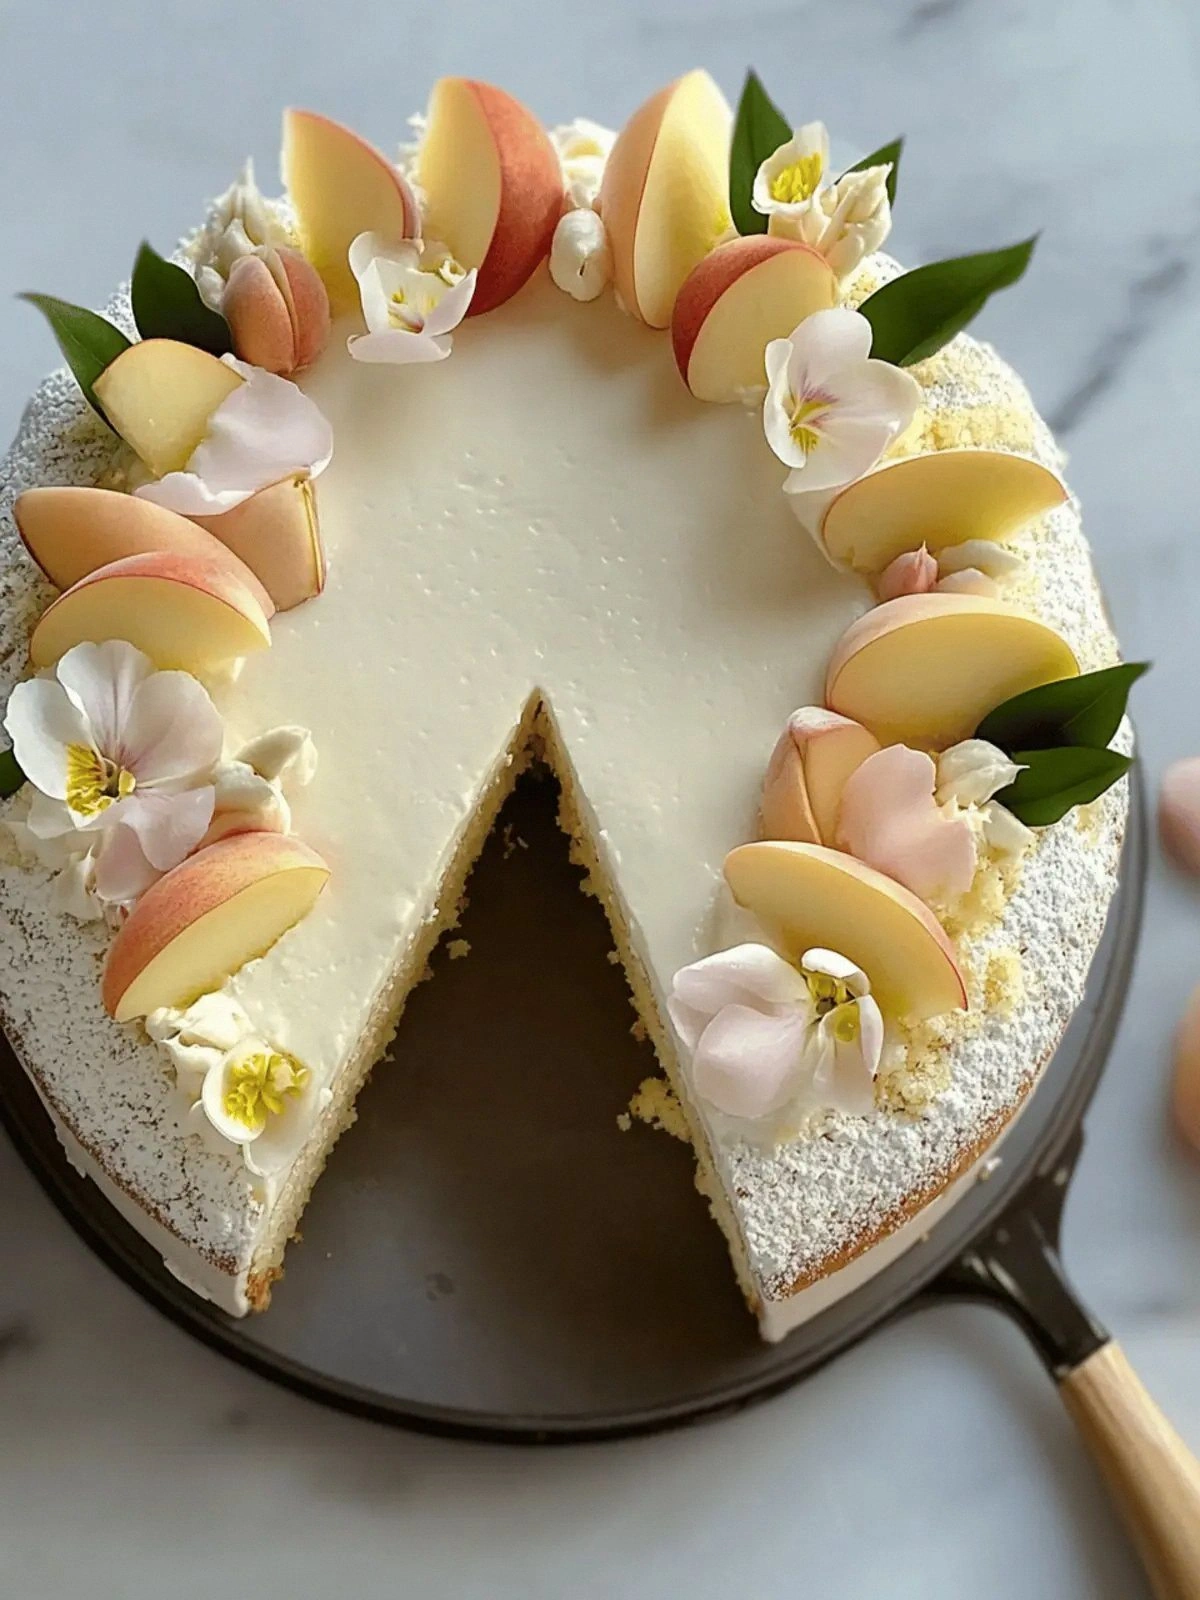
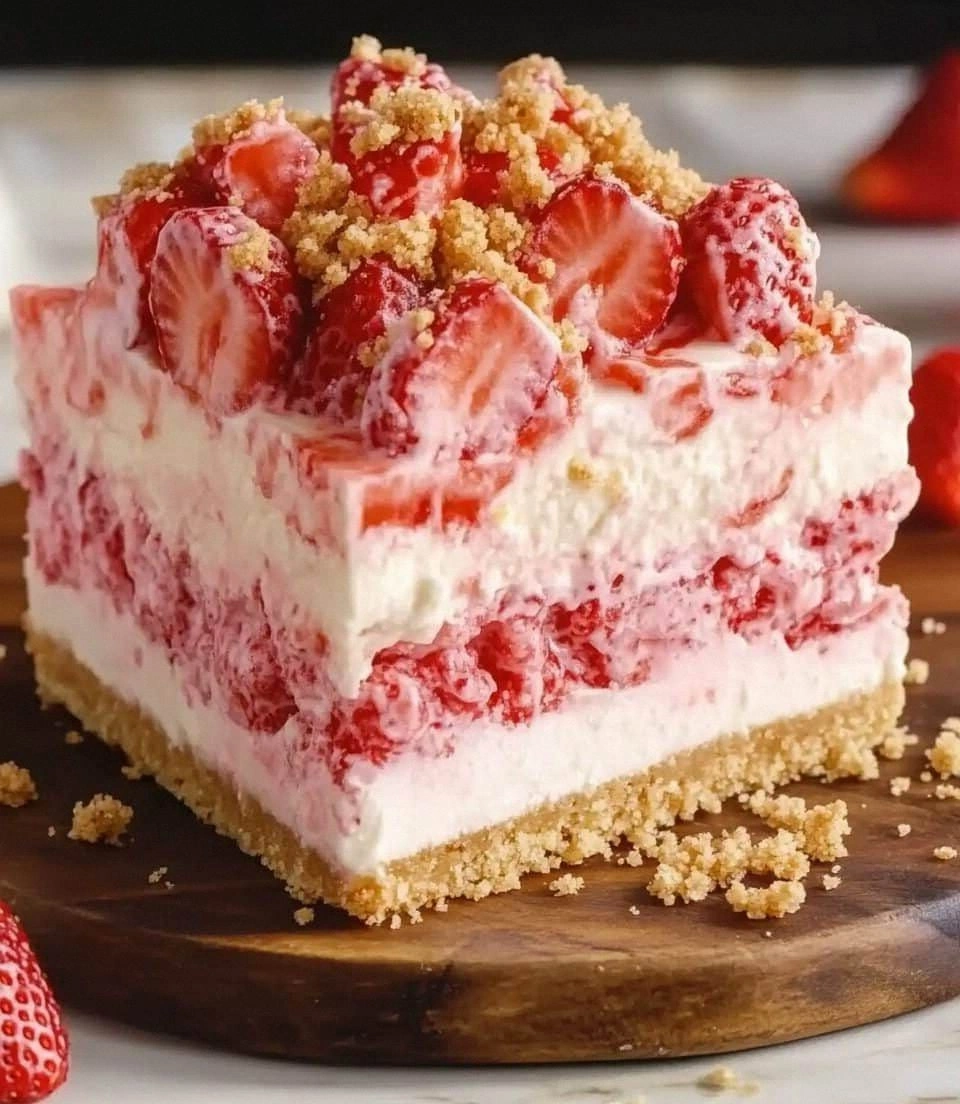
Strawberry Crunch Cheesecake
Picture this: you’re standing in a cramped kitchen, a half‑finished cheesecake sits on the counter, and the air smells like burnt sugar and hope. That night, I accidentally dropped a spoonful of cream cheese into a bowl of fresh strawberries, and the result was a sticky, sweet swirl that turned my disaster into destiny. I swear, that first bite was so creamy it made the crust feel like a buttery blanket hugging a warm summer day. The crunch of graham crackers on top gave it a satisfying snap, while the strawberry puree sang a juicy, tart chorus that kept me coming back for more. It was a revelation that turned a simple dessert into an obsession, and I’m here to spill every secret so you can recreate that magic at home.
I’ve tried countless cheesecake recipes—some too dense, others too light, and a few that just didn’t have that wow factor. What makes this version stand out is the perfect marriage of silky filling and crisp topping, a texture profile that feels like a dessert and a snack all at once. The fresh strawberries add a burst of natural sweetness that cuts through the richness without overpowering it. The graham cracker crunch isn’t just a garnish; it’s a textural anchor that balances the soft interior. Every bite is a symphony of flavors—sweet, tart, buttery, and slightly salty—all harmonizing in a way that feels both indulgent and comforting. And the best part? You can whip this up in under an hour, making it a go‑to for last‑minute gatherings.
I dare you to taste this and not go back for seconds. I’ll be honest—my first batch was so good I ate half the cheesecake before anyone else even saw it. Most recipes get this completely wrong by either overbaking or underseasoning, but here’s what actually works: a low oven temperature, a gentle bake, and a quick cool before chilling. Picture yourself pulling this out of the oven, the whole kitchen smelling incredible, and the first slice looking like a piece of art. The crust is golden, the filling is silky, and the topping is a crisp, fruity crown that’s impossible to resist. I’ve spent years perfecting this balance, and it’s time you tasted the result.
If you’ve ever struggled with a cheesecake that cracks or tastes flat, you’re not alone—and I’ve got the fix. The trick lies in the layering of flavors and textures, and in the small details that most people overlook. This version is hands down the best you’ll ever make at home, because it delivers on every promise: creamy, sweet, crunchy, and utterly unforgettable. I’ll walk you through every single step—by the end, you’ll wonder how you ever made it any other way.
What Makes This Version Stand Out
- Flavor: The strawberry puree infuses the filling with natural sweetness, cutting through the richness of the cream cheese. It’s a fresh, vibrant contrast that elevates the classic cheesecake profile. The result is a dessert that feels light yet indulgent.
- Texture: The graham cracker crunch isn’t just a garnish; it’s a textural anchor that balances the soft interior. Each bite delivers a satisfying snap followed by silky creaminess. This duality keeps the palate engaged.
- Simplicity: With only a handful of ingredients, the recipe stays approachable without compromising flavor. Even novice bakers can achieve professional results with minimal fuss. The steps are straightforward, but the outcome is extraordinary.
- Uniqueness: The combination of fresh strawberries and graham cracker topping sets this cheesecake apart from the usual vanilla or chocolate variants. It’s a seasonal twist that feels both classic and novel.
- Audience: Whether you’re a dessert aficionado or a casual baker, this cheesecake will impress. Friends will ask for the recipe, and family will keep coming back for seconds. It’s the perfect crowd‑pleaser.
- Ingredient Quality: Using high‑quality cream cheese and fresh strawberries makes all the difference. The richer the ingredients, the more vibrant the final flavor profile. Treat the ingredients as the foundation of your masterpiece.
- Cooking Method: Baking at a low temperature with a water bath ensures a silky center and prevents cracking. The gentle heat keeps the cheesecake from overcooking, preserving its delicate texture.
- Make‑Ahead Potential: The cheesecake can be assembled and frozen before baking, saving you time on busy days. Once baked, it keeps well for a week in the fridge, making it a versatile dessert for any occasion.
Inside the Ingredient List
The Flavor Base
The cornerstone of this cheesecake is the creamy filling, made from four cups of softened cream cheese that provides a velvety mouthfeel. Granulated sugar balances the tang of the cream cheese, creating a sweet harmony that isn’t cloying. Vanilla extract adds depth, giving the filling an aromatic warmth that lingers. Eggs bind the mixture, ensuring a smooth, cohesive texture that holds together during baking.
The Texture Crew
Sour cream introduces a subtle tang that brightens the rich filling, preventing it from becoming too heavy. The graham cracker crumbs in the crust form a buttery base that crisps up beautifully when baked. Melted butter tames the crumbs, adding moisture and a buttery aroma that complements the strawberry notes. The crushed graham crackers in the topping add a crunchy finish that contrasts the creamy interior.
The Unexpected Star
Fresh strawberries, pureed into a smooth sauce, infuse the cheesecake with natural sweetness and a vibrant color. Their acidity cuts through the richness, creating a balanced flavor profile. If you prefer a deeper strawberry flavor, let the puree sit in the fridge for a few hours before mixing. For a hint of tartness, add a splash of lemon juice to the puree.
The Final Flourish
Powdered sugar dusted on top after baking adds a light sweetness and a silky finish that’s almost invisible but adds a finishing touch. Sliced fresh strawberries on top create an appealing presentation and a fresh burst of flavor with each bite. A pinch of sea salt on the crust enhances the sweetness and balances the overall taste. If you’re feeling adventurous, a drizzle of balsamic reduction can add a surprising depth.
Everything's prepped? Good. Let's get into the real action…
The Method — Step by Step
- Preheat your oven to 325°F (163°C) and set a large baking dish on the middle rack. Line the bottom with parchment paper for easy removal. This low temperature is key to preventing cracks. While the oven warms, let your ingredients sit at room temperature for about 30 minutes.
- In a medium bowl, combine the graham cracker crumbs, melted butter, and 1/4 cup sugar. Stir until the mixture resembles wet sand. Press the crumb mixture into the bottom of a 9‑inch springform pan, forming an even layer. Chill the crust in the fridge for 10 minutes to set.
- In a large mixing bowl, beat the cream cheese until smooth and creamy. Add the granulated sugar and vanilla, then continue beating until the mixture is light and fluffy. This creates a silky base that will hold its shape during baking.
- Add the eggs one at a time, fully incorporating each before adding the next. Then fold in the sour cream, ensuring a uniform consistency. The sour cream adds a tang that brightens the flavor. This step is crucial for a smooth finish.
- Stir in the strawberry puree until evenly distributed. The color will shift to a beautiful pink hue. If the mixture seems too thick, add a tablespoon of milk to achieve a silky consistency. This will give your cheesecake a vibrant look.
- Pour the batter over the chilled crust, smoothing the top with a spatula. Place the springform pan in a larger baking dish and add hot water to the larger dish until it reaches halfway up the sides of the pan. This water bath keeps the cheesecake from overheating.
- Bake for 45 minutes, or until the edges are set but the center still has a slight wobble. The water bath prevents the top from cracking. Carefully remove the pan from the oven, then let it cool on a wire rack for 30 minutes. This gradual cooling preserves the texture.
- Once cooled, run a knife around the rim of the pan to loosen the cheesecake, then release the springform. Chill the cheesecake in the refrigerator for at least 4 hours, preferably overnight, to set the filling. The cold temperature firms up the center, making it easier to slice.
- Just before serving, top the cheesecake with sliced fresh strawberries, crushed graham crackers, and a dusting of powdered sugar. The fresh berries add a pop of color and a fresh burst of flavor. The crushed crackers give a satisfying crunch that contrasts the creamy filling. This final touch turns a simple dessert into a showstopper.
That’s it — you did it. But hold on, I've got a few more tricks that'll take this to another level…
Insider Tricks for Flawless Results
The Temperature Rule Nobody Follows
Baking at a consistent low temperature of 325°F is essential for a silky center. A higher heat will cook the edges too quickly, leaving the middle raw. Many bakers skip the water bath, but it’s the secret to preventing cracks. Keep the water level steady throughout baking.
Why Your Nose Knows Best
If you smell a faint caramel or buttery aroma before the cheesecake is fully baked, the filling is almost done. Your nose can guide you to the perfect finish, avoiding overcooking. Trust your senses as much as your timer.
The 5-Minute Rest That Changes Everything
Letting the cheesecake rest on the cooling rack for 30 minutes before refrigerating preserves its texture. This short break allows the heat to dissipate gradually, preventing sudden temperature shifts that could cause cracks. It also lets the flavors meld.
Chill, Don’t Freeze, for the Best Slice
Refrigerating the cheesecake for at least four hours ensures a firm but creamy bite. If you attempt to slice immediately, the filling will be too soft and may crumble. A cold cheesecake slices cleanly and showcases the crust’s crunch.
Keep the Crust Crisp
After baking, allow the crust to cool on a wire rack. If you leave it in the pan, the moisture from the filling can soften the crumbs. A crisp crust is the hallmark of this cheesecake’s texture profile.
Use Fresh, Ripe Strawberries for a Punch
Ripe strawberries provide a natural sweetness and a vibrant color. If you’re using frozen berries, thaw them completely to avoid excess liquid. Fresh berries also give a more authentic flavor that canned or frozen puree can’t match.
Creative Twists and Variations
This recipe is a playground. Here are some of my favorite ways to switch things up:
Chocolate Swirl Surprise
Fold melted dark chocolate into the filling for a rich, bittersweet swirl. The chocolate pairs beautifully with the strawberry, creating a multi‑layered flavor. Serve with a dusting of cocoa powder for a decadent finish.
Minty Freshness
Add a teaspoon of fresh mint extract to the batter for a refreshing twist. The mint complements the strawberry’s tartness and adds a subtle herbal note. Garnish with a sprig of mint for an elegant touch.
Almond Crunch Layer
Sprinkle toasted almond slivers on top of the crust before baking. The nuts add a nutty crunch that contrasts the creamy filling. This variation is perfect for nut lovers who crave extra texture.
Caramelized Banana Delight
Swap the strawberry puree for caramelized banana puree for a tropical vibe. The banana adds a subtle caramel flavor that pairs well with the graham cracker crust. Top with sliced banana for a fun presentation.
Berry Medley Fusion
Blend strawberries with blueberries and raspberries for a colorful berry medley. The mix of berries adds depth and a burst of tartness. Use a small amount of lemon zest to brighten the overall flavor.
Chocolate‑Covered Strawberry Crunch
Dip the finished cheesecake slices in melted chocolate and let them set. The chocolate coating adds a glossy sheen and a sweet crunch. Finish with a sprinkle of sea salt for a sweet‑savory contrast.
Storing and Bringing It Back to Life
Fridge Storage
Wrap the cheesecake tightly in plastic wrap and store in the refrigerator for up to 5 days. The cool temperature keeps the filling firm and prevents mold growth. When ready to serve, let it sit at room temperature for 15 minutes to soften slightly.
Freezer Friendly
To freeze, wrap the cheesecake in two layers of plastic wrap followed by a layer of aluminum foil. It can be stored for up to 2 months. Thaw overnight in the refrigerator before serving. This method preserves texture and flavor.
Best Reheating Method
Reheat slices in a microwave on low power for 10–15 seconds to warm the filling without melting the crust. Alternatively, place the cheesecake in a preheated oven at 300°F for 5 minutes. Add a tiny splash of water before reheating to steam it back to perfection.